How Informed Moisture Awareness Helps Prevent Common Wood Project Challenges Across Seasons and Settings
Wood moisture content is far more than a technical footnote—it’s a dynamic factor influencing whether a handcrafted shelf remains stable through seasonal shifts, whether deck boards withstand years of weather exposure, or whether firewood burns cleanly and efficiently. This guide translates material science into accessible, actionable knowledge. You’ll learn why moisture content matters across diverse contexts—from framing a garden shed to preserving antique furniture—and gain reliable methods to assess wood readiness without guesswork. Grounded in established industry references and environmental principles, this resource empowers homeowners, woodworkers, gardeners, and DIY enthusiasts to work confidently with wood’s natural behavior.
Introduction
In workshops, lumberyards, and online forums, discussions often center on wood species, grain aesthetics, or finishing techniques. Yet one foundational variable quietly shapes nearly every outcome: moisture content (MC). Overlooking it increases the likelihood of avoidable issues over time. Reputable industry references—including standards from ASTM International (D4442), the National Wood Flooring Association (NWFA), and building codes like the International Residential Code (IRC)—consistently emphasize moisture management as critical to project longevity across construction, woodworking, and outdoor applications. This guide synthesizes widely accepted principles of wood science, environmental interaction, and field-tested protocols into a clear framework. Whether you’re evaluating lumber for a bookshelf, checking deck joists after rain, or preparing firewood for winter, understanding moisture content transforms uncertainty into informed decision-making. We begin with the science that makes this knowledge universally relevant.
The Science Made Simple: Why Moisture Content Governs Wood’s Behavior
What Exactly Is Wood Moisture Content?
Wood moisture content expresses the weight of water within wood as a percentage of its oven-dry weight:
MC (%) = [(Wet Weight – Dry Weight) ÷ Dry Weight] × 100
This formula reflects wood’s hygroscopic nature: it continuously exchanges moisture with its surroundings through microscopic cellular structures. Water exists in two forms:
- Free Water: Occupies cell cavities and lumens. Lost first during drying; its presence has minimal impact on dimensional stability.
- Bound Water: Held within cell walls. As bound water leaves, cell walls contract—triggering observable movement like warping, cupping, or checking.
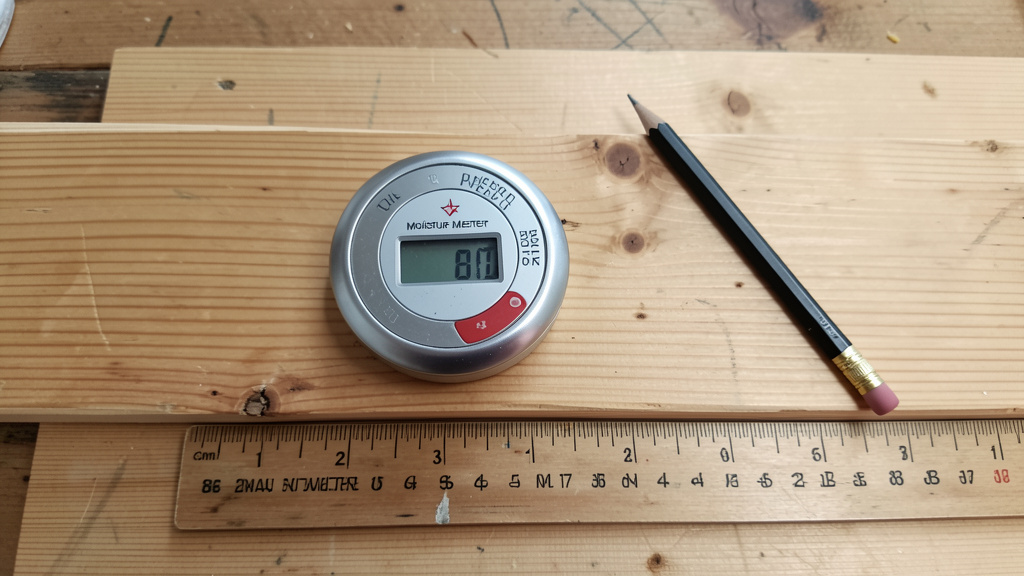
Critical threshold: The Fiber Saturation Point (FSP). Typically occurring between 25% and 30% MC (varying slightly by species), this marks the transition where free water is gone but cell walls remain saturated. Below the FSP, moisture loss causes measurable shrinkage. Above the FSP, wood dimensions remain relatively stable despite weight changes. This explains why a freshly cut log (80%+ MC) submerged in water shows little distortion, yet begins to twist once drying progresses below 30% MC. Recognizing the FSP is essential for anticipating wood movement.
Equilibrium Moisture Content (EMC): Nature’s Balancing Act
Wood continually seeks balance with its environment. Given time, it gains or loses moisture until reaching Equilibrium Moisture Content (EMC)—a state aligned with ambient relative humidity (RH) and temperature. EMC is not fixed; it shifts with climate and location. Consider these illustrative EMC ranges at 70°F (21°C):
| Relative Humidity | Approximate EMC Range | Typical Environment Context |
|---|---|---|
| 30% RH | 5–7% MC | Heated home in dry winter climates |
| 45% RH | 7–9% MC | Climate-controlled interior (common target) |
| 60% RH | 10–12% MC | Unheated garage in spring |
| 80% RH | 14–16% MC | Basement during humid summer |
| 90% RH | 18–20% MC | Covered outdoor shed in rainy season |
This illustrates why firewood stored under a tarp in a humid region may stabilize near 18% MC, while identical wood in an arid zone reads closer to 10%. Neither is “incorrect”—both reflect local equilibrium. The key insight: Wood moves toward the EMC of its environment, not toward an absolute “dry” state. Installing wood at 12% MC into a space averaging 70% RH (EMC ~14%) creates conditions for future swelling. Conversely, placing wood acclimated to a humid yard (14% MC) into a dry, heated room (EMC ~7%) invites checking. Successful projects align the wood’s current MC with the anticipated long-term EMC of its final location—a principle reflected across building guidelines and woodworking best practices.
Understanding Potential Consequences of Mismatched Moisture
Structural Considerations
In construction contexts, moisture levels influence performance. Building codes like the IRC typically specify framing lumber should not exceed 19% MC at installation. Sustained moisture above 20% MC in the presence of oxygen and moderate temperatures can create conditions favorable for wood-decay fungi. Below this threshold, decay initiation is significantly less likely. For structural elements like deck ledgers or support posts, verifying moisture levels supports long-term integrity—especially where wood contacts damp surfaces or experiences limited airflow.
Dimensional Movement Patterns
Wood shrinks and swells unevenly across grain directions:
– Tangential shrinkage (around growth rings): Typically greatest
– Radial shrinkage (across rings): Moderate
– Longitudinal shrinkage (along grain): Minimal (<0.1%)
This anisotropy explains why flat-sawn boards may cup, quartersawn material often remains flatter, and round logs develop radial checks. A 1×6 pine board moving from 18% to 8% MC in a dry interior may lose measurable width. In wide-plank flooring or glued panels, inconsistent moisture levels between boards can generate internal stresses, potentially leading to gaps, cupping, or joint failure over time. This isn’t a flaw in the wood—it’s a predictable physical response. Acclimation protocols exist to minimize these risks.
Finish and Adhesive Performance
Applying finishes or adhesives to wood outside recommended moisture ranges may compromise results. Excess moisture can interfere with adhesion, extend drying times unpredictably, or cause finishes to blister as trapped vapor seeks escape. Most manufacturers recommend verifying wood is within target MC ranges (often 6–12% for interior work) and stable before proceeding. This step supports durable outcomes in furniture, cabinetry, and flooring projects.
Firewood Efficiency and Safety
For firewood users, moisture content directly affects combustion. Wet wood requires significant energy to evaporate surface and internal moisture before sustained burning begins. This reduces usable heat output and increases smoke production. Organizations like the Chimney Safety Institute of America note that wood below 20% MC generally burns more cleanly and efficiently. Properly seasoned wood also minimizes creosote buildup—a factor in chimney maintenance. A moisture meter provides objective readiness assessment beyond subjective cues like sound or appearance.
The Four-Pillar Framework: A Practical System for Wood Moisture Assessment
Analysis across woodworking, construction, and restoration contexts reveals four interdependent practices that support informed decisions. This framework adapts to projects of any scale—from a backyard planter to structural elements.
Core Insight: Moisture content is neither inherently “good” nor “bad”—its suitability depends entirely on the wood’s intended use, location, and environmental context.
Pillar 1: Define the Target—Match MC to Application and Environment
No single “ideal” moisture content applies universally. Target ranges align with end-use conditions:
| Application Category | Typical Target MC Range | Key Considerations |
|---|---|---|
| Interior Woodworking (Furniture, Cabinets, Trim) | 6% – 9% | Align with expected indoor EMC (usually 35–50% RH). Acclimate in the installation space for several days. |
| Hardwood Flooring | 6% – 9% | NWFA guidelines suggest flooring MC within 2% of subfloor MC. Subfloor typically ≤12% MC. Acclimate per manufacturer instructions. |
| Exterior Construction (Decks, Fences, Siding) | 12% – 19% | IRC generally requires ≤19% MC at installation. Allows for natural outdoor EMC fluctuations. Ensure drainage and airflow. |
| Firewood | ≤20% (Ideal: 15–18%) | Below 20% supports cleaner, more efficient burning. Store under cover with side ventilation. |
| Green Woodturning | 30%+ (Freshly Cut) | Intentionally worked wet. Final drying requires careful monitoring to reduce checking. |
| Timber Framing (Heavy Beams) | 12% – 18% | Large sections dry slowly. Target balances workability with anticipated in-service movement. |
| Antique Restoration | Match existing piece (Often 8–12%) | Critical: Measure existing wood MC. Acclimate replacement material to match. Avoid rapid drying. |
| Raised Garden Beds (Untreated Cedar/Redwood) | ≤15% | Lower initial MC may support longer service life at soil contact. Consider interior moisture barrier. |
Common Pitfall to Avoid: Assuming “kiln-dried” labeling guarantees readiness. Wood can absorb moisture during transport or storage in humid conditions. Similarly, “air-dried” wood varies significantly by region and season. Verification at point of use with a reliable meter provides confidence. For instance, lumber arriving at a job site after transit through humid conditions may read higher than its kiln-exit value—prompting additional acclimation before installation.
Pillar 2: Decode the Environment—Anticipate the Moisture Journey
Wood’s MC will gradually shift toward the EMC of its surroundings. Proactively assess the environment where the wood will reside:
- Permanent location: Indoors climate-controlled? Unheated structure? Covered outdoor area? Ground contact?
- Local climate patterns: Review historical humidity data for your region. Coastal areas often maintain higher average RH than arid zones.
- Seasonal shifts: Will the space experience wide RH swings? (e.g., A sunroom in a temperate zone may range from 25% RH in winter heating season to 65% RH in summer).
- Microclimates: Basements near foundation walls, north-facing deck sections, or woodpiles under dense tree cover often retain moisture longer.
Practical Guidance:
– Interior projects in climate-controlled homes: Target 6–9% MC. In consistently dry-heating climates, lean toward lower end; in humid-summer regions, slightly higher may align with seasonal EMC.
– Exterior projects: In high-rainfall zones (e.g., Pacific Northwest), anticipate EMC ranges of 14–18%; in arid regions, 8–12%. Design with movement in mind—adequate spacing between deck boards accommodates swelling during wet periods.
– Case Insight: A deck installed in a humid region with boards tightly butted at 15% MC may experience cupping when ambient EMC rises to 17–18% during rainy seasons. Installing at ≤14% MC with appropriate gaps allows for natural expansion. Understanding local patterns turns reactive fixes into proactive planning.
Pillar 3: Select the Right Measurement Approach—Tool Awareness Matters
Choosing an appropriate assessment method depends on the project’s needs and constraints. Two primary meter types serve distinct purposes:
Pin-Type (Resistance) Meters: Targeted Depth Assessment
How they work: Pins penetrate the surface; electrical resistance between pins correlates to moisture level. Deeper pins access subsurface conditions.
Best suited for:
– Checking specific depths (e.g., surface vs. core after rain)
– Thick timbers where gradient assessment matters
– Situations requiring localized precision
Important considerations:
– Surface moisture (dew, condensation) can skew readings. Wipe surface dry first.
– Pin orientation matters: Insert perpendicular to grain for accuracy.
– Species variation affects readings. Apply correction factors if your meter supports them.
– Creates small punctures—avoid on finished surfaces or antiques.
Reliable Protocol:
1. Clean and dry the measurement spot.
2. Insert pins fully and perpendicular to grain.
3. For thick material, sample surface, mid-depth, and near-core if accessible.
4. Take 2–3 readings within a small area; note consistency.
5. Apply species correction if known and meter allows.
Pinless (Non-Destructive) Meters: Surface Area Screening
How they work: Electromagnetic waves assess moisture within a defined depth zone (varies by model). Provides an average reading across the scanned area.
Best suited for:
– Scanning subfloors, wall panels, or lumber stacks efficiently
– Finished surfaces where punctures are unacceptable
– Identifying moisture patterns or anomalies across a surface
Important considerations:
– Measures average MC within its depth range—cannot isolate surface vs. core.
– Wood density influences readings; very dense or light species may require adjustment.
– Requires flat, clean contact surface. Curved or uneven areas reduce accuracy.
– Metal (nails, staples) or underlying concrete can interfere.
Reliable Protocol:
1. Ensure sensor makes full, gap-free contact with a clean, flat wood surface.
2. Scan systematically (e.g., grid pattern on subfloor).
3. Note areas with unexpected readings for closer inspection.
4. Verify meter function on a known reference sample if available.
Context on Other Methods
- Oven-Dry Method: The laboratory standard (ASTM D4442) involves precise weighing before and after controlled drying. While impractical onsite, it underpins meter calibration. Avoid improvised oven/microwave attempts—they risk fire, damage wood, and yield unreliable data.
- Field Cues (Weight, Sound, Split Test): These offer rough indications only. A log that “rings” when struck may be drier, but species, size, and cracks heavily influence sound. Splitting to check interior color provides clues but lacks precision. For decisions impacting safety, longevity, or significant investment, a calibrated meter provides far greater reliability than sensory guesses.
Practical Takeaway: For most DIY and homeowner applications, a quality dual-mode meter (pin + pinless) offers versatile value. Focus on consistent technique and contextual interpretation over meter price alone. Even modest meters used thoughtfully outperform unverified assumptions.
Pillar 4: Interpret and Act—Context Turns Data into Direction
A moisture reading gains meaning only when viewed through relevant filters:
Filter 1: Species Awareness
Wood density and composition affect meter response. Meters calibrated for common softwoods (e.g., Douglas Fir) may read slightly high or low on hardwoods. If your meter includes species adjustment, use it. If not, recognize that absolute precision is less critical than relative stability and consistency across pieces for most projects. When matching replacement wood to an antique, for example, prioritize matching the existing piece’s reading over chasing a theoretical “ideal” number.
Filter 2: Temperature Awareness
Electrical resistance changes with temperature. Many digital meters include automatic temperature compensation (ATC). If yours does not, be aware that cold wood may read artificially high, warm wood artificially low. For critical decisions, allow wood and meter to acclimate to the measurement environment for 30+ minutes.
Filter 3: The Action Guide
Use this contextual decision aid:
| Scenario | Reading Context | Suggested Consideration |
|---|---|---|
| Interior Project (Target ~7–9%) | ≤9% and stable | Proceed if ambient conditions are stable. |
| 10–12% | Allow additional acclimation time in the installation space. Re-check in 24–48 hours. | |
| >12% | Investigate source (recent rain exposure? high humidity?). Delay until stable and within range. | |
| Exterior Project (Target ≤19%) | ≤18% | Proceed with attention to drainage and ventilation design. |
| 19–22% | If weather permits, allow brief additional drying under cover with airflow. Re-check. | |
| >22% | Delay installation. Store elevated with airflow. Monitor until declining toward target. | |
| Firewood (Target ≤20%) | ≤18% | Ready for efficient burning. Store under cover with side airflow. |
| 19–25% | Continue seasoning. Restack if airflow was restricted. Re-check in 2–4 weeks. | |
| >25% | Not ready. Improve stacking (off ground, spaced rows, top-covered only). Re-check monthly. | |
| Suspected Moisture Issue | Localized reading >3–5% above surrounding area | Investigate potential source (leak, condensation, poor ventilation). Monitor trend over days. |
The Stability Check: For important decisions (flooring installation, structural elements), take an initial reading. Return 24 hours later and re-measure the same spot. If the value shifts more than 1–2%, environmental conditions are still changing—delay action until readings stabilize. Consistency confirms equilibrium.
Application-Specific Guidance: Adapting Principles to Real Situations
For Homeowners: Protecting Your Space
Checking Subfloor Before Flooring
Why it matters: Installing finished flooring over a damp subfloor increases the risk of future movement. NWFA guidelines emphasize verifying subfloor conditions.
Practical Steps:
1. Use a pinless meter to scan the subfloor in a grid pattern. Note areas reading above 10–12%.
2. On flagged spots, use a pin meter (if accessible) to check below the surface.
3. If readings exceed 12%: Identify potential causes (recent plumbing work? inadequate vapor barrier? weather exposure). Address the source.
4. Allow time with dehumidification or ventilation until readings stabilize near target.
5. Acclimate flooring in the room on raised stickers for the duration recommended by the manufacturer (often 3–7 days). Verify flooring MC aligns with subfloor per guidelines.
Helpful Tip: Tape a 2’x2′ plastic sheet tightly to the subfloor overnight. Condensation underneath suggests moisture vapor transmission from below—indicating a need for a vapor barrier before proceeding.
Deck Assessment After Rain
Why it matters: Surface dampness ≠ structural moisture saturation. Premature concern can lead to unnecessary work.
Practical Steps:
1. Wait 24–48 hours after rain ends (allows surface drying).
2. Wipe a board surface dry.
3. Use a pin meter between boards (avoiding grooves holding moisture) at shallow depth.
4. Readings ≤18%: Normal seasonal fluctuation. No action needed.
5. Readings consistently >22% after several dry days: Investigate drainage, airflow under the deck, or potential decay. Probe soft areas gently with an awl.
Note on Pressure-Treated Wood: Newer treated lumber may initially read higher due to treatment chemicals. Focus on trends—readings that decline steadily over weeks indicate normal drying.
For Woodworkers: Supporting Craftsmanship and Longevity
Selecting Lumber at the Yard
– Scan multiple boards in a stack with a pinless meter. Note significant outliers.
– Inspect ends for deep checks (cracks), which can indicate internal stress from uneven drying.
– Smell for sour or musty odors, which may suggest moisture-related issues during storage.
– For critical projects, select boards with MC readings within 1–2% of each other to minimize internal stresses in assemblies.
Effective Acclimation Protocol
1. Unwrap promptly: Remove plastic packaging to prevent trapped moisture.
2. Sticker properly: Place uniform wood strips (“stickers”) between layers, aligned vertically for airflow.
3. Location is key: Acclimate in the workshop or room where the project will be built and used—not a damp garage or humid basement.
4. Monitor patiently: Check MC every day or two on multiple boards. Stop when:
– Readings remain stable for 2–3 consecutive days
– MC aligns with your workshop’s typical EMC (use a hygrometer to track RH)
– Variation between boards is minimal (≤1–2%)
5. Respect timelines: 4/4 lumber may stabilize in 1–2 weeks; thicker stock can take several weeks. Rushing risks future movement.
Pre-Gluing and Pre-Finishing Checks
– Verify mating surfaces are within 1–2% MC of each other before gluing.
– Ideal shop environment: 60–75°F (16–24°C), 35–50% RH. Monitor with a hygrometer.
– Before finishing, confirm MC is stable within target range. Wipe a small area with mineral spirits: if it soaks in evenly without beading or excessive darkening, the surface is likely ready.
– If finish issues arise later (blistering, poor adhesion), revisit moisture history as a potential factor.
For Firewood Users: Efficiency and Safety Focus
Seasoning Best Practices
– Split promptly: Exposes interior wood to air, accelerating drying.
– Elevate stack: Use pallets or rails to keep wood off damp ground.
– Maximize airflow: Arrange logs in loose rows with small gaps; avoid tight packing.
– Cover wisely: Use a tarp only over the top to shed rain while allowing sides to breathe. Full coverage traps moisture.
– Location: A sunny, breezy spot (south-facing if possible) aids drying. Rotate stack periodically for even exposure.
Reliable Readiness Check
1. Wait minimum 6 months for softwoods, 12+ months for dense hardwoods after splitting.
2. Select a log from the center of the stack (less affected by weather extremes).
3. Split a small section fresh. Immediately insert pin meter pins into the newly exposed face.
4. Take readings near bark, mid-radius, and near center. Average them.
5. Ready: Average ≤20%. Ideal burning range: 15–18%.
Note: Sound (“ring” vs. “thud”) or visible cracks are unreliable alone. A meter removes guesswork. Burning wood significantly above 20% MC increases smoke and creosote accumulation—underscoring the value of verification. Annual chimney inspection remains essential regardless of wood MC.
For Restoration and Conservation Contexts
Antique Furniture Considerations
– Measure first: Use a pinless meter on an inconspicuous area (inside drawer, underside) to establish existing MC.
– Match meticulously: Acclimate replacement wood to exactly match the measured value of the original piece. This may require a controlled environment over weeks.
– Avoid rapid changes: Never force-dry historic wood. Patience preserves integrity.
– Document: Record MC, ambient RH, and temperature during repair for future reference.
– Ethical note: For historically significant pieces, consult a professional conservator. Your meter informs care but doesn’t replace specialized expertise.
Structural Timber Assessment (Non-Invasive Approach)
– Scan accessible surfaces systematically; map readings.
– Where possible, compare surface readings to deeper readings (using long-pin meter on beam ends) to detect gradients.
– Correlate high readings with visual signs: discoloration, soft spots, musty odor.
– Monitor trends: Re-check critical areas quarterly. Early detection supports timely, minimal intervention.
– When readings and visual cues conflict or indicate potential risk, involve a qualified structural assessor.
For Gardeners and Outdoor Projects
Raised Garden Beds
– Wood choice: Naturally durable species like cedar or redwood are common choices for direct soil contact.
– Pre-installation: For untreated woods, MC ≤15% is preferable. Higher initial moisture may accelerate decay at the soil line.
– Moisture barrier: Lining the inside with heavy-duty landscape fabric creates a buffer between wood and constant soil moisture, potentially extending service life.
– Watering practice: Direct water into the soil bed, not onto wood sides. Soaker hoses placed within the bed minimize wood exposure.
Compost Bins and Tool Handles
– Compost bins: Wood ≤19% MC is generally suitable. Drill small drainage holes in the base. Elevate bin slightly off the ground. Accept that MC will stabilize higher (15–18%)—appropriate for this non-structural use.
– Tool handles: Target 8–10% MC. Too dry (<6%): may become brittle. Too wet (>12%): can swell in the metal ferrule, then loosen upon drying. Store handles in a stable, dry location (not a damp shed). If a handle loosens, do not soak it—this causes uneven swelling. Light application of boiled linseed oil can gently swell fibers to re-secure the fit.
For Builders and Contractors: Supporting Code Compliance and Quality
Framing Lumber Protocol
– Verify upon delivery: Randomly sample bundles. Reject material showing signs of excessive moisture or mold. Document readings if required by project specs.
– On-site storage: Elevate bundles on skids. Cover top only with a breathable tarp. Never store directly on soil, concrete, or in standing water.
– Pre-enclosure check: Re-verify critical areas (bottom plates, rim joists) before sheathing or drywall. MC should align with project specifications (typically ≤19%). If elevated, increase ventilation and delay enclosure until readings improve.
– Documentation: Maintain records of moisture verification as part of quality assurance—supports transparency and risk management.
Hardwood Flooring Installation Alignment
1. Confirm subfloor MC meets manufacturer requirements (often ≤12% for wood subfloors).
2. Acclimate flooring in the installation room per manufacturer timeline (minimum 3 days is common).
3. Verify flooring MC is within the specified range relative to subfloor (often within 2%).
4. Ensure ambient conditions (temperature, humidity) are stable and within the manufacturer’s pre-installation window for several days.
5. Post-installation: Educate occupants on maintaining indoor humidity within the recommended range (often 30–50% RH) year-round using humidifiers or dehumidifiers as needed.
Prevention Insight: The most frequent flooring movement issues trace back to insufficient acclimation or installing over a subfloor outside target MC. A brief verification step supports long-term satisfaction.
Navigating Common Challenges: Practical Troubleshooting
Species and Meter Interaction
Wood density, resins, and extractives influence meter response. Southern Yellow Pine’s resin content may cause pin meters to read slightly low if uncorrected; White Oak’s structure may read slightly high.
– Action: Identify species confidently. Use your meter’s species adjustment if available. For critical work on unfamiliar woods, prioritize relative stability and consistency across pieces over absolute precision. When matching to existing wood (e.g., restoration), matching the reading matters more than the theoretical “correct” value.
Temperature Effects on Readings
Cold wood increases electrical resistance, potentially elevating pin meter readings. Warm wood has the opposite effect.
– Action: Allow meter and wood sample to rest in the measurement environment for 30+ minutes. Use meters with ATC (Automatic Temperature Compensation) when possible. If not, recognize that readings taken in very cold or hot conditions may require cautious interpretation—focus on trends over single-point measurements.
Surface Moisture vs. Core Moisture
Morning dew, rain splash, or high humidity creates temporary surface moisture. Acting on this alone leads to errors.
– Action: Wipe surface dry. For pin meters, insert pins beyond the surface layer. For pinless meters, a high reading after rain likely reflects surface moisture; re-check after several hours of drying. If pinless shows 20% MC but pin meter at 1/4″ depth reads 12%, the core is likely stable—wait for surface equilibrium.
Pressure-Treated Wood Considerations
Modern treatments (ACQ, CA) contain conductive salts that can elevate pin meter readings initially.
– Action: When possible, use a pinless meter for initial assessment. If using pin meter:
– Allow treated wood to air out for 1–2 weeks before critical measurement.
– Focus on changes over time rather than absolute values.
– For installation decisions, prioritize visual dryness, time since treatment, and adherence to storage best practices alongside meter trends.
– Critical Safety Reminder: Never burn pressure-treated wood. Moisture assessment relates solely to structural suitability.
When to Seek Professional Assessment
Your meter is a diagnostic aid. Consult qualified professionals when:
– Readings remain persistently high (>25%) in structural elements with no clear moisture source
– Visible decay, significant softening, or fungal growth accompanies elevated readings
– Working with historically significant structures or valuable antiques
– Readings conflict strongly with physical evidence (e.g., meter indicates dryness but wood feels damp and smells musty)
– Suspecting hidden moisture intrusion behind walls or under floors
Professionals employ complementary tools (thermal imaging, boroscopes, data loggers) for comprehensive evaluation. Early consultation can prevent escalation.
Your Questions, Answered
Q: Are inexpensive moisture meters ($20–$40) reliable for home use?
A: For general firewood checks or rough exterior assessments, basic meters can indicate trends. For interior projects, flooring, or structural decisions, meters with species adjustment, temperature compensation, and proven calibration stability (typically $60+) provide greater confidence. Even a modest meter used consistently is better than no verification—but understand its limitations. Verify calibration periodically using the manufacturer’s test block.
Q: Why do I get slightly different readings on the same spot?
A: Minor variation is normal due to wood grain, localized density changes, or pin placement. Take 2–3 readings within a 1–2 inch area. Discard obvious outliers (e.g., one reading significantly higher likely hit a resin pocket or knot). Average the consistent values. Ensure pins are clean, fully inserted, and perpendicular to grain. For pinless meters, ensure firm, flat contact without gaps.
Q: How do I measure moisture in plywood or engineered wood products?
A: Plywood and composites present challenges due to glue layers and thin veneers.
– Use a pinless meter set to “plywood” mode if available.
– Scan multiple areas, avoiding edges where moisture wicks.
– For critical applications (e.g., subfloor under flooring), follow manufacturer specifications—they may recommend additional tests like calcium chloride testing for concrete substrates.
– Always prioritize the flooring or finish manufacturer’s specific MC requirements for engineered products.
Q: Does applying finish affect future moisture readings?
A: Yes. Film-forming finishes (polyurethane, lacquer) block moisture exchange and interfere with meter accuracy. Pin meters may penetrate but yield unreliable results; pinless meters cannot read through finishes. Always measure and verify MC before applying any finish. For existing finished surfaces with suspected moisture issues, professional assessment with specialized probes is recommended.
Q: Can wood be too dry? What are the risks?
A: Yes. Wood significantly below the EMC of its environment (e.g., 4% MC in a home averaging 35% RH) will absorb moisture, potentially causing swelling, joint stress, or gaps closing. In woodworking:
– Overly dry wood (<5% MC) may machine poorly (increased tear-out) or become brittle.
– In very arid climates or heated winter homes, indoor wood MC can drop low. Using a humidifier to maintain 30–45% RH helps stabilize conditions.
Target MC should align with the expected long-term environment, not an arbitrary “driest possible” value.
Q: How often should I verify my meter’s calibration?
A: Check calibration monthly if used regularly; before any critical project if used occasionally. Most meters include a calibration verification block—place the sensor on it and confirm the reading matches the labeled value (e.g., “12%”). If off by more than 1%, follow the manufacturer’s recalibration instructions. Clean pin sensors with isopropyl alcohol periodically to remove resin or debris. Store in a protective case with a desiccant pack.
Q: Does moisture content affect how wood cuts or machines?
A: Yes. Wood within typical shop ranges (7–12% MC) machines cleanly.
– Wood >15% MC: May clog blades with sap/resin, increase tool load, promote tear-out, and accelerate rust on steel tools.
– Wood <6% MC: Can generate excessive fine dust (use respiratory protection), increase static, and splinter more easily on exit cuts.
Maintaining stable shop humidity (40–50% RH) supports consistent machining and tool longevity.
Q: Can I measure MC on already installed wood (like existing floors)?
A: Carefully, yes. For pinless meters: Clean the surface thoroughly; avoid waxy residues. Scan between boards if possible. For pin meters: Use the finest pins available; test in inconspicuous areas (inside closets, under furniture). Insert pins parallel to the floor surface to minimize visibility. Patch tiny holes with matching filler. For valuable or historic floors, professional assessment is advisable.
Q: Why do firewood readings vary within the same stack?
A: Natural variation occurs due to:
– Position (edge logs dry faster than center)
– Species differences (oak dries slower than ash)
– Split size and exposure to sun/wind
Solution: Test multiple logs from different stack sections. Average the results. Focus on the majority of logs being ≤20%. Rotate the stack occasionally during seasoning for more uniform drying.
Q: Are wood moisture meters the same as drywall or concrete moisture meters?
A: No. Meters are calibrated for specific material properties. Using a drywall meter on wood (or vice versa) yields meaningless results. Some advanced meters offer multiple material modes—ensure “Wood” mode is selected. Always use a tool designed for your target material.
Q: Does altitude directly affect moisture content readings?
A: Altitude itself has negligible direct impact on MC or meter function. However, high-altitude locations often correlate with lower ambient humidity (e.g., Denver vs. Miami), leading to lower target EMC values. A meter reading is unaffected by elevation, but your interpretation should reflect local climate. Base target MC on measured or historical RH data for your specific location, not elevation alone.
Conclusion and Your Next Step
Wood moisture content is a fundamental aspect of working successfully with wood—a thread connecting cellular behavior to real-world project outcomes. This guide has moved beyond simplistic “dry vs. wet” thinking toward a contextual understanding where environment, application, and material interact. You now have a framework to:
– Anticipate movement and stability based on location and season
– Verify material readiness with appropriate tools and techniques
– Adapt practices for furniture, construction, firewood, or restoration
– Support longevity through informed moisture-aware decisions
Your 24-Hour Action Step
Within the next day, select one accessible wood item in your environment—a workshop board, a deck plank, a log in your woodpile. Clean its surface. Take two or three moisture readings using guidance from this article. Note the value, location, and current weather conditions. This simple act bridges theory and practice, building personal familiarity with moisture as a measurable factor. You’ve taken a step toward working with wood’s nature, not against it.
Cultivating Ongoing Awareness
Mastery grows through observation. Notice how wood feels on humid mornings versus dry afternoons. Observe subtle seasonal gaps in flooring. Listen to the sound of firewood. These sensory cues, combined with occasional verification, build intuitive judgment. Share insights thoughtfully: Explain to a neighbor why deck board spacing matters. Discuss firewood seasoning with a fellow gardener. When we normalize moisture awareness, we collectively reduce waste, enhance safety, and honor wood as a remarkable renewable material.
Wood responds to care and understanding. By respecting its relationship with moisture, we create projects that endure, function well, and bring satisfaction for years to come—not by chance, but by informed choice.
Explore Related Guidance in Our Woodcraft and Home Care Series:
Understanding Wood Grain: Strength, Stability, and Selection | Preventing Wood Rot: A Homeowner’s Moisture Management Guide | Firewood Seasoning Fundamentals: From Splitting to Storage | Subfloor Readiness Checklist for Flooring Success | Workshop Climate Control: Humidity, Temperature, and Wood Stability | Building Long-Lasting Raised Garden Beds: Materials and Methods | Wood Finish Selection: Oils, Varnishes, and Maintenance Basics