A Systematic Framework for Diagnosing, Repairing, and Maintaining Your Home’s Critical Drainage System
Your gutters serve as a vital hydraulic pathway, directing rainwater safely away from your foundation, walls, and landscape. When leaks appear, sections sag under debris weight, or clogs cause overflow, these are clear indicators of system stress—not minor inconveniences. Left unaddressed, such issues may contribute to fascia deterioration, moisture intrusion, soil erosion, or structural concerns over time. This guide provides a structured, principle-based approach to understanding gutter failures, executing targeted repairs, and establishing sustainable maintenance habits. You’ll learn how to assess root causes, select context-appropriate solutions across skill and budget levels, adapt practices to your climate and property, and recognize when professional support is warranted—all grounded in observable building dynamics and practical field methodology.
Introduction: Gutters as an Integrated System
Gutters function at the intersection of roof runoff and foundation protection. A localized issue—like a seam leak or minor sag—often reflects broader system dynamics: improper slope elsewhere, chronic debris accumulation, compromised hangers, or fascia conditions. Water pooling due to inadequate pitch stresses joints; accumulated debris adds weight that strains supports; moisture trapped against wood accelerates deterioration. Recognizing gutters as an interconnected flow pathway—not a collection of isolated parts—is foundational to effective repair.
This perspective aligns with holistic home maintenance principles: addressing visible symptoms while correcting underlying contributors reduces recurrence and supports long-term system resilience. Before tools are gathered, invest 15–20 minutes in deliberate observation. Note staining patterns, debris accumulation zones, slope inconsistencies, and fascia condition. This diagnostic mindset shifts gutter care from reactive patching to informed stewardship. Safety remains paramount throughout: use a stable ladder on level ground, wear grippy footwear and eye protection, avoid overreaching, and consider professional assistance for multi-story homes or uncertain structural conditions.
The Gutter Health Assessment Framework: Inspect, Diagnose, Prioritize
A repeatable three-phase process transforms uncertainty into actionable clarity. Perform this assessment biannually (spring and fall) and after significant weather events. Document observations with notes or photos to track changes over time.
Step 1: Comprehensive Inspection (Ground and Ladder Assessment)
Ground-Level Scan:
Stand 15–20 feet back. Observe the full gutter line. Note:
– Visible dips, separations from fascia, or sections pulling away
– Staining, bubbling paint, or algae streaks on siding beneath gutters
– Erosion, pooling, or vegetation changes near downspout discharge points
– Debris visibly spilling over edges or vegetation growing within troughs
Why it matters: Ground clues often pinpoint problem zones. Staining below a seam suggests leakage; soil erosion indicates discharge issues; visible sag correlates with debris load or hanger failure.
Hands-On Ladder Examination:
Work systematically from one downspout to the next. Use this focused checklist:
| Component | What to Assess | Key Indicators |
|---|---|---|
| Gutter Interior | Debris depth, corrosion, seam integrity | >1″ debris layer; pinholes; separated joints; flaking rust |
| Hangers/Brackets | Tightness, corrosion, spacing, fascia attachment | Loose hardware; bent spikes; soft/spongy wood at anchor points |
| Slope/Pitch | Alignment toward downspout; water pooling | Standing water >1 hour post-rain; sections level or reverse-sloped |
| Downspouts | Joint security, flow path, outlet condition | Separated elbows; blockage at base; outlet buried in soil |
| End Caps | Seal integrity, alignment | Water seepage at cap edge; visible gaps |
| Fascia/Soffit | Wood condition behind gutter | Discoloration, softness, crumbling texture, mold presence |
Pro Tip: After light rain (or simulate with a garden hose), observe water movement. Does flow progress steadily toward downspouts? Does pooling occur? Does leakage appear at seams or behind the gutter? This dynamic test reveals issues static inspection may miss. Record all findings before proceeding.
Step 2: Symptom Diagnosis (Connecting Observation to Cause)
Symptoms are clues; accurate diagnosis prevents wasted effort. Match observations to likely origins:
- Seam Leak: Typically stems from dried/cracked sealant, loose hangers creating joint tension, or thermal movement stress—not manufacturing defects in sound gutters.
- Hole/Puncture Leak: Often results from physical impact (branches, tools), corrosion in vulnerable materials, or ice pressure in cold climates. Material matters: aluminum dents; steel rusts progressively; copper develops slow patina-related changes.
- Water Behind Gutter: Usually indicates improper slope preventing drainage or a clog forcing backup. Less commonly, missing roof drip edge allows water to bypass the gutter front.
- Sagging Section: Primary cause is hanger failure (corrosion, spacing >36″, loose hardware). Secondary factors include chronic debris overload or compromised fascia wood.
- Recurring Clogs: Driven by environmental factors (overhanging trees), inadequate slope slowing flow, missing downspout strainers, or gutter shape (K-style holds more debris than half-round).
- Downspout Overflow: Typically caused by internal blockage (especially at elbows), undersized downspouts for roof area, or obstructed discharge outlet—not gutter trough issues.
Critical Insight: Failures often cascade. Example: Debris accumulation (Cause A) → water pools → added weight stresses hangers (Effect B) → sag creates low spot → more debris collects (Cause C) → pooled moisture breaches seam (Effect D). Effective repair addresses all links: clear debris, restore slope, reinforce supports.
Step 3: Repair Prioritization Matrix
Not all findings require immediate action. Use this objective triage guide:
| Priority | Criteria | Examples | Suggested Timeline |
|---|---|---|---|
| Critical | Active water intrusion threatening structure; safety hazard | Section detached/dangling; water streaming behind gutter onto wall; fascia soft/crumbly | Address within 48 hours |
| High | Rapidly worsening condition; high escalation risk | Visible sag with heavy debris load; multiple active leaks; disconnected downspout | Schedule within 1–2 weeks |
| Medium | Functional but degrading; preventive opportunity | Minor rust spots; slight slope deviation; light debris buildup | Plan within current season |
| Low | Cosmetic or very slow progression | Small paint chip; isolated dry leaf; minor discoloration | Monitor at next inspection |
Why this works: Prioritization prevents overwhelm. Focus first on protecting structural integrity. Document your plan: tackle Critical items immediately, calendar High items, and integrate Medium/Low into routine maintenance. This builds confidence and sustainable habits.
The Fundamental Principle: Gutters operate as a unified hydraulic pathway. Isolated repairs—sealing a leak without correcting slope or clearing blockages—often prove temporary. Durable resolution requires system-aware thinking: inspect holistically, diagnose root contributors, prioritize strategically, and implement solutions that restore balanced water flow from roof edge to discharge point.
Part 1: Addressing Leaks—Precision Repair by Material and Cause
Leaks demand precise identification of location, material, and origin. Rushing to apply sealant without diagnosis frequently masks symptoms while underlying issues progress. Always work on dry surfaces; moisture prevents proper adhesion.
Material Identification: The Essential First Step
Repair methods must align with gutter composition. Mismatched materials or adhesives can accelerate failure.
- Aluminum (Most Common): Lightweight, non-magnetic, typically white/brown/beige. Resists rust but can corrode if debris traps moisture. Repair Focus: Butyl or polyurethane sealants; aluminum patches; avoid steel wool (causes galvanic corrosion).
- Galvanized Steel: Heavier, magnetic, may show crystalline “spangle” pattern. Prone to rust at scratches. Repair Focus: Thorough rust removal first; zinc-rich primers; steel-compatible sealants.
- Copper: Distinctive reddish-brown aging to green patina. Seamed mechanically or soldered. Repair Focus: Copper-specific solder or epoxy; avoid standard silicones. Patina is protective—gentle cleaning only.
- Vinyl (PVC): Lightweight, snaps together, common on sheds or budget installations. Repair Focus: Adhesives rarely hold long-term; section replacement usually preferred. Avoid overtightening clips.
- Zinc: Silvery-gray, develops uniform matte patina. Less common in residential North America. Repair Focus: Specialized zinc solder/epoxy; professional consultation recommended.
Identification Tip: Use a magnet. Strong attraction indicates steel. Weak or no attraction suggests aluminum, copper, vinyl, or zinc. Confirm with visual cues (color, texture) or consult a hardware specialist with a photo.
Seam Leak Repair: Restoring Joint Integrity
Seams endure constant stress from thermal movement, water pressure, and debris load. Sealant failure is common, especially if originally applied over dirt or moisture.
Recommended Protocol: Mechanical Reinforcement + Sealant
Tools/Materials: Wire brush (brass for aluminum, steel for steel), isopropyl alcohol (90%+), rag, gutter-specific sealant (butyl rubber or polyurethane-based), caulk gun, pop rivet gun + matching rivets (optional but advised), utility knife, safety gear.
Steps:
1. Clean Meticulously: Remove all old sealant, debris, and corrosion from interior and exterior seam surfaces. Scrub until metal is bright. Wipe thoroughly with alcohol-dampened rag. Allow to dry completely (10+ minutes). Critical: Residual moisture or oil guarantees sealant failure.
2. Reinforce Structurally (Highly Recommended): If rivets are loose or missing, drill out old ones. Align sections precisely. Install new pop rivets every 2–3 inches along the seam. This transfers structural stress from sealant to mechanical fasteners—significantly extending repair life.
3. Apply Sealant: Cut nozzle tip for a 1/8″ bead. Apply a smooth, continuous bead along the entire interior seam where water flows. Lightly smooth with a soapy-water-dipped finger for optimal adhesion. Apply a thinner backup bead on the exterior seam. Avoid excessive globs that trap debris.
4. Cure: Follow product instructions (typically 12–24 hours dry time before exposure to rain). Butyl-based sealants often cure faster in ambient warmth.
Common Pitfalls to Avoid:
– Skipping surface prep: Applying sealant over old residue or moisture leads to rapid failure.
– Using household silicone: Lacks flexibility and UV resistance; cracks within months.
– Sealing exterior only: Water enters from above; interior seal is primary defense.
– Overtightening rivets: Can distort aluminum sections. Snug is sufficient.
Budget-Conscious Alternative: Sealant-Only Refresh
If riveting isn’t feasible, meticulous cleaning followed by high-quality gutter sealant application may provide 1–2 seasons of service. Follow Steps 1 and 3 precisely. Acknowledge this as a temporary measure—ideal for renters or bridging to professional work.
Emergency Containment: Epoxy Putty Stick
For active leakage during rain: Dry area as thoroughly as possible. Knead marine-grade epoxy putty (e.g., JB Weld WaterWeld) until uniform. Press firmly over leak, extending 1 inch beyond edges. Sets underwater in minutes. Important: This is strictly for immediate containment. Remove completely before performing permanent repair.
Illustrative Example: A homeowner noticed staining below a seam after seasonal rains. Inspection revealed brittle sealant and one loose rivet. After thorough cleaning, two new rivets were installed, and butyl rubber sealant applied interior and exterior. The repair maintained integrity through subsequent heavy rainfall cycles. Key success factors: mechanical reinforcement and immaculate surface preparation.
Hole, Puncture, and Corrosion Repair
Strategy depends on hole size, material condition, and surrounding integrity.
Small Holes (<1/4 inch) & Pinhole Rust (Steel):
1. For steel: Aggressively scrub rust until bright metal appears. Apply rust converter per instructions to stabilize remaining corrosion. Let dry.
2. Clean area with alcohol. Apply thick sealant dab over hole. For added security, place small aluminum flashing piece over sealant before it skins. Press firmly.
3. For aluminum: Clean thoroughly; sealant alone often suffices due to non-rusting nature. White powder (aluminum oxide) indicates trapped moisture—address debris source.
Medium Holes (1/4 to 2 inches):
1. Clean and prepare area meticulously.
2. Cut patch 1 inch larger than hole on all sides; round corners to prevent peeling.
3. Apply sealant to patch back. Position over hole. Rivet at corners (and center if large). Apply thin sealant bead around interior perimeter. Smooth.
4. Why rivets matter: Sealant alone flexes with gutter movement and fails. Rivets provide mechanical anchor.
Large Damage (>2 inches) or Severe Corrosion:
Replacement is generally more reliable than patching. Attempting large patches creates weak points prone to re-failure. Proceed to “Section Replacement Protocol” later in this guide. Exception: If surrounding metal is sound, an oversized patch (3+ inch overlap) riveted and sealed may serve as a temporary measure.
Material-Specific Guidance:
– Steel Gutters: Rust is progressive. If flaking rust surrounds a hole, the metal is compromised beyond the visible area. Cut out entire affected section (minimum 6 inches beyond soft spots) and replace. Patching rusted steel rarely succeeds long-term.
– Aluminum Gutters: Corrosion appears as white powder. Less structurally threatening than steel rust but signals moisture retention—often from debris. Clean thoroughly; sealant adheres well to prepared aluminum.
– Copper Gutters: Small holes may be soldered by specialists. DIY epoxy repairs are visible and less durable. For historic or high-value installations, consult a copper restoration professional.
Cautionary Note: Temporary fixes on actively corroding materials (e.g., duct tape over rust) can trap moisture and accelerate deterioration. Address the root cause—corrosion or impact damage—promptly.
End Cap Leak Resolution
Water dripping from the gutter terminus usually indicates failed end cap seal. End caps experience unique stress from thermal expansion against a fixed point.
Repair Steps:
1. Remove Cap: Drill out rivets/screws. Gently pry cap off without bending gutter end.
2. Clean Thoroughly: Remove all old sealant, debris, and corrosion from gutter end and cap interior. Use wire brush and alcohol. Ensure surfaces are completely dry.
3. Reinstall Correctly: Apply continuous bead of gutter sealant around the inside lip of the cap. Slide cap firmly onto gutter. Wipe excess. Re-rivet/screw securely (typically top, bottom, center). Apply thin exterior bead for backup.
4. Verify Flow: Ensure cap sits flush and does not protrude inward, obstructing water movement toward the downspout.
Why Failure Occurs: Original installations sometimes omit interior sealant, relying solely on rivets. Thermal movement breaks rigid connections. Flexible sealant inside the joint—where water pressure exists—is essential for lasting integrity.
Leak Prevention Integration
Repair alone isn’t sufficient. Embed these habits:
– Post-Repair Test: Simulate rain with a hose. Observe for 5 minutes. Confirm no drips at repair site or adjacent seams.
– Biannual Sealant Check: During routine inspections, gently press seams. If sealant feels brittle, cracks, or pulls away, refresh proactively.
– Debris Management: Leaks accelerate where moisture is trapped. Maintain clean sections (see Part 3).
– Slope Verification: Ensure water flows to downspouts, not pooling near seams (see Part 2). Standing water stresses joints.
– Material Consideration: If leaks recur frequently on aging steel gutters, evaluate full replacement with corrosion-resistant aluminum as a long-term solution.
Part 2: Correcting Sags, Slope, and Structural Support
Sagging gutters disrupt water flow, create debris traps, and strain attachment points. Correction requires identifying the root cause—hanger failure, fascia condition, installation error, or chronic overload—before applying solutions. Safety first: support sagging sections with temporary blocks before removing hardware.
Diagnosing Sag Origins
Don’t just lift the gutter. Determine why it sagged:
– Hanger-Specific Sag: Sharp dip under one location. Loose, bent, or missing hanger visible. Fascia feels solid when probed. Cause: Hardware failure due to corrosion, impact, or inadequate spacing.
– Fascia-Related Sag: Gradual dip across a section. Fascia wood behind hangers feels soft, spongy, or crumbles under light pressure. Cause: Moisture intrusion (from roof edge, leaky gutter, or poor ventilation) compromising the anchor point.
– Systemic Slope Failure: Gutters level or slope away from downspouts. Multiple sections hold standing water. Cause: Original installation error, fascia not level, or house settling over time.
– Overload Sag: Uniform dip across long section with visible heavy debris load. Cause: Infrequent cleaning combined with significant tree cover.
Diagnostic Check: With gloved hand, gently press up on sagging section. Does it feel springy (hanger issue)? Does fascia flex or feel soft (rot)? Does trapped water slosh toward the low point (slope issue)? This tactile feedback guides repair path.
Hanger Repair and Strategic Reinforcement
Hangers are the structural backbone. Standard spacing guidelines:
– Maximum 36 inches apart for aluminum/steel gutters in typical conditions
– 24 inches apart recommended for heavy debris areas, snow climates, or older installations with wide spacing
Replacing a Failed Hanger:
Tools/Materials: Ladder, drill/driver, corrosion-resistant screws, matching hanger type, level, wood epoxy filler (if fascia damaged), safety gear.
Steps:
1. Support Gutter: Place temporary wood block under sagging section to relieve weight.
2. Remove Old Hardware: Unscrew or drill out rivets. For spike-and-ferrule systems (common pre-1980s), carefully pry spike out with flat bar. Avoid damaging fascia.
3. Inspect Fascia: Probe screw holes with awl or screwdriver. If wood is soft, address rot first (see Fascia Repair section). Never reinstall into compromised wood.
4. Install New Hanger:
– Solid Fascia: Position hanger. Pre-drill pilot holes to prevent splitting. Drive screws until snug (avoid overtightening). Ensure hanger sits flat against fascia.
– Localized Rot: Fill cavity with wood epoxy filler. Cure fully per instructions. Re-drill pilot hole into cured epoxy. Install hanger. Epoxy creates a solid anchor.
5. Verify Alignment: Use small level on hanger arm. Adjust until perfectly level side-to-side. Gutter should rest securely in cradle.
Upgrading Hanger Spacing (Preventive Measure):
If existing hangers exceed 36-inch spacing:
1. Mark new locations midway between existing hangers using chalk line.
2. Install new hangers following Step 4 above. Use stainless steel or coated heavy-duty screws.
3. Pro Insight: In high-debris or snow regions, 24-inch spacing significantly reduces sag risk. Hidden hanger systems (mounted under front lip) offer superior strength and cleaner appearance but require precise measurement.
Spike-and-Ferrule Systems (Older Homes):
– Repair: Remove bent spike. Clean hole. Insert new spike through ferrule and gutter. Drive firmly with hammer (use wood block to protect gutter). If fascia is soft, fill hole with epoxy first.
– Upgrade Consideration: Replacing entire spike system with modern hidden hangers is often worthwhile. Spikes loosen with thermal movement; hidden hangers distribute load better and simplify future cleaning. This is a moderate DIY project or ideal professional scope.
Restoring Proper Slope (Pitch)
Gutters require gentle, consistent slope toward downspouts for complete drainage. Standard pitch: approximately 1/4 inch drop per 10 feet of gutter length. Too flat = pooling; too steep = reduced capacity or splashing.
Measuring Existing Slope:
1. Stretch string line tightly from high end of section to downspout outlet. Attach small line level.
2. Measure vertical distance from string to top of gutter at high end and downspout end.
3. Calculate drop: (Downspout end measurement) minus (High end measurement). For 20-foot section, ideal drop ≈ 0.5 inches.
Adjusting Slope on Installed Gutters:
Tools/Materials: Ladder, 24″+ level, chalk line, drill/driver, temporary supports.
Steps:
1. Identify High/Low Points: Use string line method. Mark current high point (farthest from downspout) and low point (at downspout).
2. Loosen Hangers: Slightly loosen screws on hangers between points. Do not remove completely. Goal: allow gentle adjustment.
3. Reposition Incrementally: Start at high end. Lower hanger slightly. Move to next hanger, lowering incrementally less. Continue toward downspout. Frequently check gutter bottom with level. Aim for consistent, gentle slope.
4. Secure and Validate: Tighten all hangers firmly. Re-check slope with string line. Simulate rain with hose. Water should flow steadily to downspout with no pooling. Adjust as needed.
5. Critical Downspout Check: Ensure gutter end at downspout inlet is the absolute lowest point. Even slight upward tilt causes backups.
Common Slope Missteps:
– “Level is Acceptable”: Level gutters retain water. Standing water accelerates corrosion, adds weight, and freezes in cold climates.
– Over-Correction: Excessive slope near downspout causes water to rush too fast, potentially splashing out or overwhelming downspout capacity.
– Ignoring Multi-Downspout Runs: On long sections (>40 feet), gutters slope down to a center downspout, then up slightly before sloping to the next. Adjust each segment independently.
Fascia Board Assessment and Repair
Fascia is the wooden band capping roof rafters—gutters attach directly to it. Compromised fascia jeopardizes gutter security and roof edge integrity.
Evaluating Fascia Condition:
– Probe Test: Gently press screwdriver into wood near hanger points. If it penetrates >1/4 inch with light pressure, wood is compromised.
– Visual Signs: Dark staining, cracking, peeling paint, mold/mildew presence, crumbling edges.
– Extent: Is damage isolated under a leak? Or widespread along a section?
Repairing Localized Rot (Small Area <6 inches):
Tools/Materials: Utility knife, chisel, wood epoxy filler, putty knife, sandpaper, primer, paint.
Steps:
1. Remove gutter section if feasible for access. If not, work carefully around it.
2. Cut away all soft, rotten wood down to solid material. Create clean edges.
3. Clean cavity thoroughly. Remove all dust/debris. Apply wood hardener if recommended by filler manufacturer.
4. Mix epoxy filler. Pack firmly into cavity, slightly overfilling. Smooth surface.
5. Cure fully per product instructions (often 24 hours). Sand smooth. Prime and paint to match. Reattach hanger into solid epoxy.
Addressing Significant Fascia Damage:
Note: This often warrants professional assessment due to safety and structural implications.
1. Safety Priority: Working at roof edge requires fall protection. If uncertain, engage a qualified carpenter or roofer.
2. Remove Gutters: Detach gutters and downspouts from affected section.
3. Excise Damaged Section: Using circular saw (depth-set to fascia thickness) and chisel, remove rotted wood back to solid material on both ends.
4. Fabricate Replacement: Cut new fascia board (typically primed pine or cedar, 1×6 or 1×8) to exact length. Critical: Prime all sides, especially cut edges, before installation.
5. Install Securely: Attach new board with corrosion-resistant fasteners into rafter tails. Ensure plumb and alignment with adjacent fascia.
6. Reinstall System: Mount new hangers into solid wood. Reattach gutters with verified slope. Seal joints. Prime/paint fascia.
Why Timely Action Matters: Moisture in fascia can migrate into soffit, roof sheathing, or wall framing. Addressing small compromised areas early prevents escalation. Make fascia probing a mandatory step during every gutter inspection.
Sag Prevention Protocol
- Seasonal Debris Control: Heavy wet debris is a primary overload cause. Clean gutters before peak leaf-fall and pollen seasons.
- Strategic Hanger Enhancement: When repairing sags, add an extra hanger on either side of the repaired zone. Upgrade to stainless steel or heavy-duty coated models.
- Slope Maintenance Checks: After major storms or high winds, verify slope hasn’t shifted. Thermal cycles can subtly alter alignment over time.
- Weight Awareness: Never use gutters as handholds or ladder supports. Avoid hanging heavy decorations directly on gutters—use roof clips instead.
- Climate Adaptation: In snow/ice regions, consider roof snow guards above gutters to prevent avalanche damage. Ensure downspouts extend sufficiently to prevent ice buildup at discharge points.
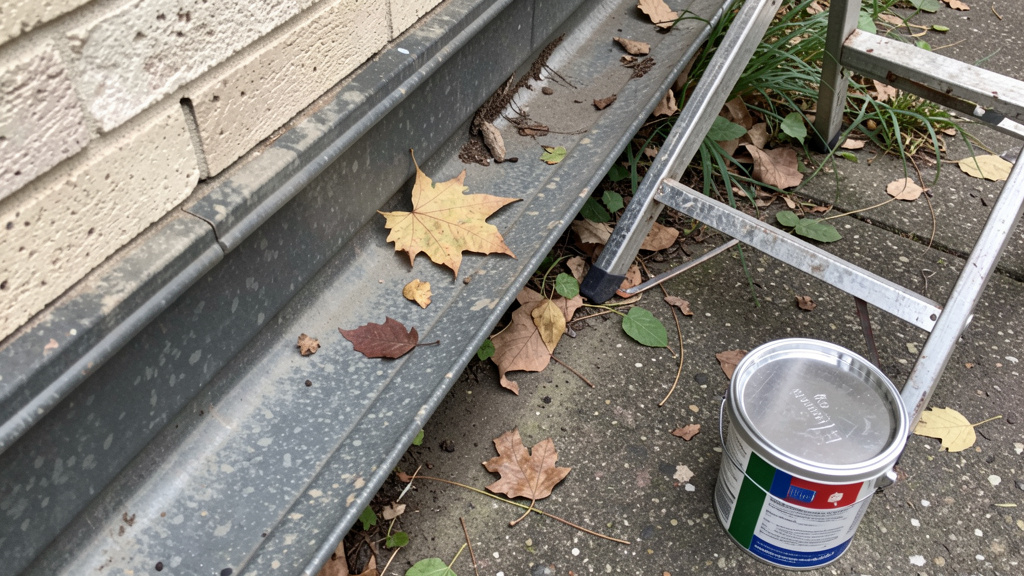
Part 3: Managing Clogs and Ensuring Unobstructed Flow
Clogs initiate a chain reaction: overflow damages siding/foundation, trapped moisture accelerates leaks and corrosion, added weight strains supports, and stagnant water attracts pests. Effective management combines thorough cleaning, context-aware prevention, and understanding why blockages form in your specific environment.
Safe and Effective Deep Cleaning Protocol
Optimal Timing: Clean twice yearly—late spring (after flowering/pollen season) and late fall (after leaf drop). Clean promptly after major storms with high winds or significant debris. Never clean during rain or on wet surfaces—ladder safety is non-negotiable.
Essential Gear:
– Sturdy extension ladder (rated for your weight + tools), leveler for uneven ground
– Heavy-duty waterproof work gloves
– Safety glasses (debris can fall upward when scooping)
– Gutter scoop or garden trowel (plastic to avoid scratching)
– Bucket with ladder hook or ground tarp
– Hose with adjustable spray nozzle
– Stiff-bristled brush (for sludge)
– Optional: Wet/dry vacuum for stubborn sludge
Step-by-Step Process:
1. Prepare Safely: Clear area below. Position ladder securely at downspout location—your anchor point. Work away from ladder in 5–10 foot sections, returning frequently to empty debris. Never overreach.
2. Remove Bulk Debris: Wearing gloves, pull out leaves, twigs, pine needles. Place directly into bucket or onto tarp. Pro Tip: Start at the end farthest from the downspout to avoid pushing debris into the inlet.
3. Clear Sludge and Fine Debris: Use scoop or brush for mud, sand, decomposed matter. Angle tool toward you to minimize spillage.
4. Flush the System: Once visibly clean, insert hose at high end. Turn on moderate flow. Observe water travel toward downspout. Critical Check: Does water flow freely? Pool anywhere? Exit discharge cleanly? This reveals hidden clogs or slope issues.
5. Clear Downspouts (Common Blockage Zone): If water backs up:
– Top Access: Remove strainer. Feed hose downspout. Use moderate pressure.
– Bottom Access: Disconnect elbow at base. Feed hose upward. Have helper monitor top.
– Stubborn Clogs: Use plumber’s snake fed gently from top or bottom. Rotate to break blockage—avoid excessive force.
– Vacuum Method: Attach wet/dry vacuum to downspout outlet. Seal gaps with rag. Turn on while feeding hose upward. Effective for wet sludge.
6. Final Verification: Flush entire system again. Check seams/joints for leaks under flow. Confirm no debris remains at downspout inlet. Wipe exterior if needed.
Efficiency Insight: Placing a mesh bag over the downspout outlet during flushing captures debris for easy disposal. In areas with heavy tree cover or fine debris (pine needles, pollen), increasing cleaning frequency to quarterly during peak seasons prevents compacted “mud cement” formation.
Understanding Your Clog Profile
Tailor prevention to your specific environment:
– Broadleaf Trees (Maples, Oaks): Large, flat leaves mat together. Strategy: Prioritize fall cleaning; guards designed for large debris.
– Coniferous Trees (Pines, Spruces): Fine needles slip through coarse guards, forming dense sludge. Strategy: More frequent cleaning; finer mesh guards; avoid reverse-curve types which needles bypass.
– Seed Pod/Flower Producers (Sweetgums, Palms): Sticky pods or fluffy seeds create stubborn blockages. Strategy: Clean immediately after shedding season; solid-top guards with small slots.
– Roof Contributors: Shingle granules, moss, or algae wash into gutters. Strategy: Address roof issues; install downspout filters.
– Animal Activity: Birds, squirrels, or insects nesting. Strategy: Secure end caps; use mesh covers; inspect during spring.
Regional Adaptation: In arid climates, clogs often consist of dust, sand, and small twigs—focus on fine sediment removal. In coastal areas, salt spray accelerates corrosion where debris traps moisture; cleaning is critical for longevity. Adapt your routine to local conditions.
Gutter Guard Systems: A Balanced Evaluation
Guards reduce cleaning frequency but require thoughtful selection. No system is universally perfect or entirely maintenance-free. Match the solution to your debris type, roof pitch, budget, and willingness to perform light upkeep.
| Guard Type | Mechanism | Best Suited For | Limitations | Required Upkeep |
|---|---|---|---|---|
| Mesh/Screen | Fine screen rests on gutter; debris sits atop | Moderate leaf areas; budget-conscious | Pine needles may clog mesh; requires debris brushing | Brush debris 1–2x/year; check for detachment |
| Reverse Curve | Curved hood uses surface tension to direct water in | Large leaves; steep roofs (>6/12 pitch) | Less effective with fine debris (needles, seeds); higher cost | Annual inspection; clean hood surface if debris adheres |
| Foam Insert | Porous foam block sits in gutter | Very temporary use; minimal budgets | Clogs internally; reduces capacity; degrades in UV | Replace every 1–2 years; generally not recommended |
| Solid Top (Micro-Mesh) | Seamless cover with tiny slots; debris slides off | Heavy debris areas; all roof pitches | Highest initial cost; professional install often needed | Rinse slots occasionally; verify seal integrity |
| Bottle Brush | Rotating brush at downspout inlet | Downspout clog prevention only | Does not protect gutter trough | Clean brush quarterly |
Selection Guidance:
– Avoid Generic Claims: A guard effective for large leaves may fail with pine needles. Research options proven in your local conditions—ask neighbors or reputable local contractors.
– Material Quality Matters: Cheap plastic guards become brittle in UV exposure, crack, and create new clog points. Opt for aluminum, stainless steel, or UV-stabilized polymers.
– Installation Precision: Poorly fitted guards leak, detach, or create dams. Professional installation is often worthwhile for solid-top or reverse-curve systems.
– Realistic Expectations: Even premium guards require some maintenance—brushing accumulated debris, checking seals. They typically reduce cleaning frequency (e.g., from twice to once yearly), not eliminate it entirely.
– DIY-Friendly Option: High-quality stainless steel micro-mesh screens offer strong value. They sit securely on standard K-style gutters, allow easy removal for cleaning, and handle mixed debris reasonably well.
Illustrative Caution: Installing inexpensive mesh guards in an area with fine debris like pine needles can lead to the mesh becoming packed solid. Water may then cascade over the gutter front, potentially affecting siding. This underscores the importance of matching guard type to specific debris profiles and local conditions.
Downspout Optimization: Securing the Exit Path
A clean gutter is ineffective if downspouts clog or discharge improperly. This zone directly impacts foundation safety.
Clog Prevention & Flow Management:
– Install downspout strainers (small mesh baskets) at top inlets—low-cost first defense against large debris.
– Use downspout extensions (rigid or flexible) to carry water at least 6 feet from foundation. Ideal: 10+ feet, especially on clay soils or sloped lots. Ensure extensions slope away from house.
– Place splash blocks (concrete or plastic) under extensions to prevent soil erosion at discharge point. Position to direct flow away from structure.
– For buried drain lines (French drains), include cleanout access points every 20–30 feet. Mark locations clearly. Flush lines annually with hose.
Local Compliance Note: Many municipalities regulate downspout discharge (e.g., not onto neighbor’s property, specific stormwater requirements). Check local codes. Redirecting to rain barrels or permeable garden beds is often encouraged where permitted.
Seasonal Considerations:
– Fall: Verify extensions are clear before peak leaf season.
– Winter (Freezing Climates): Disconnect and store extensions before first freeze to prevent ice blockage. Monitor downspout outlets for ice dams. Reconnect in spring.
– Spring: Flush extensions; check for rodent nests built over winter.
Building a Sustainable Maintenance Rhythm
Clog management thrives on consistency, not intensity. Integrate this adaptable cycle:
1. Pre-Season Scan (10–15 mins): Before peak debris season, inspect gutters. Remove early accumulations. Verify guard integrity.
2. Post-Storm Check (5 mins): After high winds or heavy storms, glance from ground. Note sections needing attention.
3. Scheduled Deep Clean (60–90 mins per 50 ft): Block calendar time for spring/fall cleans. Treat as essential home care—like HVAC filter changes.
4. Post-Clean Verification (5–10 mins): Always flush system. Document observations (photo + note) for future reference.
5. Annual System Review: Once yearly, evaluate if prevention tools (guards, strainers) remain effective. Adjust as trees grow or conditions change.
Habit-Building Tip: Pair gutter maintenance with a positive ritual. “After cleaning gutters, I enjoy coffee on the patio appreciating the clean lines of my home.” Linking task to reward fosters consistency. Involve household members with clear, safe roles (spotter, debris collector, hose operator).
When to Engage Professional Support
DIY repairs build valuable skills, but safety and complexity require honest self-assessment. Knowing when to hire a qualified professional prevents injury, property damage, and costly rework. This section provides objective criteria—not fear—to guide your decision. Reputable professionals value informed clients who ask thoughtful questions.
Clear Indicators for Professional Engagement
- Height and Access Concerns: Homes exceeding one story without proper fall protection equipment (harness, anchor points). Ladder work above 10 feet significantly increases fall risk. Professionals use specialized equipment (aerial lifts, roof anchors) and carry liability insurance.
- Significant Structural Compromise: Fascia softness extending beyond 12 inches, suspected damage to soffit or roof sheathing, or interior water stains below gutter lines. These require carpentry expertise, moisture assessment tools, and coordinated repairs.
- System-Wide Replacement Scope: If >30% of gutters show severe corrosion, widespread sagging, or original installation flaws (chronic slope errors, inadequate sizing). Professionals ensure correct sizing (based on roof area and local rainfall patterns), proper pitch, code-compliant installation, and safe disposal.
- Complex Roof Architecture: Steep pitches (>8/12), multiple valleys, dormers, or intricate rooflines challenge safe access and precise alignment. Specialists navigate these efficiently.
- Suspected Hidden Damage: Interior moisture signs (ceiling stains, musty attic odors near eaves) indicate water has breached the system. Professionals use moisture meters or inspection cameras to assess scope without invasive demolition.
- Personal Safety Considerations: If ladder work causes dizziness, balance concerns, or physical limitations affect strength/stamina. Your well-being is paramount.
Evaluating Professional Services Thoughtfully
Avoid selecting solely on price. Seek competence and transparency:
1. Verify Credentials: Request proof of:
– Liability Insurance: Covers accidental property damage.
– Workers’ Compensation: Covers crew injuries on your property. Never hire uninsured contractors.
– Local Business License: Required in most jurisdictions.
2. Request Detailed Written Estimates: Obtain 2–3 quotes specifying:
– Exact scope (e.g., “Repair 3 sagging sections, reseal 5 seams, full system cleaning”)
– Materials to be used (sealant type, hanger specifications, replacement section details)
– Project timeline and cleanup protocol
– Warranty terms for labor and materials
3. Ask Insightful Questions:
– “How will you protect my landscaping and siding during work?”
– “Will you provide a written report of all findings after initial inspection?”
– “What is your process if additional damage (e.g., rotted fascia) is discovered?”
– “May I contact references from similar projects completed recently?”
4. Recognize Red Flags:
– Cash-only demands or high-pressure “today-only” discounts
– Vague estimates (“We’ll determine scope on-site”)
– Unmarked vehicles or inability to name company affiliation
– Requests for full payment before work begins (standard deposit: 10–30%)
Understanding Cost Variables
Repair and replacement costs vary significantly by region, home size, material choices, and project scope. When obtaining quotes:
– Focus on scope clarity, material specifications, and warranty terms rather than lowest price alone.
– A detailed quote accounting for potential hidden issues (like fascia repair) often provides better long-term value than a minimal estimate.
– Quality workmanship and appropriate materials typically reduce recurrence risk and future expenses.
– For perspective: Professional cleaning generally costs less than repairing water-related damage to siding, fascia, or foundation. Investing in correct repairs supports home resilience.
Collaborating Effectively with Professionals
Even when hiring out, your preparation adds value:
– Share your documented assessment (photos, notes on specific concerns).
– Ask the technician to walk you through their diagnosis: “Could you show me exactly where the fascia is compromised and explain the cause?”
– Request before/after photos of repairs for your records.
– Discuss prevention strategies tailored to your property.
This partnership ensures transparency, verifies quality, and builds your knowledge for future maintenance. A skilled professional educates—you gain insight without creating dependency.
Your Questions, Answered
These responses synthesize observable field patterns, material properties, and building maintenance principles.
Q: How often should I clean my gutters?
A: Biannual cleaning (late spring, late fall) is a reliable baseline for most homes. Adjust based on your environment: increase to quarterly with heavy pine trees or significant pollen; annual may suffice in low-debris desert areas. After major storms, perform a quick visual check. The hose flush test is your best indicator—if water flows freely with no pooling, your current schedule is adequate.
Q: Can I use a pressure washer to clean gutters?
A: Generally not advised. High-pressure streams risk:
– Forcing water behind the gutter, saturating fascia and soffit
– Damaging seam sealant, creating new leak points
– Denting aluminum or cracking vinyl sections
– Dislodging hangers if aimed incorrectly
A garden hose with adjustable spray nozzle provides sufficient flushing power safely. For stubborn sludge, a stiff brush and manual removal are more effective and controlled.
Q: My gutters overflow even when clean. What could be wrong?
A: This typically indicates system design or installation factors, not clogs:
– Undersized Components: Older homes may have gutters/downspouts too small for roof area or local rainfall intensity.
– Insufficient Downspouts: Long runs (>40 ft) often need additional downspouts (standard: one per 30–40 ft of gutter).
– Slope Issues: Water isn’t efficiently reaching the downspout (re-check pitch per Part 2).
– Discharge Blockage: Buried drain line clogged or extension kinked/buried. Inspect entire exit path.
A professional assessment can evaluate capacity and recommend targeted upgrades.
Q: Repair old gutters or replace the entire system?
A: Consider these factors:
1. Age and Material: Steel gutters over 15–20 years with multiple rust spots often justify replacement with aluminum. Aluminum with isolated damage is usually repairable.
2. Extent of Damage: Are >30% of seams leaking, sections sagging persistently, or fascia compromised? Replacement provides a unified, reliable system.
3. Original Installation: Chronic slope errors or widely spaced hangers indicate foundational issues better resolved with new installation.
4. Cost Comparison: If cumulative repair costs approach 40–50% of replacement value, replacement may offer better long-term value and peace of mind.
When uncertain, obtain a professional evaluation—they can quantify scope and options objectively.
Q: What sealant works best for gutter repairs?
A: Avoid standard household silicone (fails under UV exposure and flexing). Recommended options:
– Butyl Rubber Sealant: Excellent flexibility, adheres to slightly damp surfaces (useful for emergencies), UV-resistant, paintable. Look for brands labeled for gutter/roofing use.
– Polyurethane Sealant: Strong adhesion and durability. Ensure product specifies “gutter,” “roofing,” or “exterior” use.
– Marine Epoxy Putty: For emergency hole repair or metal patching (e.g., JB Weld WaterWeld). Not ideal for seams.
Universal Requirement: Clean surfaces meticulously with wire brush and alcohol before application. Follow cure time instructions—rushing compromises bond strength.
Q: Do gutter guards eliminate the need for cleaning?
A: No system is entirely maintenance-free. Guards reduce cleaning frequency but require context-appropriate selection and light upkeep:
– Mesh guards need debris brushed off periodically.
– Reverse-curve guards may require surface cleaning if fine debris adheres.
– Solid-top micro-mesh systems perform well across debris types but benefit from occasional slot rinsing.
Research guards proven effective in your specific area and debris profile. Consult neighbors or local contractors. Manage expectations: guards are a tool within a maintenance strategy, not a complete solution.
Q: Why do gutters make dripping or ticking noises at night?
A: This is commonly thermal contraction. As metal cools rapidly after a warm day, sections shift slightly against hangers or seams. It’s typically harmless. To minimize:
– Ensure hangers aren’t overtightened (allow slight movement).
– Apply a tiny amount of dry lubricant (e.g., graphite-based) to contact points between gutter and hanger.
If noise accompanies visible movement, leaks, or occurs during daytime, inspect for loose hardware.
Q: Can painting old gutters extend their life?
A: Painting can refresh appearance and seal minor surface corrosion if the metal is sound:
– Aluminum: Clean thoroughly, light sanding, metal primer, then 100% acrylic latex paint.
– Steel: Remove all rust (wire brush, sandpaper), apply rust-inhibiting primer, then topcoat.
Painting is cosmetic—it won’t fix holes, structural weakness, or active corrosion. Never paint over leaks or unaddressed rust; proper surface preparation is essential. For severely deteriorated gutters, replacement is more effective long-term.
Q: How to address ice-related concerns in cold climates?
A: Ice dams form when attic heat melts roof snow, which refreezes at cold eaves. Prevention focuses upstream:
– Attic Management: Ensure adequate insulation (target R-38+) and balanced ventilation (soffit/ridge vents) to maintain a cold, uniform roof deck. This is the most effective long-term strategy.
– Roof Raking: After heavy snow, use a roof rake (from ground) to clear snow from the lower 3–4 feet of roof above gutters. Prevents meltwater accumulation.
– Heat Cables: Install self-regulating heat cables in gutters/downspouts before winter. Follow manufacturer layout precisely to create melt channels.
– Avoid: Chipping ice with tools (damages gutters), using rock salt (corrodes metal, harms plants/soil). For existing ice dams, consult a professional removal service using low-pressure steam.
Q: Are vinyl gutters suitable for DIY installation?
A: Vinyl has trade-offs:
– Pros: Lightweight, rust-proof, lower initial cost, simple cutting.
– Cons: Becomes brittle in extreme cold (risk of cracking); significant thermal expansion/contraction can stress seams; lower weight capacity (more prone to sag under debris); UV exposure causes gradual fading/weakening.
Aluminum generally offers better durability, flexibility, and long-term value for primary home gutters. Vinyl may suit detached sheds, garages, or very mild climates with minimal tree cover. If installing vinyl, use extra hangers (every 24 inches) and avoid overtightening clips.
Q: What is a common oversight in gutter maintenance?
A: Delaying attention until visible failure occurs. Gutters are often “out of sight, out of mind,” yet small issues compound quickly. The most impactful habit is scheduling biannual inspections and cleanings proactively. Prevention requires minimal time and cost compared to repairing water damage, fascia rot, or foundation issues. Treat gutter care as routine home stewardship—like changing HVAC filters—a small, consistent action that protects significant value.
Conclusion: Cultivating Proactive Home Stewardship
Gutters perform quietly but critically, guiding water away from your home’s vulnerable points. This guide has equipped you with a structured framework—not just isolated fixes—to understand, repair, and maintain this essential system with confidence.
Core Principles to Carry Forward:
1. Assess Before Acting: Use the Inspect-Diagnose-Prioritize process to target root contributors, not just visible symptoms. A leak is data; a sag is feedback.
2. Think Systemically: Gutters function as an integrated flow pathway. Repairing a seam without verifying slope or clearing blockages often leads to recurrence. Address the entire journey—from roof edge to discharge point.
3. Prevention as Practice: Regular cleaning and checks aren’t chores; they’re insurance. Strategic hanger spacing, context-appropriate guards, and slope verification transform gutters into a reliable, low-maintenance asset.
Your 24-Hour Micro-Action:
Within the next day, spend just 10 minutes on this simple step: At dusk, stand in your yard with a flashlight. Shine it upward along your gutter line. Note one observation—a section with accumulating debris, a spot with staining, a downspout discharging too close to the foundation. Write it down. This small act breaks the cycle of neglect. It converts knowledge into personal awareness. Tomorrow, you can decide the next step: schedule a full inspection, order a gutter scoop, or research local service providers. Momentum begins with a single, specific observation.
The Broader Perspective:
Mastering gutter care fosters a deeper shift in home ownership. You move from reacting to crises toward stewarding your property with foresight. This mindset extends far beyond gutters—it’s the foundation of resilient home maintenance. Understanding water flow, material behavior, and how small, timely actions prevent larger issues protects not only your investment but also your peace of mind. Each repaired seam, cleared clog, and verified slope is a quiet affirmation of care. This is the essence of thoughtful home stewardship: consistent, informed action that preserves integrity and supports safety for years to come. Start small. Stay consistent. Your home responds to attentive care.
Explore Our Complete Home Maintenance System:
The Homeowner’s Guide to Roof Inspection and Care | Downspout Drainage Solutions: Directing Water Safely Away | Choosing Gutter Protection: A Climate and Debris Guide | Seasonal Home Maintenance Checklist: Spring, Summer, Fall, Winter | Fascia and Soffit Care: Preserving Your Roof’s Edge | Foundation Drainage Basics: Protecting Your Home’s Base | Exterior Wood Maintenance: Cleaning, Repairing, and Protecting Surfaces