A Step-by-Step Framework to Clean Every Surface Without Damage and Extend the Life of Your Outdoor Living Spaces Through Informed, Material-Respectful Care
Sun-bleached furniture, slippery deck boards, patio stones veiled in green algae—these aren’t just eyesores. They signal underlying conditions that, if addressed thoughtfully, support safety, preserve material integrity, and sustain the beauty of your outdoor environment. Yet many cleaning efforts fall short because they apply a universal method to uniquely responsive surfaces. This guide offers a unified, material-aware system grounded in manufacturer guidelines, environmental stewardship principles, and observable patterns in surface preservation. You’ll learn precisely when gentle agitation suffices versus when targeted chemistry is needed, why pH balance and dwell time matter more than scrubbing force, and how to restore surfaces thoughtfully—without compromising their structural or aesthetic character.
Introduction: Why Surface Intelligence Matters More Than Force
Hardware store aisles overflow with cleaners promising instant transformation. Yet recurring issues—warped deck boards after aggressive washing, etched stone from acidic solutions, faded fabrics from harsh chemicals—reveal a deeper truth: cleaning success hinges not on product strength, but on alignment between method and material behavior. Concrete breathes differently than cedar. Wrought iron reacts uniquely to moisture compared to powder-coated aluminum. Treating all surfaces identically invites premature wear or irreversible change.
This guide bridges that gap. Synthesizing widely available manufacturer care instructions (from composite decking and stone producers to fabric innovators), environmental considerations for runoff, and time-tested preservation approaches, we present a cohesive methodology centered on surface integrity. You’ll move beyond guesswork to a confident, repeatable process where every action honors your materials’ physical properties. Whether addressing algae on shaded decking after prolonged rain or salt residue on coastal furniture, this system provides context-aware protocols—not temporary fixes. Safety, sustainability, and thoughtful stewardship form the foundation of every recommendation. No prior expertise required; only mindful attention.
The 3-Layer Safety and Assessment Framework
Before selecting a tool or solution, adopt this foundational sequence. Thoughtful assessment prevents the majority of common cleaning challenges documented across surface restoration resources. This isn’t optional preparation—it’s the cognitive shift that transforms outcomes.
Layer 1: Surface Assessment & Environmental Scan
Why this layer matters:
A pressure washer effective on concrete may damage softwood grain. Oxygen bleach revitalizes mildew-stained teak but requires caution near untreated iron. Assessment is strategic intelligence gathering—not hesitation.
How to execute thoroughly:
1. Identify material composition:
– Patios: Tap stones gently. A sharp ping suggests dense granite or porcelain; a dull thud indicates porous limestone or sandstone. Examine mortar joints: crumbling texture suggests historic masonry needing gentle methods.
– Decks: Check end-grain stamps or texture. “PT” denotes pressure-treated pine (softer, prone to splintering); “HDPE” indicates composite (uniform, smooth); visible growth rings signal natural wood (cedar, redwood, ipe).
– Furniture: Magnetic test—strong attraction suggests steel. Lightweight with hollow sound? Likely aluminum. Visible grain pattern? Wood. Fabric label: “Solution-dyed acrylic” (e.g., Sunbrella®) generally tolerates diluted oxygen bleach; “polyester” typically requires pH-neutral cleaners. Always verify with current care labels.
- Diagnose the contaminant:
- Green/black slippery film: Algae (thrives in moisture and shade) versus mold (requires organic matter like wood tannins).
- White powdery residue: Efflorescence (mineral salts migrating through masonry—not surface dirt; scrubbing often worsens appearance).
- Rust streaks: Metal furniture reacting with moisture; indicates need for rust treatment before general cleaning.
-
Dark streaks on wood rails: Often tannin bleed (a natural wood process, not mold), requiring specific pH-balanced treatment.
-
Environmental conditions check:
- Temperature: Cleaning below 50°F (10°C) risks ineffective solution activation and prolonged surface dampness, potentially encouraging microbial growth.
- Sun exposure: Avoid direct midday sun. Heat causes solutions to dry too quickly, potentially leaving residues or streaks. Overcast mornings or late afternoons are often ideal.
- Drainage: Trace water flow direction. Will runoff contact garden beds, storm drains, or pool systems? Place absorbent barriers at edges if near sensitive zones.
- Wind: Breezy conditions (>10 mph) may carry spray onto windows or neighboring properties. Consider postponing.
Common assessment considerations:
– Weathered silver-gray on cedar or redwood is often a natural, protective patina—not grime. Aggressive cleaning removes beneficial oils, potentially accelerating future deterioration.
– Slope matters: Low spots on patios collect water; these areas need careful agitation but reduced pressure to avoid erosion.
– Inspect hardware: White corrosion on deck screws indicates zinc degradation. Clean gently to preserve head integrity.
Layer 2: Tool & Solution Selection Matrix
Why matching tools to materials prevents unintended outcomes:
A stiff brush safe for concrete may scratch composite decking. Vinegar cuts grease on metal but can compromise sealants on natural stone. Selection follows material science—not preference.
Material-aware compatibility guide:
| Surface Type | Generally Suitable Cleaners | Use With Caution / Avoid | Recommended Tools | Pressure Washing Guidance |
|———————–|———————————–|———————————-|———————————–|———————————|
| Concrete/Pavers | Oxygen bleach, pH-neutral degreaser | Muriatic acid (unless intentional etching), undiluted vinegar | Stiff nylon brush, push broom | 2,500–3,100 PSI max; wide fan tip only |
| Natural Stone (flagstone, limestone) | Stone-specific cleaner, diluted oxygen bleach (1:4) | Acidic cleaners (vinegar, CLR), chlorine bleach | Soft-bristle brush, microfiber cloth | Generally not recommended; consult stone specialist |
| Wood Decks (cedar, pine) | Oxygen bleach solution, deck brightener (oxalic acid-based) | Chlorine bleach (may degrade fibers), undiluted detergents | Medium-bristle nylon brush, garden hose | ≤1,200 PSI; wide fan tip; 12+ inches away; test first |
| Composite Decks | Manufacturer-recommended cleaner, mild soap | Abrasives, solvents, high-PSI pressure | Soft brush, microfiber mop | ≤1,500 PSI per most warranties; wide fan tip; test hidden area |
| Wrought Iron | Rust converter, mild soap | Steel wool (traps moisture), acidic cleaners | Soft cloth, soft toothbrush | Not recommended (forces water into joints) |
| Aluminum/Powder-Coated | pH-neutral soap, baking soda paste | Abrasives, chlorine bleach | Soft sponge, microfiber cloth | ≤1,200 PSI; low angle; test first |
| Teak/Wood Furniture | Teak cleaner, diluted oxygen bleach | Chlorine bleach, harsh detergents | Soft brush, lint-free cloth | Not recommended |
| Fabric Cushions | Mild soap + lukewarm water, enzyme cleaner | Hot water, bleach, stiff brushes | Soft brush, gentle hose spray | Never pressure wash |
Thoughtful alternatives:
– Oxygen bleach alternative: 1 cup washing soda + ½ cup hydrogen peroxide (3%) + 2 gallons warm water. Suitable for algae on concrete (patch-test first).
– Deck brightener alternative: Dissolve oxalic acid crystals per package directions (wear gloves). Restores weathered wood appearance without chlorine-based products.
– Light rust treatment: Baking soda + water paste applied to affected area; wait 15–20 minutes before gentle wiping.
Critical reminder: “Biodegradable” does not equal “surface-safe.” Citrus-based degreasers may strip sealants. Always patch-test cleaners in an inconspicuous area and observe for 24 hours before full application.
Layer 3: Execution Protocol with Preservation Focus
Why technique shapes outcome:
A gentle cleaner applied correctly often outperforms harsh chemicals used recklessly. This layer translates assessment into deliberate action.
Adaptable cleaning sequence:
1. Dry removal first: Sweep patios/decks thoroughly. Wipe furniture with a dry microfiber cloth. Why? Loose grit becomes abrasive when wet, potentially causing micro-scratches that trap future debris.
2. Strategic pre-rinse: For vertical surfaces (rails, furniture backs), rinse from bottom to top to prevent dirty water from re-soiling cleaned zones. Lukewarm water is gentler on wood fibers than cold.
3. Solution dwell time: Never let cleaner dry on the surface. For oxygen bleach on decks: saturate, wait 10–15 minutes (until bubbling subsides), then agitate. For grease: allow degreaser 5 minutes to emulsify before gentle scrubbing.
4. Grain-aware agitation: On wood decks, scrub along board grain—not across—to minimize fiber disruption. On textured pavers, use gentle circular motions. Apply moderate pressure: white knuckles signal excessive force.
5. Purposeful rinsing: Rinse immediately after scrubbing. Work in manageable sections (e.g., 4×4 ft) to prevent residue buildup. Begin with lower pressure to remove loosened debris, then a final flush.
6. Post-clean check: Wipe with a white paper towel. Discoloration may indicate tannin bleed (wood) or embedded residues requiring targeted follow-up before sealing or reassembly.
The Guiding Principle: Cleaning is intentional removal. Every action should eliminate contaminants while honoring the material’s structural and aesthetic character. Precision and patience consistently outperform force.
If unintended effects occur:
– Chlorine bleach contact on composite: Immediately flood area with water. Apply diluted baking soda solution (1 tbsp per quart water) to neutralize, then rinse thoroughly. Monitor for changes over 48 hours.
– Minor pressure washer mark on softwood: Once fully dry, lightly sand along the grain with 120-grit paper. Apply matching wood filler if needed. Seal after recommended drying period.
– Dried cleaner streaks on stone: Dampen microfiber cloth with distilled water; wipe gently. For persistent residue, use stone polish diluted per instructions.
Patio Deep Dive: Concrete, Pavers, and Natural Stone
Patios endure foot traffic, weather shifts, and organic exposure. Their cleaning needs vary significantly by material composition. Uniform treatment risks cracked pavers, etched stone, or compromised joints.
Concrete Patios: Balanced Restoration
Concrete is porous and alkaline. Acidic spills (citrus, fertilizer) may etch its surface; oils penetrate deeply. Yet concrete responds well to methodical cleaning.
Step-by-step approach:
1. Prep: Clear furniture. Sweep vigorously. For fresh oil stains, cover with cat litter or cornstarch; wait 30 minutes to absorb, then sweep away.
2. Degreasing (if needed): Mix pH-neutral degreaser per label (e.g., ¼ cup per gallon warm water). Apply to stain, wait 10 minutes, scrub gently with soft brush, rinse.
3. Organic growth treatment: Mix oxygen bleach per package directions. Apply with pump sprayer. Wait 10–15 minutes until bubbling slows. Scrub with stiff nylon push broom using overlapping strokes.
4. Rinse: Start at the highest point. Use garden hose with fan spray, working downward to guide water toward drains.
5. Efflorescence protocol: Avoid scrubbing. Mix 1 part white vinegar to 3 parts water only if surface is concrete (never on natural stone). Apply sparingly with spray bottle, wait ≤2 minutes, wipe with damp microfiber cloth, rinse immediately. For persistent cases, use a commercial efflorescence remover following label instructions precisely.
6. Drying: Allow 48+ hours of dry weather before replacing furniture. Concrete needs time to release moisture fully.
Why oxygen bleach is often preferred for concrete:
Chlorine bleach remains largely on the surface, potentially leaving microbial roots intact within pores. It may also produce fumes when reacting with minerals. Oxygen bleach (sodium percarbonate) releases oxygen bubbles that lift organic matter from within pores while breaking down into water, oxygen, and soda ash—generally safer for surrounding vegetation once rinsed.
Illustrative insight: In shaded patio scenarios, recurring algae often stems from persistent moisture. Switching to oxygen bleach applied during cooler, overcast conditions—with adequate dwell time and post-cleaning adjustments like redirecting downspout runoff—addresses both symptom and contributing factor.
Common considerations:
– Undiluted vinegar may etch concrete; always dilute for spot treatment only.
– Pressure washing too closely or at excessive PSI can remove the cement paste layer, creating a rougher surface that traps dirt more readily. Maintain distance and use wide fan tips.
– Cleaning won’t resolve structural cracks. Address significant cracks after cleaning and drying, or consult a professional.
Paver Patios: Joint Preservation Focus
Interlocking pavers rely on joint material for stability. Aggressive cleaning can wash away polymeric sand, leading to shifting, sinking, or weed growth. The goal: clean surfaces while protecting joints.
Joint-conscious sequence:
1. Dry sweep: Use a soft push broom to remove surface and joint debris. Avoid stiff bristles that dislodge sand.
2. Spot treatment: For gum or tar, freeze with an ice cube, then gently lift with a plastic putty knife. For organic stains, apply diluted oxygen bleach with a small brush; wait 10 minutes; rinse lightly.
3. Surface algae: Apply oxygen bleach solution only to paver surfaces using a sponge—avoid saturating joints. Wait 10 minutes. Scrub pavers gently with medium-bristle brush. Rinse with low-pressure hose spray.
4. Post-clean joint care: Once patio is completely dry (72+ hours), sweep fresh polymeric sand into depleted joints. Mist lightly with water to activate binding. Never apply sand to damp pavers.
Understanding joint materials:
Polymeric sand contains water-activated polymers that form a flexible, weed-resistant barrier. Regular sand lacks this binding property and washes out more easily. If joints appear significantly depleted (sand level >¼ inch below surface), replacement with polymeric sand is advisable.
Pressure washing guidance for pavers:
Only consider for heavily soiled concrete pavers with intact joints. Use:
– PSI: ≤1,500
– Tip: 40-degree white fan tip
– Distance: 18+ inches
– Technique: Hold nozzle at 30-degree angle, move steadily. Never linger. Test hidden area first.
Avoid entirely for clay brick pavers—pressure washing may erode their surface.
Long-term perspective:
Weeds often establish where organic debris accumulates in joints. Post-cleaning, consider installing perimeter edging to block soil migration. Regular sweeping during high-debris seasons (like fall) reduces organic buildup.
Natural Stone Patios: Honoring Sensitive Surfaces
Flagstone, limestone, bluestone, and travertine are porous and chemically reactive. “Cleaning” often means preserving natural character—not achieving artificial uniformity.
Stone-care mantra: Less is more. Test always. Rinse thoroughly.
Material-aware protocols:
– Flagstone (sandstone): Highly porous. Mix pH-neutral stone soap per instructions (e.g., 1 tbsp per quart lukewarm water). Apply with soft cloth. Wait 2–3 minutes. Wipe gently. Rinse with fine mist. Avoid vinegar or citrus-based cleaners—they may dissolve binding minerals.
– Limestone/Travertine: Extremely acid-sensitive. Use only stone-specific cleaners. For mildew in textured areas, dip soft toothbrush in diluted oxygen bleach (1:4 with water); gently dab spots. Rinse immediately.
– Bluestone: Dense but may develop iron oxide stains. Try a baking soda + water poultice: apply paste, cover with plastic wrap, wait 24 hours, rinse.
Sealing: A considered choice:
Sealers can block stains but may trap moisture if applied incorrectly. Moisture expansion during freeze-thaw cycles can cause spalling (surface flaking). Consider sealing only if:
1. The area experiences frequent spills (near grill or dining zone)
2. Stone is highly porous (water absorbs within minutes)
3. A breathable impregnating sealer is selected (not film-forming)
Apply only to clean, bone-dry stone on a dry day with low humidity. Reapply per manufacturer guidance.
Heritage note:
For antique or historically significant stone patios, consult a masonry conservator. Gentle dry brushing and targeted poultice treatments often preserve valued patina and tooling marks better than broad cleaning approaches.
Deck Revival: Wood and Composite Care
Decks combine structural function with aesthetic value. Safety and material longevity should guide cleaning choices—not cosmetic perfection alone.
Wood Decks: Working With Natural Movement
Wood expands when wet and contracts when dry. Cleaning methods should respect this cycle to minimize warping, splintering, or sealant disruption.
Phased wood deck approach:
Phase 1: Safety and prep
– Inspect for structural concerns before cleaning: loose railings, protruding fasteners, soft spots (probe gently; significant give warrants professional assessment).
– Cover nearby plants. While diluted oxygen bleach is generally plant-safe after rinsing, concentrated solution may cause foliage damage.
– Remove all items. Sweep thoroughly.
Phase 2: Organic growth management
– Mix oxygen bleach solution per label. Chlorine bleach is not recommended for wood—it may degrade lignin (the compound binding wood fibers), potentially accelerating graying and surface roughness.
– Apply to dry deck with pump sprayer. Saturate evenly. Wait 10–15 minutes (until bubbling slows).
– Scrub with the grain using medium-bristle nylon brush. Focus on grooves between boards where moisture collects. Avoid circular motions.
– Rinse thoroughly with garden hose, working from top downward. Ensure water flows between boards to flush debris.
Phase 3: Weathered wood restoration (optional)
Grayed wood results from oxidation, not dirt. Oxygen bleach cleans but won’t restore original color. For color revival:
– Mix deck brightener (oxalic acid-based) per label.
– Apply to damp (not soaking) deck. Wait 10–15 minutes. Light agitation may help.
– Rinse extremely thoroughly. Residue can attract moisture or interfere with sealant.
– Note: Brighteners work best on bare wood. Previously sealed decks may require stripping first—consult product guidance.
Phase 4: Drying and verification
– Allow 48–72 hours of dry, breezy weather. Wood should feel uniformly dry.
– Post-clean check: Wipe boards with white cloth. Brown residue may indicate tannin bleed (common in redwood/cypress); black specks may signal residual mold requiring spot treatment.
Phase 5: Protective finishing
– Sealant options:
– Clear water repellent: For natural appearance; reapply more frequently.
– Semi-transparent stain: Adds UV protection and subtle color; longer-lasting.
– Solid-color stain: Hides imperfections; longest-lasting but less natural look.
– Apply with brush for better grain penetration. Work board by board. Maintain a “wet edge” to avoid lap marks.
– Ideal conditions: 50–90°F, low humidity, no rain expected for 48 hours.
Pressure washing perspective on wood:
Even at lower PSI settings, pressure washers can force water deep into wood grain. Trapped moisture may contribute to:
– Board swelling or cupping
– Accelerated deterioration at hidden connection points
– Surface fiber disruption leading to splinters
If pressure washing is chosen:
– Use widest fan tip available
– Hold nozzle 12+ inches away
– Spray with the wood grain direction
– Avoid seams between boards
– Allow extended drying time
Many preservation resources recommend oxygen bleach and brushing as a lower-risk alternative for organic growth removal.
Regional adaptations:
– Humid climates: Biannual cleaning may be beneficial. Consider adding borax to oxygen bleach solution for enhanced microbial management (patch-test first).
– Arid climates: Focus on dust and pollen. Regular dry brushing prevents abrasive buildup. Annual cleaning often suffices.
– Coastal areas: Salt spray accelerates corrosion. Rinse decks periodically with fresh water. Use stainless steel hardware for repairs. Clean with oxygen bleach to remove salt crystals from wood pores.
Composite Decks: Warranty-Aware Maintenance
Composite decking blends wood fibers and polymers. It resists rot but requires care to avoid scratches, streaks, or warranty complications.
Warranty-conscious protocol:
1. Review documentation first. Manufacturer guidelines vary (e.g., PSI limits, approved cleaners). Adherence often supports warranty validity.
2. Routine upkeep: Sweep weekly to prevent grit accumulation. Grit combined with foot traffic may cause micro-scratches.
3. Standard cleaning (every 3–6 months):
– Mix mild dish soap (phosphate-free) per gallon lukewarm water.
– Apply with soft brush or microfiber mop. Scrub gently along board length.
– Rinse thoroughly with garden hose.
4. Stubborn stains:
– Mold/mildew: Use manufacturer-approved cleaner or diluted oxygen bleach (1:3 with water). Apply, wait 10 minutes, scrub softly, rinse.
– Grease/oil: Sprinkle baking soda on stain. Add drop of dish soap. Scrub gently. Rinse.
– Heat marks: Try a dampened melamine foam sponge (test hidden area first).
5. Pressure washing (if permitted):
– Max PSI per warranty (often 1,300–1,500)
– Wide fan tip (25–40 degrees)
– Distance: 12+ inches
– Angle: Spray with board direction at 30 degrees
– Always test in inconspicuous area first
Why wood brighteners may harm composite:
Oxalic acid-based brighteners (used on wood) can etch the polymer component of composite, potentially causing dulling or discoloration. Never use them unless explicitly approved by your deck manufacturer. For faded composite, some brands offer color-refreshing products applied post-cleaning.
Seasonal composite considerations:
– Spring: Clean after pollen season. Pollen + moisture creates sticky film.
– Summer: Rinse after pool use (chlorine exposure over time may affect appearance).
– Fall: Remove wet leaves promptly. Tannins may stain light boards.
– Winter: Shovel snow with plastic shovel. Avoid ice melt containing calcium chloride—it may leave residues. Use sand for traction.
Outdoor Furniture: Material-Specific Preservation
Furniture cleaning errors often stem from mismatched methods. Each material responds uniquely to moisture, chemistry, and abrasion.
Metal Furniture: Corrosion Awareness
Metal longevity depends on preventing moisture retention and abrasive damage.
Wrought iron (painted or bare):
– Prep: For bare spots with loose rust, use fine steel wool (0000 grade) gently. Avoid abrasives on painted surfaces.
– Cleaning: Mild soap solution (1 tbsp per quart lukewarm water). Wipe with soft cloth. Use soft toothbrush for intricate areas.
– Rust spots on bare iron: Apply rust converter per label. Wait until color change occurs (typically purple/black). Wipe clean. Prime and paint promptly.
– Drying: Wipe thoroughly, especially crevices where water pools.
– Critical: Avoid soaking. Water trapped in welded joints may cause internal corrosion invisible until advanced.
Aluminum (including powder-coated):
– Cleaning: Same mild soap solution. For white oxidation, try baking soda + water paste; rub gently; rinse immediately.
– Stubborn residues: Isopropyl alcohol (70%) on cloth for adhesives or sap (test hidden area).
– Powder-coated surfaces: Avoid abrasive pads. Scratches may expose underlying metal. For minor scuffs, automotive touch-up paint matching the coating may help.
– Drying: Wipe joints and welds to prevent moisture retention.
Corrosion prevention habits:
– Apply automotive wax to clean, dry metal surfaces seasonally. Creates a moisture-resistant barrier.
– Store cushions separately. Moisture trapped between cushion and frame accelerates rust.
– In coastal zones, rinse furniture periodically with fresh water to remove salt crystals.
Wood Furniture: Honoring Natural Oils
Teak, eucalyptus, and acacia develop beautiful patinas but require cleaning that preserves their inherent oils.
Teak considerations:
– Natural patina: Silver-gray color is protective and desirable for many. Cleaning aims to remove dirt without stripping this layer.
– Routine cleaning: Diluted oxygen bleach solution (1 cup per gallon warm water). Apply with soft brush. Wait 10 minutes. Scrub gently with grain. Rinse thoroughly.
– Restoring golden tone (optional): After cleaning and drying, apply teak brightener per label. Rinse thoroughly. Sealing teak is generally not recommended—it needs to breathe; sealants may trap moisture causing black spots.
– Stain removal: For wine or oil, baking soda on damp cloth; rub gently; rinse.
Eucalyptus/Acacia notes:
– Similar protocol to teak. These dense hardwoods may benefit from sparingly applied teak oil after cleaning and drying to maintain moisture balance. Wipe excess after 15 minutes.
– Avoid linseed oil—it may become sticky and attract debris.
Wood furniture precautions:
– Pressure washing disrupts surface fibers, creating roughness that traps dirt and increases splinter risk.
– Chlorine bleach may weaken fibers and cause uneven coloration.
– Over-oiling creates a sticky surface. Apply oil only when wood appears dry (water no longer beads well).
Plastic, Resin, and Wicker Furniture
Often labeled “low maintenance,” these materials require attention to textured surfaces and UV exposure.
All-weather resin (polyethylene):
– Cleaning: Mild soap solution + soft brush. Use soft toothbrush for textured areas.
– Mold in grooves: Toothbrush dipped in diluted oxygen bleach (1:4 with water). Scrub gently. Rinse immediately.
– Color restoration: White vinegar solution (1 cup per gallon water) may help. For significant fading, plastic restoration products exist (test first).
– Avoid: Abrasives scratch surfaces, making them appear dirtier faster.
Wicker guidance:
– Synthetic (resin) wicker: Vacuum first with brush attachment. Wipe with damp microfiber cloth and mild soap solution. Rinse cloth frequently.
– Natural rattan/wicker: Never soak. Dampen cloth slightly with soap solution; wipe gently. Dry immediately with a second cloth. Moisture may cause swelling and mildew within the weave.
– Mold treatment: For synthetic wicker, diluted oxygen bleach on cloth. For natural wicker, rubbing alcohol on cloth (test hidden area first).
Reviving faded plastic (cosmetic only):
1. Clean thoroughly.
2. Lightly sand with 220-grit sandpaper to create surface “tooth.”
3. Wipe away dust.
4. Apply spray paint formulated for plastics in light, even coats.
5. Seal with clear acrylic spray for UV protection.
Note: This addresses appearance only. Structural cracks require replacement.
Outdoor Fabrics and Cushions: Gentle Care
Fabric longevity depends more on drying and chemical compatibility than cleaning intensity.
Solution-dyed acrylic (Sunbrella®, Outdura®):
– Spot cleaning: Blot spills immediately (don’t rub). Mix mild soap + lukewarm water. Dab stain. Rinse area with damp cloth. Air dry.
– Full cleaning: Remove covers if possible. Machine wash cold on gentle cycle with mild detergent. Avoid bleach. Air dry completely before reinserting foam.
– Mold/mildew: Diluted oxygen bleach solution (1 cup per gallon lukewarm water). Apply with soft brush. Wait 15 minutes. Rinse thoroughly. Air dry completely before storage.
Other fabrics (polyester, olefin, etc.):
– Always check care label first. Many require specific protocols.
– General approach: Mild soap solution only. Avoid oxygen bleach unless label permits. Test hidden seam first.
– Drying: Never machine dry. Heat may shrink fabric or damage water-resistant coatings. Air dry flat in shade.
Foam cushion core care:
– If cover is non-removable, clean surface only. Avoid saturating foam.
– If foam becomes wet: Remove from cover. Stand upright in ventilated area. Rotate periodically. Dry completely (may take 48+ hours) before re-covering. Damp foam encourages mold.
– Storage tip: Store cushions vertically on edge during off-season to maintain shape and promote airflow.
Stain-specific approaches:
– Grease/oil: Sprinkle cornstarch; wait 15 minutes; brush off. Repeat until oil absorbs. Then clean with mild soap solution.
– Mud: Let dry completely. Brush off crust. Then clean with damp cloth.
– Mildew: Oxygen bleach solution (for solution-dyed acrylic) or diluted vinegar (1:1 with water) for other fabrics (verify compatibility first). Rinse extremely well. Residue attracts dirt.
Special Situations: Complex Challenges Addressed
Real-world scenarios often require layered solutions. These protocols address recurring challenges with precision.
Mold and Mildew: Removal and Recurrence Prevention
Mold affects aesthetics, air quality, and material integrity. Effective management requires removal and environmental adjustment.
Critical distinction:
– Surface growth: Lives on organic debris on the material. Often removable with oxygen bleach.
– Embedded growth: Penetrates material (wood fibers, fabric weave). Requires deeper treatment and moisture control.
Step-by-step protocol:
1. Safety first: Wear N95 mask, goggles, gloves. Contain area if near indoor spaces.
2. Dry removal: Brush loose growth into a bag (avoid sweeping—spreads spores).
3. Solution application:
– Wood decks/patios: Oxygen bleach solution. Saturate. Wait 10–15 minutes. Scrub with grain. Rinse thoroughly.
– Fabric cushions: Oxygen bleach solution (for solution-dyed acrylic) or vinegar solution (1:1 water) for others (verify first). Dab, don’t soak. Rinse well.
– Shaded patio corners: Consider adding borax to oxygen bleach solution for residual inhibitory effect after rinsing (patch-test).
4. Drying acceleration: Use fans to promote rapid drying. Mold requires moisture to regrow; surfaces should be bone-dry within 24 hours.
5. Prevention strategy:
– Trim overhanging branches to increase sunlight exposure.
– Improve airflow: Space furniture 6+ inches from walls.
– Address persistent pooling with drainage solutions.
– Apply mold-inhibiting products (for wood) or fabric protectors (for cushions) after cleaning and drying.
Chlorine bleach limitation on porous surfaces:
Chlorine bleach may kill surface mold but struggles to penetrate deeply into wood or fabric. Its high water content can feed residual roots. Oxygen bleach’s oxygenating action physically lifts contaminants while neutralizing spores. Research indicates oxygen bleach is generally more effective than chlorine bleach for reducing mold recurrence on porous materials like wood.
Rust Management on Metal Surfaces
Rust forms through a reaction requiring iron, oxygen, and moisture. Cleaning removes existing rust; prevention disrupts the cycle.
Removal protocol by severity:
– Light surface rust: Baking soda + water paste. Apply with soft cloth. Rub gently. Rinse. Dry immediately.
– Moderate rust: Apply rust converter gel per label. Wait until color change occurs. Wipe clean. Prime within recommended timeframe.
– Heavy rust or structural elements: Consult a professional. Aggressive removal may compromise integrity.
Post-removal protection:
1. Wipe area with cloth dampened with denatured alcohol to remove oils.
2. Apply rust-inhibiting primer.
3. Once dry, apply topcoat matching original finish.
4. Seal edges and welds with clear automotive wax.
Prevention habits:
– Elevate metal furniture on blocks (not directly on damp ground).
– Apply paste wax to clean, dry metal seasonally. Buff to shine.
– In humid climates, include silica gel packs in storage covers.
– Rinse metal furniture after rain if not under cover.
Grease and Oil Stains: Emulsification Approach
Oil penetrates porous surfaces. Effective removal requires breaking oil into water-soluble particles (emulsification).
Surface-specific protocols:
– Concrete/pavers:
1. Absorb fresh spill: Cover with cat litter, cornstarch, or baking soda. Wait 30 minutes. Sweep away.
2. Degrease: Apply pH-neutral degreaser. Wait 10 minutes. Scrub with stiff brush. Rinse.
3. Stubborn stains: Poultice method—mix acetone (use outdoors with ventilation) + clay powder to paste. Apply ¼” thick. Cover with plastic. Wait 24 hours. Scrape off. Rinse.
– Wood decks:
1. Blot immediately with paper towels.
2. Sprinkle baking soda on stain. Add drop of dish soap. Scrub gently with grain.
3. Rinse. If stain persists after deck is fully dry, light sanding (120-grit) followed by re-sealing may be needed.
– Composite decks:
Same as wood deck protocol, but avoid sanding. Try a dampened melamine foam sponge for residual marks (test hidden area first).
Why dish soap often suffices:
Dish soap contains surfactants designed to emulsify cooking oils—common in outdoor grease stains. Heavy-duty degreasers may contain solvents that strip protective sealants. For typical grill spills, diluted original-formula dish soap is often effective and gentler on surfaces.
Efflorescence on Masonry: Understanding the Phenomenon
White, powdery residue on brick or retaining walls is mineral salts migrating through masonry as water evaporates—not surface dirt. Scrubbing often brings more salts to the surface.
Appropriate removal protocol:
1. Dry brush first: Use stiff nylon brush to remove loose powder.
2. Acid wash (concrete only): Mix 1 part white vinegar to 3 parts water. Test hidden area first. Apply sparingly. Wait ≤2 minutes. Wipe with damp microfiber cloth. Rinse immediately and thoroughly.
3. Commercial option: Use efflorescence remover per label (typically dilute 1:5 with water, apply, wait 3–5 minutes, rinse aggressively).
4. Address the source: Check soil grading around patio (should slope away from masonry). Repair mortar cracks. Ensure downspouts direct water 3+ feet from edge. Persistent cases may require professional assessment of moisture intrusion.
Vinegar caution:
Vinegar’s mild acidity dissolves calcium carbonate salts. However, it can etch acid-sensitive stone (limestone, marble). Never use vinegar on natural stone. For stone, dry brushing is the safest initial step; severe cases warrant professional poultice treatment.
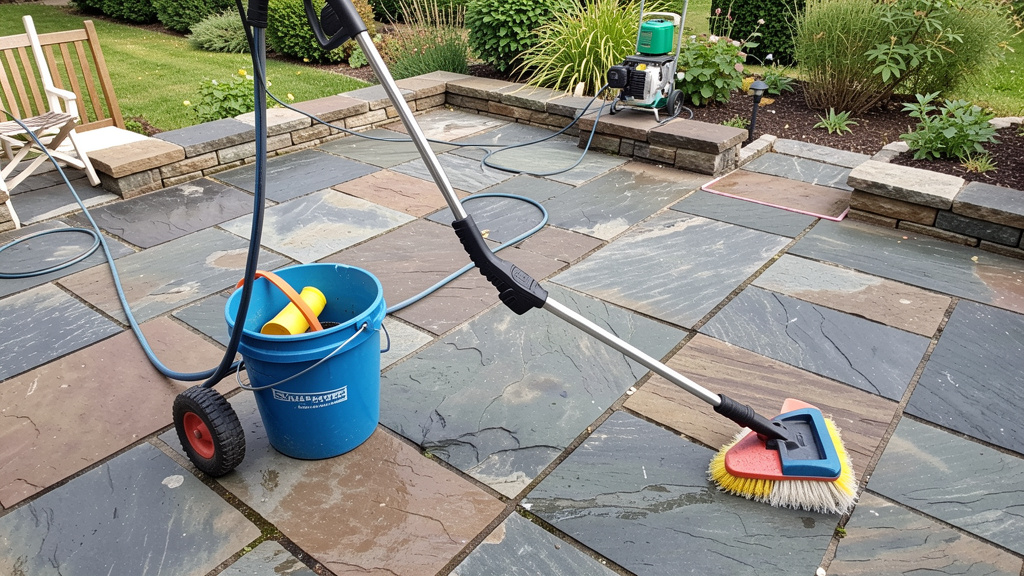
Tool and Product Guide: Building a Purposeful Kit
A focused toolkit delivers better results than an overcrowded arsenal. Prioritize quality and material compatibility.
Essential Hand Tools (Under $100 Total)
- Soft-bristle brush (nylon): For composite decks, furniture, stone. Flagged tips hold solution well. ($12)
- Medium-bristle brush (nylon): For wood decks, concrete. Balanced agitation without scratching. ($15)
- Stiff push broom (nylon): For concrete patios. Replaceable head preferred. ($25)
- Soft toothbrushes (2–3): For furniture crevices, paver joints, rail details. ($5)
- Microfiber cloths (pack of 10): For drying metal, wiping stone, polishing. Reusable and lint-free. ($18)
- Plastic putty knife: For scraping gum, tar, or dried debris without scratching. ($6)
- Garden hose with adjustable nozzle: Fan spray setting essential for controlled rinsing. ($20)
Pressure Washer: A Contextual Decision
Pressure washers are powerful but carry risk. Consider:
– Do you have large concrete areas with heavy oil stains? → An electric model (1,600–2,000 PSI) may be suitable.
– Is your primary surface wood decks, composite, or furniture? → Proceed with extreme caution or skip. Oxygen bleach + brushing is often safer and equally effective for organic growth.
– Do physical limitations make scrubbing difficult? → Rent a low-PSI (≤1,500) electric model with wide fan tip. Practice on scrap material first.
If pressure washing:
– Always start with widest fan tip (white, 40-degree)
– Hold nozzle 12+ inches from surface
– Move steadily—never linger
– Test hidden area first
– Rinse thoroughly afterward
Cleaning Solutions: Purposeful Selection
| Product Type | Best Suited For | Key Attributes | Use With Caution If… | Thoughtful Alternative |
|---|---|---|---|---|
| Oxygen Bleach | Decks, concrete, solution-dyed fabric | Breaks down to oxygen/water/soda ash | Cleaning natural stone | Washing soda + hydrogen peroxide |
| pH-Neutral Degreaser | Concrete oil stains, grill areas | Plant-based surfactants | Using on unsealed wood | Diluted dish soap |
| Deck Brightener | Restoring weathered wood decks | Oxalic acid-based | Using on composite or stone | None—specialized product |
| Stone Cleaner | Flagstone, limestone patios | Non-acidic, biodegradable | Using on concrete (may be too mild) | Mild soap + soft cloth |
| Rust Converter | Iron furniture rust spots | Tannic/phosphoric acid-based | Using on aluminum | Baking soda paste (light rust) |
| Fabric Protector | Cushions post-cleaning | Fluoropolymer-based | Applying to damp fabric | None—worth considering |
Storage note: Keep solutions in original labeled containers. Store in a cool, dark place. Oxygen bleach loses potency after opening—purchase smaller containers if cleaning infrequently.
Seasonal Maintenance Calendar: Consistent Micro-Habits
Regular, light maintenance prevents intensive annual projects. Integrate these into existing routines.
Spring (March–May):
– Weekly: Sweep patios/decks. Remove pollen before rain makes it sticky.
– Monthly: Inspect deck structure. Clean furniture with mild soap solution.
– Seasonal project: Deep clean using the 3-Layer Framework. Seal wood decks if needed after cleaning.
Summer (June–August):
– Weekly: Rinse decks/patios after heavy use. Wipe metal furniture to prevent corrosion from salts/sweat.
– Bi-weekly: Flip cushions for even sun exposure. Vacuum cushion crevices.
– After storms: Remove debris promptly. Check for standing water.
Fall (September–November):
– Weekly: Sweep leaves daily during peak fall. Wet leaves may stain light surfaces.
– Monthly: Clean gutters to prevent debris runoff onto patios/decks.
– Pre-winter: Clean and dry all furniture thoroughly. Store cushions in breathable bags (not plastic). Cover frames if not storing indoors.
Winter (December–February):
– As needed: Shovel snow with plastic shovel. Avoid metal edges.
– Avoid: Rock salt or calcium chloride ice melt near decks/patios—they may stain or corrode. Use sand for traction.
– Indoor task: Inspect stored cushions for moisture. Air them on dry days.
The 15-minute weekly ritual:
Every Sunday morning:
1. Sweep patio/deck (5 mins)
2. Wipe down 2–3 furniture pieces with damp cloth (5 mins)
3. Check corners for debris or standing water (3 mins)
4. Quick visual inspection of deck structure (2 mins)
Consistency builds resilience. Small, regular actions prevent major challenges.
Your Questions, Answered
Q: Can I use a pressure washer on my composite deck?
A: Most composite manufacturers permit pressure washing only under strict conditions: max 1,300–1,500 PSI, wide fan tip (25–40 degrees), nozzle held 12+ inches away, spraying with board direction. However, oxygen bleach and soft brushing often achieve thorough cleaning without risk of surface abrasion or moisture intrusion. When uncertain, consult your specific warranty documentation—pressure washer damage is frequently excluded from coverage.
Q: How often should I clean my wood deck?
A: Frequency depends on exposure: shaded, humid areas may benefit from cleaning every 6–12 months; sunny, dry decks may only need annual attention. Signs it’s time: slippery surface, visible organic growth, or water no longer beading on sealed wood. Many wood deck warranties recommend annual cleaning to maintain coverage—keeping dated records is prudent.
Q: Is vinegar safe for cleaning outdoor surfaces?
A: Vinegar is suitable only in specific contexts: diluted (1:3 with water) for efflorescence on concrete or spot-treating rust on metal. It is not recommended for natural stone (may etch), wood decks (may strip oils), composite (may affect finish), or fabric (may weaken fibers). Oxygen bleach is generally a safer, more versatile choice for organic growth on compatible surfaces.
Q: My patio has white powder that keeps returning. What is it and how do I stop it?
A: This is likely efflorescence—mineral salts migrating through masonry as water evaporates. Cleaning alone won’t resolve it; addressing the moisture source is essential. First, dry-brush the powder. For concrete, a diluted vinegar solution (1:3) may help (never use on stone). Then: verify soil slopes away from the patio, repair mortar cracks, and ensure downspouts direct water 3+ feet from the edge. Persistent cases may require professional assessment of subsurface moisture.
Q: Can I clean outdoor cushions in the washing machine?
A: Only if the care label explicitly permits it and covers are removable. Use cold water, gentle cycle, mild detergent. Avoid bleach or fabric softener. Air dry completely—never machine dry. For non-removable covers or delicate fabrics, spot-clean with mild soap solution and air dry. Always ensure foam cores are 100% dry before re-covering to prevent mold.
Q: Why does my deck feel rough after cleaning?
A: Common causes include: (1) Using chlorine bleach, which may degrade wood fibers, or (2) Pressure washing too closely or aggressively, lifting the grain. Once the deck is fully dry (72 hours), lightly sand boards with 80-grit sandpaper along the grain. Vacuum dust. Apply wood brightener if desired, then seal. Prevention: Use oxygen bleach and soft brushing next time.
Q: How do I remove dark streaks from my deck railing?
A: These are often tannin stains—natural compounds leaching from wood (common in cedar, redwood, cypress). Chlorine bleach may worsen them. Instead: mix deck brightener (oxalic acid-based) per label. Apply to damp wood. Wait 10–15 minutes. Light agitation may help. Rinse thoroughly. For persistent cases, repeat after 24 hours. Sealing the wood afterward may slow future tannin migration.
Q: Is oxygen bleach safe around plants and pets?
A: Oxygen bleach (sodium percarbonate) breaks down into oxygen, water, and soda ash—generally non-toxic residues. However, concentrated solution may harm plant foliage. Precautions: cover nearby plants before application; rinse plants thoroughly with clean water after cleaning; keep pets away during application and until the surface is rinsed and dry (typically 1–2 hours). Always follow package dilution instructions.
Q: My metal furniture has white corrosion on the screws. Should I clean it?
A: Yes—this is likely zinc corrosion (white rust) on galvanized hardware. If ignored, it may seize screws or weaken connections. Clean gently: dip cotton swab in white vinegar; dab corrosion. Wait 1–2 minutes. Wipe clean with damp cloth. Dry immediately. Apply clear nail polish to screw heads afterward to seal out moisture. If screws are severely corroded, replace them with stainless steel equivalents.
Q: Can I seal my patio stones right after cleaning?
A: No—sealing too soon traps moisture, potentially causing cloudiness, peeling, or spalling (surface flakes breaking off). Concrete and pavers typically need 48–72 hours of dry weather to fully dry. Natural stone may require longer. Test dryness: tape a 12×12″ plastic sheet to the surface overnight. If condensation forms underneath, it’s not dry enough. Always follow the sealer manufacturer’s drying time specifications.
Q: What’s a practical way to refresh a patio before guests arrive?
A: Prioritize safety and appearance: (1) Sweep thoroughly to remove slip hazards. (2) Spot-treat visible stains with an appropriate cleaner. (3) Rinse the entire area with a garden hose using fan spray. (4) Place outdoor rugs over stubborn areas temporarily. For future ease, adopt the 15-minute weekly ritual to avoid last-minute pressure.
Q: How can I help prevent outdoor furniture from fading?
A: UV radiation is the primary cause. Prevention strategies: (1) Store furniture under cover or use quality covers during extended non-use. (2) Apply UV-protectant spray formulated for your material (e.g., 303® Aerospace Protectant for plastics/resin). (3) Position furniture in shaded areas when possible. (4) For fabric, choose solution-dyed acrylic (Sunbrella®)—color is embedded within fibers. While cleaning won’t restore faded color, these steps significantly extend vibrancy.
Conclusion and Next Step
Reviving outdoor spaces isn’t about force or expensive tools. It’s a thoughtful practice of listening to what each material communicates—concrete, wood, stone, fabric—and responding with appropriate care. You now hold a complete system: the 3-Layer Framework to assess before acting, material-specific protocols that honor surface integrity, and seasonal habits that transform maintenance into a calming ritual. The patios you walk on, the decks where connections deepen, the furniture that hosts conversation—they all respond to care that respects their nature.
Recap: Three guiding principles
1. Assess before you act: Identify material and contaminant first. Informed choices prevent unintended outcomes.
2. Match method to material: Oxygen bleach for organic growth on compatible surfaces; pH-neutral solutions for stone; mild soap for metals. Precision consistently outperforms force.
3. Prevent thoughtfully: Address moisture sources, adopt micro-maintenance, and protect surfaces post-clean. Longevity is built through consistent, informed actions.
The 24-Hour Invitation:
Within the next day, spend 10 minutes doing this: Walk your entire outdoor space. Note one area that would benefit from attention (e.g., “slippery spot on deck step,” “green film in patio corner”). Take a photo with your phone. This small step breaks inertia. Tomorrow, revisit the relevant section of this guide. Begin with that one spot, using the precise protocol. Momentum grows from completed micro-actions.
The Broader Perspective:
Your outdoor spaces are living extensions of home. They witness quiet mornings, celebrate gatherings, and endure seasons. Cleaning them mindfully isn’t merely cosmetic—it’s stewardship. Each careful action honors the craftsmanship within these surfaces and invests in years of safe, beautiful use. You’re not just refreshing surfaces; you’re preserving places where life unfolds.
Explore Our Complete Outdoor Living System:
The Thoughtful Deck Inspection Guide: 27 Points for Safety and Longevity | Patio Drainage Solutions That Promote Dry, Safe Surfaces | Seasonal Furniture Storage: A Preservation Guide | Gentle Pest Management for Outdoor Living Areas | Sealant Selection Simplified: Wood, Composite, and Concrete Compared