From Pinpricks to Large Openings—Restore Your Walls Confidently with Verified Techniques, Safety Protocols, and Texture-Matching Guidance
Drywall damage is a common occurrence in any home. A misplaced doorknob creates a dent. Seasonal shifts may reveal fine cracks. Everyday living leaves minor marks. Yet each imperfection presents an opportunity: to restore your wall with care, precision, and lasting results. This comprehensive guide transforms drywall repair from uncertainty into an accessible, methodical skill. You will learn to assess damage accurately, select appropriate materials, execute repairs with attention to detail, and achieve finishes that integrate seamlessly. Forget fragmented advice and trial-and-error approaches. Here lies a unified system grounded in material behavior, environmental awareness, and practical craftsmanship. Your path to confident, durable repairs begins with understanding—not haste.
Introduction: Why Repair Outcomes Vary (And How Diagnosis Changes Everything)
Hardware store aisles offer countless spackles, patches, and compounds. Yet online communities frequently share images of repairs that bulge, crack, or remain visible after painting. Why? Often, the method applied does not align with the damage type. A solution designed for a shallow ding lacks structural integrity for a deeper void. A rigid compound applied over a movement-prone crack will likely fail.
Successful repair begins with thoughtful assessment—not immediate action. Industry references, including guidelines from the Gypsum Association, emphasize that durable results depend on three interconnected factors: accurate damage characterization, material compatibility with the substrate and environment, and awareness of contextual conditions like humidity, temperature, and wall movement. This guide synthesizes established repair protocols, material science principles, and practical considerations into a clear, adaptable framework. It cultivates repair intelligence: the ability to observe wall damage and select the appropriate sequence of steps, materials, and timing for a resilient, visually integrated outcome. Whether addressing a single flaw before repainting or restoring multiple areas post-renovation, this methodology supports informed decisions that honor both structural integrity and aesthetic continuity.
The Damage Diagnostic Framework: Align Method to Damage Type
Before selecting tools or materials, dedicate a few minutes to observation. This diagnostic step significantly reduces the likelihood of repair failure. Evaluate the damage through three practical lenses:
- Size & Depth: Measure the longest dimension. Is only the paper layer affected, or is the gypsum core exposed, missing, or compromised?
- Location & Context: Is the area near a corner, seam, electrical fixture, window, or high-traffic zone? Is the wall in a bathroom, garage, or exterior-facing space where humidity or temperature fluctuates?
- Cause & Behavior: Did the damage occur suddenly (impact) or gradually (settling)? Does a crack appear wider during dry winter months? Does the area feel soft, crumbly, or show discoloration (potential moisture indicators)?
Apply this decision pathway to identify your repair approach:
- Under ½ inch (12mm) & shallow: Nail pops, pinholes, minor dings → Spackle & Sand Method
- ½ inch to 6 inches (12mm–15cm) with stable edges: Anchor holes, small impacts, missing chunks → Patch Method (Mesh or California)
- Over 6 inches (15cm) or irregular shape: Large impacts, removed fixtures, compromised sections → Insert Patch or Backing Board Method
- Thin lines (any length): Hairline cracks at seams or corners → Flexible Crack Repair Protocol
- Widening/recurring cracks: Stress cracks from settling or movement → Monitor Stability Before Repairing
- Soft, discolored, or crumbly areas: Suspected moisture involvement → Address Moisture Source First
The Foundational Principle: A durable repair replicates the wall’s original layered integrity: stable substrate, appropriate core fill, reinforcement where needed, and surface finishing. Omitting a critical layer risks premature failure.
This framework addresses unspoken user concerns: “Will this hold through seasonal changes?” “Why did my previous patch crack again?” “Is this damage too complex for a DIY approach?” By anchoring every step in diagnostic reasoning, the process becomes logical, adaptable, and confidence-building.
Your Essential Drywall Repair Toolkit: Purposeful Tools for Every Scenario
Gathering appropriate tools beforehand prevents mid-project delays and supports cleaner results. Organize your toolkit into functional categories. Options are included for varying project scopes and resource considerations.
Safety Foundation: Non-Negotiable Protection
- Safety Glasses: Essential during cutting, sanding, or scraping to shield eyes from gypsum dust and debris.
- NIOSH-Approved Respirator (N95 or better): Drywall dust contains fine particles. A simple cloth mask is insufficient; a certified respirator filters airborne particulates effectively. Critical during sanding or larger repairs.
- Work Gloves: Protect hands from sharp drywall edges and compound irritation. Nitrile gloves suit compound work; cut-resistant gloves are advisable for cutting tasks.
Measuring & Marking
- Steel Tape Measure (25-ft): For precise damage assessment and patch sizing.
- Carpenter’s Pencil or Sharp Utility Knife: For marking cut lines. A sharp knife creates cleaner scores on drywall than pencil alone.
- 4-ft Level or Straightedge: Ensures patch edges align plumb and level, especially near corners or seams.
- Stud Finder (Electronic or Magnetic): Highly recommended for openings over 3 inches. Locating framing members prevents accidental contact with wiring or plumbing and identifies anchor points for backing. Verify functionality on a known stud first.
Cutting & Preparation
- Utility Knife with Fresh Blades: Dull blades tear paper and create ragged edges. Keep spare blades accessible.
- Keyhole Saw or Jab Saw: For creating clean rectangular openings around damaged areas.
- Drywall Saw (Optional): Designed for controlled cuts through gypsum board with reduced vibration.
- Putty Knife (1.5-inch): For gently removing loose paper fibers or crumbling material at the damage perimeter.
Application & Smoothing
- Putty Knives (Recommended Set):
- 1.5-inch: Filling tiny holes, applying compound into tight cracks.
- 4-inch: Primary tool for feathering edges on small-to-medium patches.
- 6-inch or 8-inch: Essential for final feathering passes on larger repairs; creates the gradual slope critical for invisibility.
- Taping Knife (10-inch or 12-inch): For large-area smoothing and final skim coats; the longer blade bridges minor imperfections.
- Drywall Mud Pan: Holds compound cleanly. Metal pans clean easily; plastic is lightweight.
- Spray Bottle (Fine Mist): Lightly dampening dried compound edges before sanding reduces airborne dust. Also useful when replicating certain textures.
Sanding & Final Preparation
- Sandpaper (Multiple Grits):
- 120-grit: Initial smoothing of dried compound.
- 150-grit: Primary sanding for most repairs.
- 220-grit: Final smoothing before priming.
- Sandpaper Sponge (Medium/Fine): Flexible for contours around edges and corners; reusable and generates less dust.
- Pole Sander with Dust Collection (Recommended for ceilings/large areas): Enhances safety and dust control.
- Tack Cloth or Lint-Free Microfiber Cloth: Removes fine dust after sanding—essential for proper primer and paint adhesion.
- Drop Cloths (Canvas preferred): Canvas is reusable, less slippery than plastic, and traps dust effectively.
Material Selection Guide: Understanding Compound Types
Selecting the appropriate compound is foundational to repair success. Each type serves distinct purposes:
| Compound Type | Best Applications | Drying/Curing Notes | Key Advantages | Important Considerations |
|---|---|---|---|---|
| Premixed All-Purpose Joint Compound | Medium/large patches, skim coating, texture work | Air-dries (24+ hours) | Versatile, sandable, widely available | May shrink slightly in deep fills |
| Lightweight All-Purpose Compound | Final feathering coats, large areas | Air-dries (24+ hours) | Less shrinkage, lighter weight, easier sanding | Slightly less rigid for deep structural fills |
| Setting-Type Compound (“Hot Mud”) | Deep fills, high-moisture areas, fast timeline needs | Chemical set (20 min–2 hrs) | Minimal shrinkage, moisture-resistant, hard cure | Requires mixing; shorter working time; harder to sand |
| Spackling Paste | Pinholes, nail pops, very small dings (<½”) | Air-dries (1–2 hours) | Minimal shrinkage in thin layers, sands smoothly | Not suitable for patches or deep fills; can be brittle |
| Flexible Acrylic Crack Sealant | Active stress cracks, corner beads | Air-dries (varies) | Accommodates minor wall movement | Not sandable; requires painting over |
Practical Guidance: For repairs deeper than ¼ inch, consider using setting-type compound for the initial fill layer (due to minimal shrinkage), followed by lightweight all-purpose compound for feathering and finishing. Spackling paste is formulated for micro-repairs only; using it beyond its intended scope often leads to cracking. Always check product labels for specific use cases and environmental limitations.
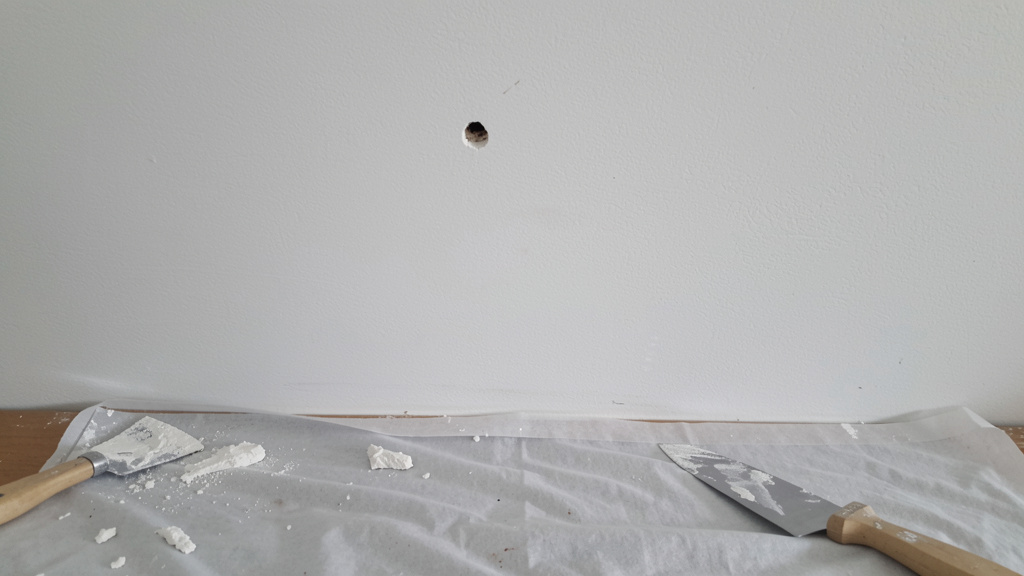
Repairing Micro-Damage: Pinholes, Nail Pops, and Superficial Dings (Under ½ Inch)
These small flaws are common yet impactful. Addressing them correctly maintains wall integrity and prevents a “pockmarked” appearance.
Why This Approach Works
Spackling paste is engineered for shallow voids. Its formulation dries hard with minimal shrinkage in thin applications and sands to a smooth finish without damaging surrounding paper. The emphasis is on precision application—filling the void without creating excess material.
Step-by-Step: Achieving an Invisible Micro-Repair
- Clean & Prepare: Wipe the area gently with a damp cloth. Use the tip of a utility knife or 1.5″ putty knife to remove any loose paper fibers or debris. Ensure the area is completely dry before proceeding.
- Apply Sparingly: Place a pea-sized amount of spackle on a 1.5″ putty knife. Hold the knife at a 45-degree angle. Press the spackle firmly into the hole, using a slight twisting motion to seat the material. Scrape across the hole to remove excess. Aim for a slight depression, not a mound. Overfilling necessitates sanding and risks damaging surrounding paint.
- Dry Completely: Allow drying per product instructions (typically 1–2 hours). Test dryness by lightly touching the edge—cool or tacky indicates more time is needed. In humid conditions, drying may take longer; gentle airflow across the room (not directly on the patch) can assist.
- Sand with Care: Fold a small piece of 220-grit sandpaper. Using light fingertip pressure, make 2–3 passes across the repair. Stop frequently to check. The surface should feel perfectly flush with the wall. Over-sanding creates a new depression. Wipe thoroughly with a tack cloth.
- Prime & Paint: Apply a small amount of primer to the repair area using a fine brush or cotton swab. Once dry, apply wall paint, feathering the edges slightly beyond the repair with a small artist’s brush for seamless blending.
Common Pitfalls to Avoid
- Over-application: Squeezing spackle directly from the tube often creates a mound. Always use a knife for controlled application.
- Skipping Primer: Unprimed spackle may absorb paint differently than the surrounding wall, potentially causing a visible spot (“flashing”). Primer creates a uniform base.
- Aggressive Sanding: Creates a new depression. Sand to flush, not past flush.
- Ignoring Recurrence: A recurring nail pop near a stud may indicate framing movement. Consider driving a new drywall screw above or below the pop into the stud, dimpling it slightly, and covering with compound.
Resource-Conscious Options
- Standard Approach: Vinyl-based spackling paste (widely available, cost-effective for occasional use).
- Enhanced Approach: Lightweight spackling compounds (e.g., formulations labeled for minimal shrinkage). These may sand more easily and accept paint uniformly.
- Temporary Measure Only: For very short-term cosmetic needs only (e.g., imminent home showing): A tiny amount of non-gel white toothpaste might fill a pinhole temporarily. Important: This is not a durable solution. It lacks adhesion and structural properties, and failure is likely within weeks. Permanent repairs require proper materials.
Conquering Medium Holes: Anchor Removals, Doorknob Dings, and Defined Gaps (½ Inch to 6 Inches)
This category represents frequent repair scenarios. Success depends on creating a stable substrate that integrates securely with the existing wall structure.
Selecting the Right Patch Method
- Self-Adhesive Mesh Patch: Suitable for clean-edged, stable holes between 1–4 inches (e.g., removed picture hook anchors, small impacts with firm edges). Offers speed. Not recommended for crumbly edges, irregular shapes, or holes near seams/corners.
- California Patch (Butterfly Patch): Recommended for irregular holes, crumbly edges, or holes near seams/corners (up to 6 inches). Creates a mechanically locked, rigid repair. Involves more steps but delivers superior durability and visual integration.
Method 1: Mesh Patch Protocol (Stable, Clean Holes)
- Edge Preparation: Use a utility knife to bevel the hole perimeter. Hold the knife at a 30-degree angle and carefully slice away the top paper layer around the entire edge, creating a shallow ramp (approximately ¼ inch wide) down to the gypsum core. This bevel provides a “tooth” for the compound to grip and prevents a sharp edge from showing through paint. Remove all loose debris.
- Apply the Patch: Peel the backing and center the mesh patch over the hole. Press firmly from the center outward, ensuring full adhesion with no wrinkles or lifted edges. Smooth thoroughly—any air pocket or lift can cause compound to crack later.
- First Compound Layer (Embedding): Load a 4″ knife with lightweight all-purpose compound. Spread a thin layer completely covering the mesh, pressing compound through the weave. Feather the edges outward 1–2 inches beyond the patch. Goal: Embed the mesh securely, not bury it under excess compound. Allow to dry per product guidelines (typically 4–6 hours).
- Second Layer (Building): Apply a wider layer (feathering 2–3 inches beyond the patch) to build slight thickness over the hole. Smooth meticulously. Allow to dry completely (overnight is often prudent).
- Final Feathering Layer: Using a 6″ or 8″ knife, apply a very thin skim coat feathering 4–6 inches beyond the repair center. This wide, gradual transition is key to visual disappearance. Allow to dry thoroughly.
- Finishing: Sand lightly with 150-grit, focusing on the feathered edges. Switch to 220-grit for final smoothness. Wipe clean with a tack cloth. Prime the entire sanded area. Paint, feathering the paint slightly beyond the primed zone.
Method 2: California Patch Technique (Irregular or Weak Edges)
Why it works: This method creates a “patch within a patch.” The inner drywall piece is secured by paper flaps adhered to the wall surface, forming a rigid, integrated repair.
- Create the Patch Piece: Cut a scrap of new drywall (¼” thick is ideal) slightly larger than the hole (e.g., for a 3″ hole, cut a 4″x4″ square). On the back of this square, use a utility knife to carefully score and remove the gypsum core from all four edges, leaving only the front paper face intact (approximately ½ inch wide border). This creates paper “flaps” on all sides.
- Prepare the Wall Hole: Clean the hole edges. If crumbly, gently scrape away loose material until solid gypsum is reached. Lightly bevel the very edge as in Method 1.
- Insert and Secure: Apply a thin bead of construction adhesive to the back of the drywall patch piece (avoiding the paper flaps). Carefully insert it into the hole, pressing firmly so the paper flaps lie flat against the wall surface. Hold in place for 60 seconds. Wipe away excess adhesive from flaps. Critical: Ensure the patch sits flush or slightly recessed (⅟₁₆”)—never protruding.
- Reinforce the Flaps: Once the adhesive is tacky (15–20 minutes), apply a thin layer of all-purpose compound over each paper flap, pressing it smoothly onto the wall. This bonds the flaps permanently. Allow to dry (2+ hours).
- Compound Layers: Proceed as Steps 3–6 in the Mesh Patch Method: embedding layer over flaps, building layer, wide feathering layer. The California patch provides a solid base, allowing for thinner compound layers.
- Finishing: Sand progressively (150 → 220 grit). Ensure seam areas feel perfectly smooth. Prime the entire repaired area. Paint with attention to blending.
Environmental and Practical Considerations
- Humidity Impact: In environments with high relative humidity (>60%), drying times for air-dried compounds can increase significantly. Using a dehumidifier in the room may help maintain workable conditions. Compound that feels dry on the surface but remains soft underneath will not sand cleanly.
- Temperature Influence: Most premixed compounds perform best between 50°F–90°F (10°C–32°C). Cooler temperatures slow drying; excessive heat may cause surface skinning over wet compound.
- Adhesion Check: After final sanding but before priming, gently tap the repair with your fingernail. It should produce a solid sound, similar to the surrounding wall. A hollow sound may indicate poor adhesion or voids, warranting reevaluation.
- Paint Sheen Awareness: Repairs can be more noticeable on flat or matte finishes. When touching up, use paint with the identical sheen as the existing wall. Higher sheens (e.g., semi-gloss) highlight surface variations, making meticulous feathering essential.
Mastering Large Openings: Structural Integration for Damage Over 6 Inches
When damage exceeds 6 inches, involves missing sections, or occurs between framing members, the repair must integrate structurally with the wall assembly. This approach is standard for openings from removed fixtures, significant impacts, or sections cut for access.
Critical Safety Precautions
Before cutting:
1. Turn off electrical power at the breaker for any outlets or switches near the work area. Verify absence of voltage using a non-contact voltage tester.
2. Use a stud finder to locate and mark framing members (studs) on both sides of the damaged area with painter’s tape.
3. If plumbing is suspected (e.g., near bathrooms or kitchens), exercise caution. Consider drilling a small exploratory hole within the damaged area to check for obstructions using a wire probe. When uncertainty exists, consulting a qualified professional is prudent.
The Backing Board Method: Establishing a Solid Base
Tools needed: Keyhole saw, drywall saw, 1×3 or 1×4 wood furring strip (or metal drywall brace), drywall screws, drill/driver.
- Create a Clean Opening: Using a level and pencil, mark a rectangle around the damaged area. Size it to expose at least 1–2 inches of solid drywall on all sides and ensure the rectangle spans between two adjacent studs. Cut along the lines with a drywall saw. Remove the damaged section. Retain this piece to assist in sizing the new patch.
- Install Backing: Cut two wood furring strips 4–6 inches longer than the opening’s height. Insert one strip horizontally behind the top edge of the opening. Position it so approximately half rests behind the existing drywall and half is exposed within the opening. Secure it by driving two drywall screws through the existing wall into the strip. Repeat for the bottom edge. Alternative: For vertical support between studs, install one long strip centered vertically.
- Cut the Patch: Place the removed drywall piece over new drywall stock. Trace its outline. Cut the new patch with a drywall saw. Technique: Score the front paper deeply with a utility knife, snap the gypsum core backward, then cut the back paper cleanly. Lightly sand sharp edges.
- Install the Patch: Apply a thin bead of construction adhesive to the exposed edges of the backing boards. Insert the patch, aligning edges precisely with the opening. Secure with drywall screws driven into the backing boards—not solely into the drywall edges. Drive screws until heads are just below the surface (creating slight “dimples”). Space screws 6–8 inches apart around the perimeter.
- Tape the Seams: Apply drywall tape (paper tape is often preferred for strength on seams) over all four edges between the patch and existing wall. Embed the tape firmly in a thin layer of all-purpose compound using a 4″ knife. Smooth out air bubbles. Allow to dry.
- Compound Application (Progressive Layering):
- Coat 1 (Bedding): Cover the tape completely with compound, feathering approximately 2 inches beyond the tape edge. Allow to dry (4+ hours).
- Coat 2 (Building): Widen the compound area to 4–6 inches beyond the patch. Smooth carefully. Allow to dry overnight.
- Coat 3 (Finishing): Use a 10″ or 12″ knife for a final skim coat feathering 8–12 inches beyond the repair. This broad transition minimizes visual shadows. Allow to dry completely (24+ hours).
- Finishing: Sand progressively (120 → 150 → 220 grit). Pay close attention to seam areas—run your hand over them; they must feel uniformly smooth. Prime the entire repaired area (extending at least 12 inches beyond the patch). Paint, feathering the paint into the surrounding wall.
When Full Replacement May Be Preferable
If damage spans more than 16 inches (typical stud spacing), involves extensive water exposure across a large section, or the wall substrate feels soft or unstable, replacing the entire drywall section between studs may be more efficient and structurally sound than patching. This process involves cutting precisely along stud lines, removing the full sheet segment, and installing a new sheet secured directly to the framing. Due to the physical demands and precision required (handling large sheets, achieving plumb cuts), this scenario is often best handled by experienced individuals or professionals.
Erasing Cracks: A Strategic Approach to Hairlines, Stress Fractures, and Corner Damage
Cracks require strategy beyond simple filling. Addressing the underlying behavior is essential for lasting results.
Diagnosing Crack Behavior: The Essential First Step
- Stable Hairline Cracks (at seams or corners): Typically cosmetic. Caused by minor settling, temperature-related contraction, or initial finishing variations. Width remains consistent over time.
- Active Stress Cracks (diagonal or vertical): May recur. Associated with structural settling, foundation movement, or framing shifts. Width might vary seasonally (e.g., wider in dry winter months). Requires monitoring.
- Corner Bead Issues: Cracks along metal or vinyl corner beads. Caused by impact or building movement. Metal beads may separate from the drywall substrate.
- Recurring Cracks: Any crack that reappears after repair signals ongoing movement.
Repair Protocol for Stable Hairline Cracks
- Prepare the Crack: Gently widen the crack using a utility knife or specialized crack-weeding tool to create a small “V” groove (approximately ⅟₁₆” wide at the surface, tapering deeper). This provides more surface area for adhesion and prevents compound from “bridging” over a void.
- Clean Thoroughly: Remove all dust and debris using a vacuum with a brush attachment, followed by a damp cloth. Allow to dry completely.
- Apply Flexible Sealant: Fill the groove with a flexible acrylic crack sealant using a caulk gun. Smooth with a damp finger or tool. This sealant accommodates minor wall movement. Avoid standard rigid joint compound for this step—it lacks flexibility and may crack.
- Reinforce (For Seams): If the crack lies on a taped seam, apply a thin layer of compound over the sealant, then embed a strip of fiberglass mesh tape. Feather compound widely.
- Finish: Once dry, apply a thin feathering coat of lightweight compound. Sand lightly. Prime and paint.
Addressing Active Stress Cracks: A Two-Phase Approach
Phase 1: Monitor and Assess
Clean the crack and fill only with flexible sealant (do not apply tape or rigid compound yet).
Place a small piece of masking tape across the crack. Mark the tape edges on the wall with a pencil.
Monitor for 2–3 months, observing through seasonal changes. Check if the crack widens (tape tears) or shifts position.
If stable: Proceed to Phase 2 repair below.
If active:* Consult a qualified structural professional. Repairing over ongoing movement is unlikely to succeed and may mask underlying issues requiring attention.
Phase 2: Repair After Stability Confirmed
1. Remove the temporary sealant and tape. Re-prepare the crack (V-out) as described for stable cracks.
2. Install expansion joint tape (a flexible, fabric-reinforced tape designed for movement areas) over the crack. Bed it securely in flexible sealant.
3. Apply two thin coats of compound over the tape, feathering widely.
4. Prime and paint. The expansion tape allows for minor future movement without compromising the surface finish.
Corner Bead Repair Guidance
- Loose Metal Bead: Secure with drywall screws spaced every 6 inches along the bead. Fill screw dimples and cracks with compound.
- Damaged Section: Cut out the damaged bead section with tin snips. Install a new bead section, overlapping the existing bead by approximately 2 inches. Secure with screws. Tape the seam between old and new bead with mesh tape. Compound and feather meticulously.
- Consideration for High-Traffic Areas: In hallways or other impact-prone zones, replacing damaged metal bead with vinyl corner bead may offer greater resilience against future dents.
The Invisible Finish: Texture Matching Guidance
A well-filled repair remains visible if the surface texture does not blend. This step requires observation, practice, and patience.
Step 1: Identify Your Wall Texture
Stand back 6 feet, then move closer. Shine a flashlight parallel to the wall surface to cast shadows that reveal texture depth and pattern. Common types include:
- Orange Peel: Fine, uniform splatter (resembling citrus skin). Very common on modern walls.
- Knockdown: Orange peel texture that has been lightly flattened with a trowel for a subtle, mottled appearance.
- Popcorn (Acoustic): Heavy, bumpy texture (common on older ceilings; pre-1980 homes may contain asbestos—professional testing is essential before disturbing).
- Slap Brush/Swirl: Distinct curved patterns created with a brush or roller.
- Skip Trowel: Random, subtle ridges applied with a trowel.
- Smooth (Level 5 Finish): No discernible texture; requires exceptional skim-coating skill.
Step 2: Practice on a Test Surface
- Cut a 12″x12″ piece of scrap drywall.
- Apply your chosen texture technique to the scrap.
- Allow to dry completely. Prime and paint exactly as you plan for the wall.
- Hold the scrap against the actual wall in the room’s natural and artificial lighting. Adjust your technique until the texture blends acceptably. This practice step is highly recommended.
Texture Replication Methods
Orange Peel:
Tool: Texture sprayer (hopper gun) is ideal. Budget alternative: modified spray bottle or stiff-bristle brush.
Method: Thin lightweight compound with water (start with a 10:1 compound-to-water ratio; adjust for spray consistency). Pour into sprayer. Hold 12–18 inches from the surface. Apply in light, sweeping passes with slight overlap. Critical: Practice spray pattern, distance, and pressure on scrap first. Too close creates globs; too far yields spotty coverage.
Alternative Technique:* Dip a stiff-bristle brush into thinned compound. Flick the wrist firmly toward the test surface to create controlled splatter. Adjust flick intensity to match density. Suitable for very small areas.
Knockdown:
Tools: Texture sprayer + 12″ drywall knife or dedicated knockdown knife.
Method: Spray an orange peel base. Wait 5–15 minutes (until surface loses sheen but remains damp to the touch). Lightly drag the flat edge of the knife horizontally across the texture to flatten peaks. Wipe the knife frequently. Timing is crucial—too wet causes smearing; too dry prevents flattening.
Slap Brush/Swirl:
Tools: Specialized slap brush or coarse-nap roller.
Method: Apply a thin, even coat of compound to the repair area. While still workable, lightly “slap” or roll the tool over the surface, lifting straight up. Rotate the tool slightly between applications for an organic pattern. Match the direction and density of the surrounding texture.
Smooth Finish (Level 5):
Tools: 12″ taping knife, high-quality lightweight compound.
Method: After the final compound coat is dry and sanded smooth, a full-wall skim coat is often necessary for true invisibility. Thin compound slightly with water. Using the 12″ knife, apply a paper-thin layer over the entire wall section (not just the patch). This evens minor variations. This technique requires significant practice; for large areas or critical finishes, professional assistance may be considered.
The Lighting Verification Test
Before priming:
1. Turn off room lights.
2. Shine a bright flashlight parallel to the wall surface across the repair.
3. Shadows will reveal ridges, dips, or texture mismatches invisible under normal light.
4. Address any inconsistencies by light sanding or reapplying texture. Repeat the test until the surface appears optically uniform.
Priming and Painting: Ensuring Visual Integration
Primer plays a critical role in achieving a seamless final appearance.
The Role of Primer
- Creates Uniform Absorption: Spackle and joint compound absorb paint differently than existing painted drywall. Primer establishes a consistent base.
- Reduces Flashing Risk: Unprimed patches may appear slightly darker or lighter than the surrounding wall after painting. Primer minimizes this contrast.
- Promotes Adhesion: Paint adheres more reliably to a primed surface.
- Blocks Stains: Essential if the repair area involved water stains (use a stain-blocking primer formulated for this purpose).
Primer Application Steps
- Surface Preparation: After final sanding, wipe the area thoroughly with a tack cloth to remove all dust.
- Select Appropriate Primer:
- Standard Repairs: Water-based acrylic primer.
- Water Stains: Stain-blocking primer (oil-based or shellac-based formulas; follow safety instructions).
- Large Repairs/Full Walls: PVA drywall primer provides uniform sealing, especially under flat paints.
- Apply Carefully: Use a small roller (4″ mini roller) for areas larger than a dinner plate. For small patches, use a high-quality synthetic brush. Prime an area extending at least 2 inches beyond the sanded repair. Feather the primer edges lightly.
- Allow Full Drying: Follow the product’s drying instructions (typically 1–2 hours). Humidity and temperature affect drying time. Primer should feel completely dry and not cool to the touch before painting.
Painting for Seamless Results
- Paint Matching: Use leftover paint from the original job if available. If not, take a large sample (cut from inside a closet or inconspicuous area) to a paint store for color matching. Note that wall colors can fade over time; an exact match may require repainting the entire wall section.
- Feathering Technique: Do not paint only the patch. Load a small roller or brush. Begin painting on the existing wall, 6–12 inches away from the repair. Roll or brush toward the repair, blending the new paint into the old with several light, overlapping passes. The transition should be gradual.
- Sheen Consistency: Use paint with the identical sheen (flat, eggshell, satin, etc.) as the existing wall. Mixing sheens will highlight the repair area.
- Final Inspection: View the repair under multiple light sources (daylight, overhead lights, lamps) and from various distances. Step back 10 feet. If the repair is not readily noticeable, the process has been successful.
Advanced Scenarios: Moisture, Ceilings, and High-Traffic Areas
Moisture-Affected Areas: Proceed with Caution
- Address the Source First: Identify and repair the moisture source (leaking pipe, roof issue, window leak) before any drywall work. Repairing over active moisture leads to recurring problems.
- Assess Damage Extent: Soft, crumbly, or discolored (yellow, brown, black) drywall indicates compromised material. Cut away all damaged sections until solid, dry gypsum is reached. Extend cuts 2–3 inches into sound drywall.
- Mold Considerations: If mold is visible (fuzzy growth, musty odor):
- Small, isolated areas: Wear appropriate PPE (respirator, gloves, goggles). Clean with an EPA-registered mold remover following product instructions. Ensure the area dries completely (use fans and a dehumidifier for 48+ hours).
- Extensive growth or uncertainty: Pause work. Consult a certified mold remediation professional. Disturbing mold without proper containment can spread spores.
- Replacement Required: Moisture-damaged drywall cannot be effectively patched. Cut out the section, install backing, and insert a new patch. In moisture-prone areas (bathrooms, kitchens), consider moisture-resistant drywall (often green-faced) for replacements. Seal edges with mildew-resistant caulk where appropriate.
Ceiling Repairs: Working Against Gravity
- Compound Selection: For the initial fill layer on ceilings, setting-type compound is often preferred. It sets chemically rather than drying by evaporation, reducing sag risk.
- Secure Patching: For openings larger than 2 inches, use backing boards secured to ceiling joists (locate with a stud finder). For small holes, self-adhesive mesh patches can work, but apply compound in thin layers.
- Sanding Safety: Use a pole sander. Wear safety glasses and a respirator—dust falls directly downward. Work in short intervals to avoid fatigue.
- Texture Matching: Critical on ceilings. Orange peel is common. Practice extensively on scrap. Repairing popcorn texture is complex; professional assistance or full re-texturing may be preferable.
High-Traffic and Impact-Prone Zones (Hallways, Children’s Rooms)
- Reinforce Repairs: For patches in areas subject to bumps:
- After patch installation and taping, apply a layer of fiberglass mesh drywall tape over the entire patch area before the first compound coat.
- Consider using setting-type compound for initial layers—it cures to a harder finish.
- After painting, clear, flexible wall protector film can be applied over the repaired area for added durability (available at hardware stores).
- Preventive Measure: Installing clear acrylic corner guards or wall bumpers in high-risk zones before damage occurs can reduce future repair needs.
Recognizing When to Seek Professional Assistance
Drywall repair is a valuable DIY skill, yet wisdom includes knowing when expert help is appropriate. Consider consulting a qualified drywall contractor or restoration professional if:
- Structural Concerns Are Present: Cracks wider than ¼ inch, diagonal cracks spanning multiple walls, cracks accompanied by sticking doors/windows, or visible foundation issues. These situations warrant assessment by a structural engineer.
- Extensive Moisture Damage Exists: Damage affecting more than 20% of a wall or ceiling, or recurring moisture with an undetermined source. Professionals have moisture meters and specialized drying equipment.
- Hazardous Materials Are Suspected: Homes built before 1980 may contain asbestos in popcorn ceilings or textured coatings. Pre-1978 homes may have lead-based paint. Do not sand, scrape, or disturb. Hire certified abatement professionals. Testing kits exist, but remediation requires licensing and containment.
- Electrical or Plumbing Hazards Are Uncertain: If damage is near outlets, switches, or pipes and you are uncomfortable verifying safety.
- Scale of Damage Is Significant: Replacing multiple sheets of drywall, especially on ceilings or large wall sections.
- Finish Quality Is Critical: For high-end finishes (Level 5 smooth walls, intricate custom textures), a professional’s expertise and efficiency may provide better value than repeated DIY attempts.
A reputable professional will typically:
Diagnose underlying causes, not just address surface symptoms.
Provide a clear scope of work, timeline, and cost estimate.
Use proper dust containment methods (plastic sheeting, HEPA filtration).
Offer a warranty on work performed.
* Hold relevant licenses and insurance.
Your Questions, Answered
Q: Can I repair drywall in cold weather (below 50°F / 10°C)?
A: Most premixed joint compounds and spackles perform best at temperatures above 50°F (10°C). Below this range, drying slows considerably, adhesion may be compromised, and freezing can ruin the material. Setting-type compounds are less temperature-sensitive but still cure optimally above 40°F (4°C). If repair is necessary in a cold space (e.g., unheated garage), temporarily raise the ambient temperature to at least 55°F (13°C) for 24 hours before, during, and after application using a safe, dry heat source. Avoid moisture-producing heaters near drying compound. Always consult specific product labels for temperature guidelines.
Q: Why does my repair keep cracking after painting?
A: Recurring cracks commonly stem from: 1) Ongoing movement: The wall may still be shifting due to settling or framing issues. Monitor stability first (see Stress Crack section). 2) Inadequate surface preparation: Edges not cleaned or beveled, or compound not pressed firmly into the substrate. 3) Material limitations: Using standard compound for deep fills (>¼ inch) without a shrinkage-resistant base layer. For deep voids, setting-type compound is often recommended for the initial fill. For stable hairline cracks, flexible sealant helps accommodate minor movement.
Q: Is there a difference between spackle and joint compound? Can I use them interchangeably?
A: Yes, they serve different purposes. Spackle is a gypsum-and-adhesive paste formulated for small, shallow repairs (pinholes, nail pops). It dries hard with minimal shrinkage in thin layers but can become brittle in thicker applications. Joint compound (“mud”) is a gypsum-based material designed for seam taping, embedding tape, and building layers. It sands easily and offers better flexibility for larger areas. Spackle is not recommended for holes larger than ½ inch or for taping seams—it lacks the necessary structural properties and may crack. Use joint compound for all patching, taping, and finishing beyond micro-repairs.
Q: How long should I wait between compound coats?
A: Drying time varies by compound type, layer thickness, humidity, and temperature. General guidance:
Premixed All-Purpose/Lightweight: Minimum 4–6 hours for thin layers; 24 hours for thick fills or humid conditions. Test by gently pressing near (not on) the edge—it should feel dry and not tacky.
Setting-Type Compound: Follow package instructions precisely (e.g., “45-minute” compound remains workable for ~35 minutes, sets hard in 45). Subsequent coats can typically be applied once fully hardened (often 60–90 minutes), as curing is chemical, not evaporation-based.
Key Principle:* When uncertain, allow extra drying time. Applying new compound over damp material traps moisture, potentially causing bubbles, poor adhesion, or extended drying. Gentle airflow (fan across the room) and dehumidification in damp conditions can support drying.
Q: My wall has a strange odor after repair. Is that normal?
A: A faint, chalky smell from drying compound is typical and should dissipate within 24–48 hours with ventilation. However, a musty, sour, or “wet dog” odor suggests trapped moisture or potential mold growth—stop work immediately. This can occur if compound was applied over damp substrate, in high humidity without adequate airflow, or if hidden moisture exists behind the wall. Carefully remove the repair material, investigate for leaks or mold, ensure the cavity is completely dry (a moisture meter can help verify), and resolve the moisture source before attempting repair again.
Q: Can I apply texture over a painted wall repair?
A: Yes, but surface preparation is essential. The primed repair area must be clean and slightly abraded. Lightly sand the primed area with 120-grit sandpaper to create “tooth” for the texture material to adhere. Wipe away all dust thoroughly. Apply the texture material (thinned compound) directly over the prepared primed area. Primer seals the patch and promotes uniform texture adhesion. Skipping the light sanding step after priming may cause the texture to peel or slide.
Q: What’s the best way to store leftover joint compound?
A: For premixed compound in a bucket:
1. Smooth the surface flat.
2. Pour a ¼-inch layer of clean water directly on top (this creates an airtight seal to prevent skinning).
3. Seal the lid tightly. Store upside down in a cool place (above freezing).
4. Before reuse, pour off the water layer, stir thoroughly. Discard if moldy, separated beyond stirring, or sour-smelling.
Setting-type powder: Keep the bag tightly sealed inside an airtight container (moisture deactivates it). Use within 6–12 months.
Spackle tubes: Screw the cap on tightly. Store upright. Inserting a small nail into the nozzle tip can prevent clogging.
Q: How do I repair drywall after removing wallpaper?
A: Wallpaper removal often damages the drywall’s paper face, leaving a fragile surface. Do not apply compound directly. Instead:
1. Scrape away all loose paper fibers with a 4″ putty knife.
2. Apply a sealer/primer designed for damaged surfaces (e.g., products labeled for problem surfaces). This penetrates and stabilizes the exposed gypsum fibers.
3. Once sealed and dry, skim coat the area with lightweight joint compound using a 10″ knife.
4. Sand smooth, prime again, then paint or texture. Skipping the sealer step often leads to uneven compound absorption and visible “flashing.”
Q: Are there eco-conscious drywall repair product options?
A: Yes. Options include:
Low-VOC or Zero-VOC Joint Compounds: Several manufacturers offer formulations with reduced volatile organic compounds. Check product labels.
Products with Recycled Content: Some compounds incorporate recycled gypsum.
Sustainable Practices: Choose reusable sanding sponges over disposable blocks, and metal mud pans over plastic. Dispose of compound waste responsibly per local regulations (avoid pouring large quantities down drains).
Natural Alternatives: Clay-based plasters exist but typically require significant skill and are better suited for full-wall applications than spot repairs.
Q: My repair is only visible in certain lighting. How can I correct this?
A: This “shadowing” usually indicates the repair isn’t perfectly flush or the texture doesn’t blend. Perform the Flashlight Test (shine light parallel to the wall). If a ridge is visible: sand lightly with 220-grit. If a dip is visible: apply a micro-thin layer of lightweight compound feathered widely over the area, let dry completely, and re-sand. For texture mismatch, revisit your practice scrap, refine the technique, and reapply texture only to the repair area, blending edges meticulously into the surrounding wall. In some cases, repainting the entire wall section (from corner to corner) provides the most efficient path to invisibility.
Q: Can I repair drywall over existing wallpaper?
A: Not recommended. Wallpaper creates an unstable, non-porous surface. Compound adhesion will be poor, leading to bubbling, peeling, and repair failure. The reliable approach is to remove the wallpaper completely (using appropriate removal solutions and tools), repair the bare drywall substrate, then prime and repaint. Patching over wallpaper is generally a temporary measure that requires redoing the work later.
Conclusion and Your Next Step
Drywall repair is a practical expression of home care. Each flaw you address thoughtfully strengthens your living space and builds confidence in your abilities. You now have a adaptable framework: the diagnostic perspective to assess damage accurately, techniques matched to specific scenarios, material insights for informed choices, and finishing practices for integrated results. Remember the guiding principle: Match the method to the damage. A pinhole requires precision spackling; a large opening demands structural integration. Honor the process—clean preparation, appropriate drying times, wide feathering—and your repairs will serve well.
The 24-Hour Action Step: Build Confidence Through Doing
Within the next day, take one manageable step:
1. Assemble a Starter Kit: Visit a hardware store. Purchase a small container of lightweight spackling paste, a 1.5″ and 4″ putty knife, 220-grit sandpaper, a sanding sponge, and a small bottle of primer. Total investment is typically modest.
2. Select a Practice Spot: Find one minor flaw—a nail pop, pinhole, or tiny ding—on a low-visibility surface (inside a closet is ideal).
3. Execute One Repair: Follow the micro-damage steps carefully. Clean, apply sparingly, allow full drying, sand lightly, prime, and paint.
4. Acknowledge Progress: Step back. That seamlessly restored spot is tangible evidence of your capability. Consider taking a “before and after” photo. This small success builds momentum for future projects.
A Broader Perspective: Walls Within the Home Ecosystem
Walls are part of a dynamic home environment. They respond to humidity, temperature shifts, and the gentle wear of daily life. A repaired wall isn’t “fixed forever”; it’s restored to harmony within its context. View future minor repairs not as setbacks, but as opportunities to refine your skill. Share knowledge—guide a family member through a simple patch, offer advice to a neighbor. In mastering this grounded craft, you connect with a timeless tradition of stewardship: caring for the spaces that shelter us, one thoughtful repair at a time. Your walls are ready. Begin with confidence.
Explore Our Complete Home Care System:
The Thoughtful Guide to Interior Painting: Preparation, Tools, and Lasting Results | Drywall Installation Fundamentals: Hanging, Seaming, and Finishing | Protecting Your Walls: Practical Strategies for High-Use Spaces | Ceiling Care and Repair: Addressing Cracks, Stains, and Texture | Recognizing Home Maintenance Cues: A Proactive Approach to Care