Move beyond fragmented advice. This integrated guide reveals how to select toilet and shower systems that work in harmony—saving water without sacrificing comfort, and elevating your daily routine with science-backed insights.
Selecting the right toilet and shower system is about more than individual fixtures; it’s about creating a cohesive bathroom experience that balances water efficiency with uncompromising comfort. This comprehensive guide walks you through every critical decision point, from decoding flush technologies and showerhead spray patterns to understanding how water pressure, household habits, and plumbing infrastructure shape your choices—ensuring you invest in a system that serves your home reliably for years. Forget generic checklists. Here, we treat your bathroom as an interconnected ecosystem where every component influences the whole.
Introduction
Walk into any home improvement store, and you’ll face a dizzying array of choices: toilets promising “whisper-quiet” flushes, showerheads boasting “spa-like rainfall,” labels touting “WaterSense certified” or “low-flow.” Yet beneath the marketing lies a fundamental truth often overlooked in fragmented online guides: your toilet and shower don’t operate in isolation. They share plumbing infrastructure, water supply constraints, drainage pathways, and—most importantly—your daily experience. A high-efficiency toilet paired with an incompatible shower valve can lead to frustrating pressure drops. A luxurious rainfall showerhead may overwhelm an older water heater, leaving subsequent users with unexpected temperature shifts. True optimization requires seeing the bathroom as a unified system.
Analysis of plumbing industry standards, municipal water conservation frameworks, and aggregated user feedback patterns across diverse household profiles reveals that the most successful bathroom upgrades prioritize system-wide harmony over isolated fixture upgrades. This guide synthesizes engineering principles, ergonomic research, and real-world performance considerations to move you beyond superficial comparisons. We’ll clarify technical terms without jargon, dismantle persistent myths (like “all low-flow toilets clog easily”), and provide actionable frameworks tailored to your specific home environment and lifestyle. Whether you’re renovating a century-old bungalow, optimizing a modern condo, or planning a new build, this blueprint empowers you to make confident, lasting decisions where efficiency and comfort coexist seamlessly.
The Harmony Framework: A 4-Pillar Approach to Bathroom System Selection
Before examining individual fixtures, establish a foundational mindset. The Harmony Framework transforms overwhelming choices into a logical, personalized decision path. This isn’t about finding the single “best” toilet or showerhead on the market—it’s about identifying the best-fit system for your unique context. Each pillar addresses a critical dimension often siloed in conventional advice. Master these four pillars, and you’ll avoid costly mismatches that plague even well-intentioned upgrades.
Pillar 1: Water Efficiency Intelligence (Beyond “Low-Flow” Labels)
Water efficiency is frequently reduced to a single number: gallons per flush (GPF) for toilets or gallons per minute (GPM) for showerheads. This oversimplification causes real-world problems. A toilet rated at 1.28 GPF might perform poorly in a home with low water pressure, leading to repeated flushing that negates savings. A 1.5 GPM showerhead might feel inadequate if your water heater cannot sustain temperature under reduced flow. True efficiency intelligence means understanding how water is used, not just how much.
Why this pillar is crucial: Municipal water costs continue to rise in many regions, and conservation awareness is growing. However, efficiency without reliable performance breeds user frustration, leading to workarounds (like extended shower times) that erase intended savings. Intelligence means optimizing for effective water use—achieving the desired outcome (a clean bowl, a satisfying rinse) with minimal waste.
How to assess intelligently:
– For Toilets: Look beyond GPF to independent performance verification. The Maximum Performance (MaP) testing program publishes verified solid waste removal scores (measured in grams). A toilet removing 600+ grams on a single flush at 1.28 GPF demonstrates genuine efficiency; one struggling below 400 grams may not, regardless of its label. Also consider flush consistency: Does it perform reliably on both liquid and solid waste? Dual-flush models offer nuance (e.g., 0.8 GPF for liquid, 1.28 GPF for solid), but only if household members consistently use the correct option—a behavioral factor often overlooked.
– For Showers: GPM tells only part of the story. Spray technology significantly influences perception and function. A well-engineered 1.75 GPM showerhead with air-injection technology (mixing air with water to create larger, softer droplets) can feel more luxurious and rinse more effectively than a poorly designed 2.0 GPM model with a weak, scattered spray. Check whether the showerhead includes adjustable flow restrictors (important for homes with variable pressure) and verify compatibility with your valve type (covered in Pillar 3).
– System Synergy Check: Assess your home’s simultaneous demand. If multiple people use water-intensive fixtures concurrently (e.g., showering while a toilet flushes), will pressure remain stable? Older homes with ½-inch supply lines may experience noticeable drops. A professional pressure assessment (ideal static range: 40–80 PSI) provides baseline data. If pressure consistently falls below 40 PSI, prioritize fixtures engineered for low-pressure performance rather than pursuing the absolute lowest GPF/GPM numbers.
Common mistakes to avoid:
– Mistake: Selecting the lowest GPF/GPM number available without verifying real-world performance data.
Consequence: Potential for repeated flushing or extended shower times, negating conservation goals and increasing water use.
Solution: Cross-reference manufacturer specifications with MaP scores (for toilets) and user reviews specifically mentioning pressure conditions similar to yours.
– Mistake: Ignoring hot water recovery dynamics when selecting shower flow rates.
Consequence: In a household with a standard tank water heater, consecutive showers at higher flow rates may deplete available hot water faster than the system recovers.
Solution: Match shower GPM to your water heater’s capacity and recovery rate. For tank systems, a moderate flow rate (1.5–1.75 GPM) often extends usable hot water duration. For tankless systems, ensure the unit’s rated flow capacity exceeds your shower’s demand plus other potential simultaneous uses.
The Fundamental Principle: Efficiency is defined not by the smallest number on a spec sheet, but by the optimal balance of resource conservation, reliable performance, and user satisfaction within your specific household context.
Pillar 2: Comfort Engineering (The Science of Sensory Experience)
Comfort is deeply personal yet systematically achievable. It encompasses ergonomics (physical interaction), hydrodynamics (water delivery), thermal stability (temperature consistency), and acoustic factors (flush noise, water sound). Dismissing comfort as purely “subjective” leads to regrettable choices. Instead, treat it as an engineering challenge with measurable parameters.
Why this pillar is crucial: Fixtures used multiple times daily directly impact well-being. Discomfort—whether a toilet seat that’s too low, a shower that fluctuates between extremes, or a spray pattern that fails to rinse effectively—creates daily friction. Thoughtful comfort engineering reduces stress, supports diverse user needs, and increases the perceived value of your space.
Decoding toilet comfort factors:
– Bowl Shape & Height: Elongated bowls (typically 18.5″ long) generally offer more sitting space and are preferred for adult comfort and hygiene. However, in compact spaces (under 30″ depth clearance), a round-front bowl (16.5″ long) or compact elongated model may be necessary. Comfort Height or Chair Height toilets (17–19″ from floor to rim) align closely with standard chair height, significantly easing sitting and standing for many users. Standard height (14–15″) may suit children or specific spatial constraints. Always measure existing clearance before purchasing.
– Seat Material & Design: Seat selection matters. Slow-close hinges prevent slamming—a common source of household annoyance. Contoured seats with adequate padding enhance comfort during extended use. For households with diverse needs, seats featuring quick-release mechanisms simplify cleaning or replacement.
– Flush Noise Level: Pressure-assisted toilets (using compressed air) typically produce louder flushes than gravity-fed models—a critical consideration for bathrooms adjacent to bedrooms or quiet living areas. If noise is a concern, prioritize gravity-fed designs with optimized trapway geometry. Some manufacturers provide approximate decibel ratings; under 60 dB is generally considered quiet for residential settings.
Decoding shower comfort factors:
– Spray Pattern Psychology: Different patterns serve distinct purposes. Rainfall (wide, gentle dispersion) promotes relaxation but may lack rinsing power for thick hair. Massage (pulsating streams) eases muscle tension but can feel intense on sensitive skin. Mist conserves water but offers minimal cleansing. Multi-function showerheads (offering 3–5 selectable patterns via a dial) provide valuable flexibility. Test patterns in-store when possible, or review detailed video demonstrations showing spray coverage on a mannequin.
– Thermal Stability Technology: This is essential for safety and consistent comfort. Pressure-balancing valves automatically adjust the hot/cold mix if pressure changes (e.g., from a toilet flush), preventing sudden temperature spikes or drops. Thermostatic valves go further: you set a precise maximum temperature (e.g., 105°F), and the valve maintains it consistently regardless of pressure fluctuations. For households with children, elderly residents, or sensitive skin, thermostatic control represents a meaningful safety investment. Never install a shower without one of these anti-scald mechanisms, as required by modern plumbing codes in most regions.
– Ergonomic Placement & Reach: For handheld showerheads, the slide bar height should accommodate both the tallest user (for overhead use) and shortest user (for seated bathing). A bar extending from 48″ to 72″ above the tub floor covers most scenarios. Ensure the hose is sufficiently long (60–72 inches) for flexibility without tangling. For fixed showerheads, the standard mounting height is 78–80″ above the shower floor, adjustable upward for taller users to prevent head contact.
Common mistakes to avoid:
– Mistake: Prioritizing aesthetic design (e.g., ultra-thin rainfall showerhead) over functional spray performance.
Consequence: Weak water pressure, poor coverage, inability to rinse effectively, leading to longer shower times and frustration.
Solution: Research spray force metrics and read reviews focusing on rinsing efficacy, not just appearance. Look for models with demonstrated performance in conditions matching your home.
– Mistake: Installing a thermostatic valve without verifying compatibility with existing plumbing rough-in.
Consequence: Costly rework or inability to use the desired valve type.
Solution: Consult a qualified plumber before purchasing to confirm valve body compatibility with your wall configuration and pipe materials (copper, PEX, CPVC).
Pillar 3: Household Harmony (Matching System to Human Patterns)
Your bathroom system must align with the rhythms, sizes, and habits of the people using it. A fixture ideal for a single occupant may be impractical for a large, active family. This pillar moves beyond technical specs to human-centered design.
Why this pillar is crucial: Fixtures are tools for living. Ignoring usage patterns leads to mismatched investments. A high-capacity commercial-style toilet is unnecessary (and potentially less comfortable) for a lightly used powder room. Conversely, a delicate, low-flow showerhead may struggle under the demands of a busy household.
Mapping your household profile:
– Occupancy & Peak Usage Times: Chart a typical weekday. When do multiple people use the bathroom simultaneously? (e.g., 6:30–7:30 AM for school/work prep). This identifies critical pressure and hot water demands. For high-traffic households, prioritize toilets with robust, consistent flush performance (MaP score >500g) and shower systems with thermostatic valves to handle pressure spikes from flushing.
– User Demographics:
– Children: Consider toilets with integrated child seats or lower-profile models. Anti-scald valves are essential. Handheld showerheads aid bathing young children.
– Seniors or Mobility Challenges: Comfort Height toilets are strongly recommended. Grab bars (installed into wall studs) near the toilet and in the shower are critical safety features—plan for them during renovation. Slide-bar handheld showers enable seated bathing. Avoid shower thresholds higher than 1.5″ for easy access.
– Hair & Skin Needs: Individuals with thick, long hair or specific skin sensitivities may benefit from showerheads with strong, focused rinse patterns and adjustable spray intensity. Filtered showerheads (reducing chlorine exposure) may be worth exploring for sensitive skin—though verify filter replacement requirements and flow impact.
– Behavioral Realities: Be honest. Will family members consistently use the “half-flush” button on a dual-flush toilet? If not, a single-flush high-efficiency model (1.28 GPF) with excellent MaP scores may deliver more reliable conservation. Do teenagers take extended showers? A shower timer (built into some valves) or a moderate-GPM head can gently encourage conservation.
Budget-Tiered Solutions for Household Harmony:
– Budget-Conscious Household (High Usage): Focus spending on the valve (thermostatic for safety where feasible) and a reliable mid-tier toilet (MaP scores >450g at 1.28 GPF). Choose a durable, multi-function showerhead at 1.75 GPM. Prioritize core performance over decorative extras.
– Mid-Range Household (Mixed Needs): Invest in a Comfort Height toilet with soft-close seat and a thermostatic valve with volume control. Select a shower system combining a fixed rainfall head (for ambiance) and a separate handheld (for utility) on a diverter valve. This offers flexibility for different users and tasks.
– Premium/Accessibility Focus: Specify a wall-hung toilet (easier cleaning, adjustable height during install) with in-wall carrier system. Install a thermostatic shower system with multiple outlets (overhead rain, handheld, body sprays) controlled by a single intuitive interface. Integrate grab bars seamlessly into the design (e.g., towel bars that double as supports). Consider a bidet seat for enhanced hygiene—ensure electrical outlet access is planned during rough-in.
Common mistakes to avoid:
– Mistake: Designing solely for current occupants without considering future needs (aging in place, potential resale).
Consequence: Costly future modifications or reduced home appeal.
Solution: Incorporate universal design principles where feasible: Comfort Height toilets, curbless or low-threshold showers, reinforced walls for future grab bar installation. These choices benefit everyone today and increase long-term value.
– Mistake: Underestimating the impact of simultaneous water use elsewhere in the house.
Consequence: Shower temperature fluctuations when the washing machine fills or dishwasher runs.
Solution: During renovation, discuss dedicated supply lines to the bathroom or main line upgrades with your plumber. For existing homes, a high-quality thermostatic valve is the most effective mitigation.
Pillar 4: Long-Term Resilience (Durability, Maintenance, Future-Proofing)
The true value of a fixture extends far beyond the purchase price. Resilience encompasses material quality, ease of repair, availability of replacement parts, resistance to local water conditions, and adaptability to future needs.
Why this pillar is crucial: Bathrooms are high-moisture, high-use environments. Components of inferior quality may fail prematurely, leading to leaks, frustration, and replacement costs that exceed initial savings. Conversely, over-engineered commercial fixtures may be unnecessarily expensive for residential use. Resilience means selecting components proven to withstand your specific conditions with minimal long-term hassle.
Evaluating toilet resilience:
– Trapway Design: A fully glazed, wide-diameter (2″ or larger) trapway resists clogs and is easier to service if needed. Avoid designs with sharp bends or narrow passages. Look for robust warranties (often 10+ years on porcelain), but review coverage details.
– Flush Mechanism: In gravity toilets, a canister-style flush valve often offers more reliable sealing and reduced mineral buildup susceptibility compared to traditional flappers. For pressure-assisted models, verify the air bladder material quality and warranty terms—this component requires durability.
– Material Quality: Vitreous china should feel dense and smooth, with a thick, uniform glaze. Tap the bowl lightly; a clear ring often indicates good ceramic density. Avoid fixtures with visible seams or rough surfaces where grime accumulates. Seats should feature solid construction with corrosion-resistant hinges.
– Water Quality Considerations: In areas with hard water (high mineral content), mineral deposits can affect performance. Toilets with specialized glaze technologies may resist staining. For internal components, brass generally withstands corrosion better than plastic. Testing your water hardness (kits available online) informs proactive choices. In regions with significant hardness, a whole-house water softener protects all plumbing fixtures and appliances.
Evaluating shower system resilience:
– Valve Body Material: This hidden component is critical. Solid brass valve bodies resist corrosion far better than plastic or zinc alloy, especially in homes with variable water chemistry. Insist on brass for any new rough-in. Verify the valve cartridge material—ceramic discs typically offer smoother operation and longer service life than rubber washers.
– Showerhead Construction: Prioritize models with minimal plastic in critical flow paths. Look for rubber nozzles (self-cleaning when wiped) rather than fixed metal holes prone to clogging. Stainless steel or solid brass bodies generally outlast plastic alternatives. Check warranty length—reputable brands often offer 5–10 year warranties on finish and function.
– Finish Durability: Chrome remains widely regarded for durability, scratch resistance, and ease of maintenance. Alternative finishes (brushed nickel, matte black) offer style but may require specific cleaners; some show water spots more readily. Verify finishes use PVD (Physical Vapor Deposition) coating for superior adhesion and corrosion resistance, especially in humid climates.
– Serviceability: Can individual components be replaced? For multi-head systems, are diverter valves and cartridges available separately? Research the manufacturer’s reputation for parts availability and customer support. Established brands with strong dealer networks often provide better long-term support.
Future-Proofing Strategies:
– Rough-In Flexibility: During new construction or major renovation, install valve bodies compatible with multiple trim styles from the same manufacturer. This allows updating visible hardware years later without opening walls. For showers, consider roughing in connections for a future handheld or body spray—even if not installed initially.
– Smart Integration Readiness: If considering future digital controls or bidet seats, ensure valve rough-ins allow space for potential components and that GFCI-protected electrical outlets are installed per code where needed (e.g., near toilet location for bidet seats).
– Water Quality Investment: As noted, addressing hard water proactively (via softening or filtration) is one of the most impactful resilience investments for fixture longevity. Test your water first to determine necessity.
Common mistakes to avoid:
– Mistake: Choosing the lowest-cost fixture available to minimize upfront expense.
Consequence: Potential for frequent repairs, leaks causing water damage, or premature replacement—increasing lifetime cost.
Solution: Allocate budget based on usage frequency and criticality. Invest more in fixtures used daily in primary bathrooms; powder room fixtures may allow for more economical choices.
– Mistake: Ignoring local water quality when selecting finishes and internal components.
Consequence: Accelerated tarnishing, clogged aerators, or corroded valve cartridges.
Solution: Consult neighbors or local plumbing professionals about common water-related challenges in your area. If hard water is prevalent, prioritize PVD finishes and brass internal components.
Deep Dive: The Toilet Selection Matrix
With the Harmony Framework established, we turn to granular fixture analysis. The toilet is often the bathroom’s workhorse—chosen hastily yet used relentlessly. Understanding the engineering behind flush types transforms selection from guesswork to precision.
Understanding Flush Technologies: How They Work and Where They Excel
Gravity-Fed Toilets (The Residential Standard)
– How it Works: Relies solely on the weight of water rushing from the tank into the bowl to create siphon action, pulling waste through the trapway. Simple, proven physics.
– Water Usage: Typically 1.28 GPF (4.8 L) for modern high-efficiency models; older models used significantly more.
– Performance Profile: Generally quieter than pressure-assisted models. Performance heavily depends on trapway design and bowl geometry. Modern high-efficiency gravity toilets with optimized siphon jets and large trapways (2″+) achieve excellent MaP scores (500g+). Ideal for most residential settings, especially where noise is a concern.
– Best For: Primary and secondary bathrooms in standard homes; households prioritizing quiet operation; retrofits where plumbing is standard.
– Key Consideration: Verify independent performance data (MaP score) for the specific model. Not all 1.28 GPF gravity toilets perform equally.
Pressure-Assisted Toilets (Commercial Power for Residential Use)
– How it Works: A sealed vessel inside the tank compresses air as water fills. Upon flush, pressurized air forces water into the bowl with greater velocity.
– Water Usage: Often 1.0–1.28 GPF, achieving high waste removal with less water due to force.
– Performance Profile: Exceptional clog resistance and bowl cleansing, especially beneficial for solid waste or challenging drain runs. Significantly louder flush (distinctive “whoosh” followed by tank refilling noise). Requires adequate water pressure (typically >25 PSI) to recharge properly.
– Best For: High-traffic bathrooms; basements or locations with long drain lines; users prioritizing maximum flush power.
– Key Consideration: Noise level is a major factor. Test in person if possible. Verify compatibility with your home’s water pressure. Higher initial cost and potentially more complex repairs.
Dual-Flush Toilets (Water-Saving Nuance)
– How it Works: Offers two flush options: reduced volume (typically 0.8–1.1 GPF) for liquid waste, full volume (1.28–1.6 GPF) for solid waste.
– Water Usage: Average usage depends entirely on user behavior. Potential for significant savings if the reduced flush is used consistently for appropriate waste.
– Performance Profile: Modern dual-flush models achieve excellent MaP scores on the full flush. The reduced flush is designed only for liquid waste; using it for solids risks poor performance. Button placement and intuitiveness vary—some designs lead to accidental full-flushes.
– Best For: Environmentally conscious households with consistent habits; powder rooms; regions with water restrictions.
– Key Consideration: User education and habit formation are critical. In households with children, guests, or inconsistent users, a high-performance single-flush model may deliver more reliable conservation.
Wall-Hung Toilets (Modern Design & Cleanability)
– How it Works: The bowl mounts to a concealed carrier frame installed inside the wall. The tank is hidden within the wall cavity. Flush actuation is via a wall-mounted plate.
– Water Usage: Varies by carrier system and flush plate selected (typically dual-flush options common).
– Performance Profile: Flush power depends on the carrier system’s engineering. Primary advantages are aesthetic (floating bowl) and hygienic (no base to clean around, easier floor maintenance). Requires significant wall modification during install; carrier frame must be precisely leveled and secured to studs.
– Best For: Modern renovations prioritizing clean lines and easy cleaning; small bathrooms where visual space gain is valuable; accessibility-focused designs (height can be set during install).
– Key Consideration: Installation is complex and costly, requiring skilled labor. Repair access requires a planned access panel. Ensure structural wall integrity can support the load. Not ideal for DIY retrofits in existing walls.
Decoding Performance Metrics: Beyond the GPF Number
MaP Testing: Your Objective Performance Compass
The Maximum Performance (MaP) testing program provides independent evaluation of toilet flush effectiveness. Instead of relying solely on manufacturer claims, MaP uses standardized test media to measure grams of waste removed in a single flush. Results are publicly accessible.
– What the Scores Mean:
– 350–499 grams: Acceptable for light residential use. May require occasional second flush for larger loads.
– 500–599 grams: Very good performance. Suitable for most households. Reliable single-flush capability.
– 600+ grams: Excellent performance. Handles demanding conditions confidently. Ideal for families or high-use bathrooms.
– How to Use It: When shortlisting toilets, look up their MaP score. Prioritize models scoring 500g+ at their rated GPF. This objective metric cuts through marketing language.
WaterSense Certification: The Efficiency Baseline
Administered by the U.S. Environmental Protection Agency (EPA), WaterSense certification requires toilets to use ≤1.28 GPF and meet minimum performance thresholds (including MaP testing of at least 350 grams). It’s a reliable baseline for efficiency and basic performance. However, many non-certified toilets exceed these standards. Use it as a starting filter, not the final word—always check the specific MaP score.
Trapway Diameter: The Hidden Flow Factor
The trapway is the curved channel leading from the bowl to the drain. A wider, smoother trapway reduces clog risk. Look for specifications:
– Standard: 1.75″ – Adequate for well-designed modern toilets.
– Optimized: 2.0″ or larger – Significantly reduces clog risk, especially beneficial for households with specific dietary factors or challenging plumbing lines.
Visually inspect product images or diagrams; some manufacturers highlight “extra-large” or “no-clog” trapways.
Comfort & Ergonomics: The Human Interface
Bowl Shape: Elongated vs. Round-Front
– Elongated: Approximately 2″ longer than round-front. Provides more sitting area, generally considered more comfortable for adults. Better for hygiene. Requires more floor space (typically needs 30″+ clearance from wall to front of bowl).
– Round-Front: Compact footprint. Ideal for small powder rooms, children’s bathrooms, or tight spaces. May feel cramped for taller adults.
Pro Tip: Measure your existing space meticulously. Account for door swing, nearby fixtures, and local building code requirements (typically require 21″ clearance in front of toilet). If space allows, elongated is usually the more comfortable choice for primary bathrooms.
Height: Standard vs. Comfort Height
– Standard Height: Bowl rim 14–15″ from floor. Traditional height.
– Comfort Height (Chair Height): Bowl rim 17–19″ from floor. Aligns with standard chair height (18″). Reduces strain on knees and hips. Strongly recommended for accessibility, aging in place, or anyone with mobility considerations. Often preferred by taller individuals.
Critical Note: “Comfort Height” is a marketing term; actual heights vary by model. Check the exact specification sheet. For universal design, Comfort Height is increasingly recommended across age groups due to ergonomic benefits.
Seat Selection: The Overlooked Essential
While often sold separately, the seat completes the experience:
– Material: Solid plastic (polypropylene) is durable and affordable. Wood seats offer warmth but require more maintenance.
– Hinges: Stainless steel hinges resist corrosion better than plastic. Slow-close (soft-close) hinges are highly recommended—they prevent slamming, reduce noise, and eliminate pinch hazards.
– Shape: Must match bowl shape (elongated seat for elongated bowl).
– Special Features: Quick-release mechanisms simplify cleaning. Heated seats or integrated bidets add luxury and hygiene but require electrical access and ongoing maintenance consideration.
Installation Realities: Retrofitting vs. New Construction
Retrofitting an Existing Bathroom
– Rough-In Measurement: This is non-negotiable. Measure from the finished wall surface to the center of the closet bolts (floor flange bolts). Standard is 12″. Less common are 10″ or 14″. Do not guess. Purchasing a toilet for the wrong rough-in causes major installation issues.
– Floor Flange Condition: Inspect the existing flange. Is it level with the finished floor? Cracked? Rusty? A damaged flange must be repaired or replaced before installing a new toilet to prevent leaks.
– Water Supply Line: Ensure the shutoff valve is functional and the supply line reaches the new toilet’s fill valve inlet. Older flexible lines may need replacement.
– Space Constraints: Verify clearance for tank removal during future repairs. Some compact toilets have tanks designed for tight spaces behind the bowl.
New Construction or Full Gut Renovation
– Rough-In Flexibility: You control the rough-in distance. 12″ is standard, but 14″ can provide slightly more knee room in spacious bathrooms.
– Flange Installation: Install the closet flange on top of the finished floor (not flush with subfloor). This ensures a proper seal with the wax ring (or wax-free seal). Secure flange bolts to the subfloor before laying tile to prevent shifting.
– Future-Proofing: Consider installing an access panel behind the toilet location if plumbing runs through an exterior wall (prevents freezing issues in cold climates). For potential bidet seats, run a dedicated GFCI-protected electrical outlet within 4 feet of the bowl location during framing.
The Bidet Seat Question: Hygiene Upgrade or Unnecessary Complexity?
Bidet seats (replacing the standard toilet seat) offer posterior and feminine wash functions, often with adjustable water temperature, pressure, and nozzle position. They represent a significant comfort and hygiene consideration for many.
Key Considerations:
– Electrical Requirement: Most feature-rich models require a nearby GFCI outlet. Battery-operated basic models exist but lack heated water and advanced features. Plan electrical during renovation.
– Water Connection: Taps into the toilet’s cold water supply line via a T-valve. Requires accessible shutoff valve.
– Space: Ensure adequate clearance behind the toilet tank for the seat’s control arm and electrical cord.
– User Acceptance: Introduce the concept gradually. Many users become devoted once experienced. Consider a non-electric “bidet attachment” (cold water only, manual spray) as a lower-cost trial option.
– Maintenance: Nozzles self-clean, but periodic manual cleaning is recommended. Filters may need replacement. Factor in long-term upkeep.
– Resilience: During power outages, non-electric models remain functional; electric models revert to standard toilet use (seat heating may not function).
For households valuing enhanced hygiene, reduced toilet paper use, or accessibility (easing personal care for limited mobility), a bidet seat is a highly worthwhile investment. Prioritize models from reputable brands with strong customer support and readily available parts.
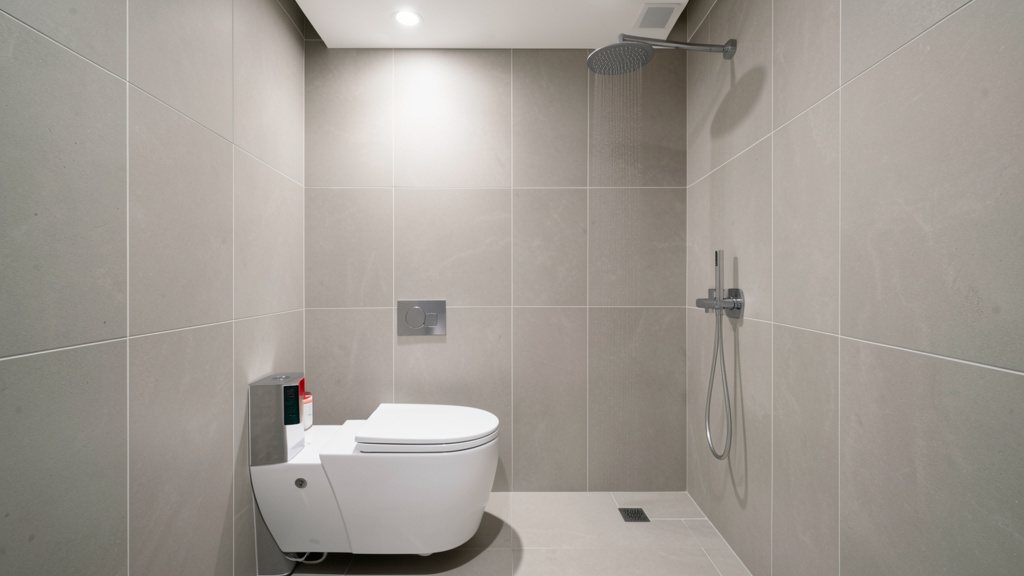
Deep Dive: The Shower System Selection Matrix
The shower is a sanctuary for many—a place to wake up, unwind, or find momentary peace. Yet its performance hinges on a cascade of interconnected components, from the hidden valve to the visible spray head. Optimizing this system requires understanding each layer.
Showerhead Technologies: Spray Science Decoded
The showerhead is the final interface between water and user. Its engineering dictates the sensory experience. Move beyond “rainfall” or “massage” labels to understand the underlying mechanics.
Air Injection (Oxygenation) Technology
– How it Works: Draws ambient air into the water stream through venturi ports, mixing air with water to create larger, softer, warmer-feeling droplets. Increases perceived spray force without increasing water flow.
– Benefits: Creates a luxurious, spa-like feel at lower GPM (1.5–1.75). Larger droplets retain heat better, reducing the sensation of cooling mid-shower. Often provides better coverage and rinsing efficiency than non-aerated heads at the same flow rate.
– Ideal For: Users seeking a balance of water savings and premium feel; homes with moderate water pressure; those who find standard low-flow showers “weak.”
– Consideration: May produce slightly more mist/spray dispersion. Ensure the model has good nozzle design to minimize dripping after shutoff.
Laminar Flow Technology
– How it Works: Channels water through precisely engineered nozzles to create distinct, non-splashing streams of water (like liquid ropes). Minimal air mixing.
– Benefits: Creates a unique, targeted massage sensation. Very little overspray or mist, keeping the shower area drier. Excellent for precise rinsing.
– Ideal For: Users who prefer a focused, high-pressure stream; therapeutic massage applications; steam showers where minimizing ambient moisture is desired.
– Consideration: Coverage area is narrower than rainfall or aerated patterns. Often used as an accent spray in multi-function heads.
Traditional Aerated Flow
– How it Works: Mixes air and water through a screen or chamber, creating a consistent, fine spray pattern. The most common technology.
– Benefits: Reliable, predictable performance. Good coverage. Generally lower cost.
– Ideal For: Budget-conscious upgrades; replacement scenarios where matching existing performance is key.
– Consideration: Can feel “harsh” at higher pressures. Less efficient at heat retention than air-injection models. Prone to clogging in hard water areas if nozzles aren’t self-cleaning.
Multi-Function Showerheads: Pattern Versatility
Most premium showerheads offer 3–8 selectable spray patterns via a rotating dial or button. Common patterns include Full Body, Massage/Pulsating, Rainfall, Mist, and Jet/Concentrated.
Critical Evaluation: Don’t assume all patterns are equally effective. Research reviews specifically mentioning the massage pattern strength or rainfall coverage width. Some budget multi-function heads have weak secondary patterns. Prioritize brands known for robust internal diverter mechanisms.
Handheld Showerheads: Utility and Accessibility
Mounted on a slide bar, handheld units offer unmatched flexibility.
– Hose Quality: Look for reinforced metal hoses (stainless steel braided) over plastic. Length matters: 60″ is standard; 72″ provides greater reach. Swivel connectors at both ends prevent kinking.
– Slide Bar: Must be securely mounted into wall studs. Height-adjustable brackets should lock firmly. Consider models where the handheld docks securely at multiple heights.
– Flow Rate: Handhelds may have slightly lower effective GPM than fixed heads due to hose restriction. Verify performance specs. Some include pause buttons to conserve water while lathering.
Fixed vs. Rainfall Showerheads: Size and Mounting
– Standard Fixed (6–8″ diameter): Mounts directly to the wall arm. Offers strong, focused spray. Less affected by low water pressure. Easier to install and maintain.
– Rainfall (8–12″+ diameter): Mounts overhead on a ceiling arm or extended wall arm. Creates immersive, gentle coverage. Requires adequate water pressure and flow. A large rainfall head at 1.75 GPM may feel weak if pressure is low; the same flow through a smaller head feels stronger. Ceiling mounting requires careful waterproofing. Consider a “rainfall with handheld combo” system for versatility.
The Heart of the System: Valve Technologies Compared
The shower valve, hidden behind the wall, is arguably the most critical component for safety, comfort, and longevity. Choosing the right type is paramount.
Pressure-Balancing Valves (The Safety Standard)
– How it Works: Contains a piston or diaphragm that automatically shifts to maintain a constant hot/cold mix ratio if inlet pressure changes (e.g., toilet flush causes cold water pressure drop; valve reduces hot flow proportionally).
– Benefits: Prevents sudden, dangerous temperature spikes or drops. Required by plumbing codes in most residential shower installations in North America. Relatively affordable.
– Limitations: Maintains ratio, not temperature. If cold pressure drops significantly, the output temperature may still rise noticeably (though not to scalding levels). Does not allow precise temperature setting.
– Best For: Budget-conscious projects meeting code minimums; guest bathrooms; secondary showers.
Thermostatic Valves (Precision Comfort & Safety)
– How it Works: Uses a thermostat element to sense output water temperature. Continuously adjusts hot/cold inlet ports to maintain the exact user-set temperature, regardless of pressure fluctuations elsewhere in the house.
– Benefits: Unmatched temperature stability. User sets a maximum safe temperature (anti-scald limit). Often includes separate volume control—set your perfect temperature once, then simply turn volume on/off daily. Essential for households with children, elderly, or sensitive skin.
– Limitations: Higher initial cost. Requires professional installation for optimal calibration.
– Best For: Primary showers; families; accessibility-focused designs; anyone prioritizing safety and consistent comfort. Strongly recommended as the default choice for main bathrooms.
Digital & Smart Valves (The Cutting Edge)
– How it Works: Electronic thermostatic valves controlled via digital interface (wall keypad, smartphone app, voice). May include presets, usage tracking, remote start, and integration with home systems.
– Benefits: Ultimate convenience and customization. Precise temperature and duration control. Some models alert to leaks or abnormal usage.
– Limitations: Highest cost. Requires electrical power (GFCI outlet nearby). Potential for electronic failure (though quality units have manual override).
– Best For: High-end renovations; smart home enthusiasts; users with specific therapeutic temperature routines.
Critical Installation Note: Valve rough-in bodies must be compatible with the trim kit (visible handles/escutcheon). Mixing brands or product lines often leads to fitment issues. Purchase the rough-in body and trim kit together from the same manufacturer. During renovation, specify the valve type before walls are closed.
Water Heating Synergy: Matching Shower Demand to Supply
Your shower experience is only as good as your hot water supply. Ignoring this link leads to frustration.
Tank Water Heaters: Capacity and Recovery
– The Consideration: A standard 40-gallon tank holds ~32 gallons of usable hot water. A 10-minute shower at 2.0 GPM uses 20 gallons. Two back-to-back showers may deplete most of the tank.
– Optimization Strategy:
– Lower GPM Showerheads: Reducing flow to 1.75 GPM extends hot water duration significantly.
– Temperature Setting: Ensure thermostat is set appropriately (typically 120°F for safety and efficiency).
– Recovery Rate: Check your heater’s First Hour Rating (FHR)—how much hot water it delivers in the first hour of use. A higher FHR means faster recovery between showers.
– Best For: Homes with predictable, spaced-out shower schedules.
Tankless (On-Demand) Water Heaters: Continuous Flow
– How it Works: Heats water instantly as it flows through the unit. No storage tank.
– Critical Sizing Factor: Must be sized for simultaneous demand. A shower typically requires 2.0–2.5 GPM flow. If someone showers while the dishwasher runs (1.5 GPM), the unit must handle 3.5–4.0 GPM total. Undersized units deliver lukewarm water.
– Shower Synergy: Pair with a showerhead matching the unit’s capacity. A high-flow rainfall head may push a borderline-sized unit to its limit. A 1.75 GPM head provides a buffer.
– Best For: Households with staggered shower times; homes with high hot water demand elsewhere.
Heat Pump & Solar Water Heaters: Efficiency Leaders
– Consideration: These highly efficient systems may have lower maximum flow rates or recovery speeds. Consult manufacturer specs regarding compatible shower flow rates. Pairing with low-GPM, high-efficiency showerheads maximizes their benefit.
The Simultaneous Demand Check: Before finalizing shower specs, calculate total potential hot water draw during peak times. List all fixtures/appliances that could run simultaneously. Sum their GPM ratings. Ensure your water heater’s capacity exceeds this total. When in doubt, consult a plumbing professional.
Accessibility and Universal Design: Comfort for All Ages and Abilities
Designing for accessibility isn’t just for current needs—it’s smart, future-proofing design that benefits everyone. The bathroom is the most critical room for universal design principles.
Shower Configuration Fundamentals
– Threshold: Eliminate trip hazards. A curbless (zero-threshold) shower is ideal, requiring careful slope planning during tile installation. If a threshold is necessary, keep it under 1.5″ high and beveled. Avoid traditional high tub lips.
– Grab Bars: Non-negotiable for safety. Install before tile is set, anchored directly into wall studs. Recommended locations: vertical bar near shower entry, horizontal bar along the back wall, L-shaped bar in the showering area.
Pro Tip: Choose grab bars that double as towel bars or shelves for aesthetic integration. Ensure diameter is 1.25–1.5″ for secure grip, with 1.5″ clearance from the wall.
– Seating: A built-in tiled bench (17–19″ high, 15–18″ deep) is ideal. If space is limited, a fold-down wall-mounted seat saves space. Ensure it’s rated for sufficient weight capacity and mounted to studs.
– Controls: Place thermostatic valve controls outside the shower spray zone, at 38–48″ height for easy reach while seated or standing. Lever handles are easier to operate than knobs for those with arthritis or limited grip strength.
Toilet Accessibility Essentials
– Height: Comfort Height toilets (17–19″) are standard for accessibility. Reduces strain significantly.
– Clearance: Minimum 30″ width in front of toilet; 18″ clearance from center of bowl to side wall. Allows space for transfer or use of grab bars.
– Grab Bars: Install horizontal bars on the side wall and behind the toilet. Reinforce walls during construction for future installation if not needed immediately.
– Flush Control: Lever handles are preferable to buttons for ease of use. Ensure location is intuitive and reachable.
Universal Design Benefits Everyone:
– Curbless showers are easier for rolling luggage, pet bathing, or cleaning.
– Grab bars provide stability for anyone feeling dizzy.
– Lever handles are simpler to use with wet, soapy hands.
– Comfort Height toilets reduce knee strain for all users.
Incorporating these elements during renovation is far more cost-effective than retrofitting later. They subtly enhance safety and comfort for every household member.
The Interconnection: How Your Toilet Choice Affects Shower Performance (and Vice Versa)
This is the critical insight most guides miss: your toilet and shower are not independent actors. They share a stage—your home’s plumbing system—and their performances are deeply intertwined. Ignoring these connections leads to real-world frustrations that specs sheets won’t predict.
The Pressure Drop Phenomenon: Physics in Action
When a toilet flushes, it demands a surge of water—typically 1.28 to 1.6 gallons delivered in seconds. This sudden draw affects water pressure throughout the branch line supplying the bathroom. If your shower is running simultaneously (or even seconds later), the pressure drop can trigger noticeable effects:
– With a Pressure-Balancing Valve: The valve detects the drop in cold water pressure and automatically reduces hot water flow to maintain the mix ratio. Result: Shower temperature remains safe (no scalding), but the volume of water decreases noticeably—a “weak shower” sensation.
– With a Thermostatic Valve: The valve works to maintain the exact set temperature. As cold pressure drops, it restricts hot flow proportionally. High-quality thermostatic valves minimize perceived flow disruption while maintaining temperature stability.
– Without Any Anti-Scald Valve (Dangerous & Code-Violating): Cold pressure drop causes a surge in hot water proportion. Result: Shower temperature spikes dangerously. This is why anti-scald valves are mandatory in modern plumbing codes.
Mitigation Strategies:
1. Upgrade the Valve: Installing a high-quality thermostatic valve is the single most effective solution for temperature stability.
2. Stagger Usage: Simple behavioral adjustment—avoid flushing while someone is showering.
3. Plumbing System Upgrades (During Renovation):
– Dedicated Supply Lines: Run separate ½-inch supply lines from the main trunk to the toilet and shower valve.
– Increase Main Supply Size: Upgrading the main line to ¾-inch before the bathroom branch can provide more reserve capacity.
– Pressure-Reducing Valve (PRV) Check: Ensure your home’s PRV (if present) is functioning correctly.
4. Fixture Selection Synergy: Choose a toilet with a refill rate compatible with your system and pair it with a showerhead designed for consistent performance at varying pressures.
Drainage Dynamics: The Hidden Flow Path
Less obvious but equally important is the shared drainage path. Toilet waste and shower water typically converge into the same branch drain line.
– The Clog Cascade: A partial clog downstream of where the toilet and shower drains join can cause bizarre symptoms. Flushing the toilet might cause water to back up into the shower pan (or vice versa), as the waste seeks the path of least resistance. This indicates a main drain issue.
– Ventilation Interdependence: Plumbing vents allow air into the drain system, enabling waste to flow smoothly. If vents are blocked or undersized, flushing the toilet can create negative pressure that siphons water out of the shower’s P-trap. Result: Sewer gases enter the bathroom—a serious health hazard.
Prevention: Ensure your plumbing system has adequate venting per local code. If experiencing gurgling sounds or slow drainage simultaneously in multiple fixtures, suspect a venting issue and consult a professional.
Water Heater Load: The Thermal Connection
While the toilet uses only cold water for flushing, its tank refill draws cold water that passes through the water heater’s cold inlet. In tank-style heaters, this influx of cold water can temporarily lower the temperature of the stored hot water if the heater is near depletion.
– Scenario: Two people take consecutive showers. The first shower uses most of the hot water. As the second person showers, a toilet flush elsewhere introduces cold water into the heater, potentially causing the shower temperature to drop sooner than expected.
– Solution: This reinforces the importance of matching shower GPM to water heater capacity and considering a thermostatic valve to maintain set temperature as the tank depletes.
Holistic System Checklist Before Purchase
Before finalizing any toilet or shower fixture, run this interconnection check:
– [ ] Pressure Assessment: Has water pressure at the bathroom location been measured? (Ideal: 40–80 PSI static).
– [ ] Valve Verification: Is the shower valve type confirmed compatible with the rough-in and household needs?
– [ ] Supply Line Assessment: Are supply lines to the bathroom adequate? Are dedicated lines feasible during renovation?
– [ ] Drain/Vent Inspection: For older homes, has drain line condition and venting been assessed? (Critical before investing in new fixtures).
– [ ] Water Heater Audit: Does hot water capacity align with peak simultaneous demand?
– [ ] Rough-In Confirmation: Toilet rough-in measurement verified? Shower valve rough-in body selected and compatible?
Addressing these interconnections transforms your bathroom from a collection of fixtures into a harmonious, resilient system.
Navigating Budgets: Tiered Solutions for Every Investment Level
Budget constraints are real, but they don’t have to mean compromising on core principles. Smart allocation ensures your investment delivers maximum value where it matters most. This tiered approach prioritizes spending based on impact, longevity, and household needs.
The Essential Tier ($800–$1,500 Total Fixture Investment)
Ideal for: Powder rooms, guest bathrooms, rental properties, strict budget renovations where core function is paramount.
Philosophy: Prioritize reliability, code compliance, and ease of maintenance over luxury features. Allocate the majority of the budget to hidden components affecting longevity and safety.
Toilet Strategy ($250–$400):
– Select a single-flush, high-efficiency gravity toilet (1.28 GPF) from a major brand with a verified MaP score of 500+ grams.
– Why this works: Gravity toilets are simpler, quieter, and easier to repair. A strong MaP score ensures reliable performance, preventing frustration and water waste. WaterSense certification guarantees baseline efficiency.
– Skip: Dual-flush mechanisms (behavioral complexity), Comfort Height (if space/budget tight).
– Pro Tip: Look for “builder grade” models from reputable brands—they offer core engineering without premium aesthetics.
Shower System Strategy ($500–$1,000):
– Valve ($200–$400): Non-negotiable investment. Install a pressure-balancing valve from a reputable brand. This meets code requirements for anti-scald protection.
– Showerhead ($50–$150): Choose a durable, single-function or basic multi-function showerhead (1.75–2.0 GPM) with solid construction. Prioritize models with rubber nozzles for easy cleaning. Chrome finish for durability.
– Trim Kit ($150–$300): Select a simple, classic trim kit matching the valve brand.
– Why this works: The valve ensures safety and decades of reliable operation. A quality showerhead provides consistent performance.
– Skip: Handheld units, rainfall heads, thermostatic valves.
– Pro Tip: Bundle valve rough-in, trim, and showerhead from the same brand during sales.
Installation Note: Even in the Essential Tier, professional installation of the valve and toilet is highly recommended. Improper installation risks leaks and damage.
The Balanced Tier ($1,500–$3,500 Total Fixture Investment)
Ideal for: Primary bathrooms in owner-occupied homes, families seeking comfort and efficiency, renovations where long-term value is a priority.
Philosophy: Invest strategically in components that deliver daily comfort, enhanced efficiency, and accessibility benefits. Balance upfront cost with long-term satisfaction.
Toilet Strategy ($400–$800):
– Select a Comfort Height toilet with elongated bowl. Prioritize models with MaP scores of 600+ grams at 1.28 GPF. Include a slow-close seat.
– Why this works: Comfort Height provides ergonomic benefits for all users. High MaP scores guarantee single-flush reliability. Slow-close seats eliminate noise and hazards.
– Consider: A dual-flush model only if household habits support consistent use of the half-flush.
– Pro Tip: Explore models with proven flush technologies from major brands.
Shower System Strategy ($1,000–$2,500):
– Valve ($400–$800): Upgrade to a thermostatic valve with separate temperature and volume controls. This is the cornerstone of the Balanced Tier—providing unmatched temperature stability and safety.
– Shower Configuration ($600–$1,500):
– Option A (Versatility): Fixed showerhead (8″ rainfall style with air injection, 1.75 GPM) + handheld showerhead on slide bar + diverter valve.
– Option B (Simplicity): High-quality multi-function showerhead (5+ patterns) with strong spray performance.
– Trim & Accessories: Select a cohesive trim kit. Add a matching grab bar (doubling as towel bar) for universal design.
– Why this works: Thermostatic control transforms the shower experience—no more temperature fluctuations. The handheld/fixed combo accommodates different users and tasks. Grab bars add subtle safety.
– Pro Tip: Invest in a showerhead with a strong warranty. Look for models with adjustable flow features if pressure is variable.
Synergy Focus: Explicitly address interconnections: verify water pressure, ensure water heater capacity supports demand, plan grab bar locations during tile installation.
The Premium/Resilience Tier ($3,500+ Total Fixture Investment)
Ideal for: Master suites, luxury renovations, accessibility-focused builds, homes in hard water areas, owners prioritizing longevity and bespoke comfort.
Philosophy: Invest in engineering excellence, material durability, future-proofing, and personalized comfort. Prioritize components with proven longevity, serviceability, and integration capabilities.
Toilet Strategy ($800–$2,500+):
– Wall-Hung System ($1,200–$2,500+): Includes carrier frame, in-wall tank, and bowl. Benefits: Sleek aesthetics, easier cleaning, customizable height. Requires professional installation.
– OR High-End Floor-Mount ($800–$1,500): Premium gravity or pressure-assisted toilet with exceptional MaP scores (700g+), Comfort Height, soft-close seat, and advanced glaze.
– Bidet Seat Integration ($300–$800+): Plan electrical outlet during rough-in. Select a feature-rich electric bidet seat from reputable brands. Prioritize models with stainless steel nozzles and strong warranties.
– Why this works: Wall-hung systems offer modern design and hygiene benefits. Premium floor-mounts deliver unmatched flush performance. Bidet seats significantly enhance hygiene and comfort.
– Pro Tip: For wall-hung systems, choose a carrier frame with a service access panel.
Shower System Strategy ($2,500–$6,000+):
– Valve ($800–$2,000+): Premium thermostatic valve system with multiple outlets (overhead rain, handheld, body sprays) controlled by a single interface. Consider digital thermostatic valves for presets and integration.
– Shower Configuration ($1,500–$3,500+):
– Overhead: Large rainfall head (10–12″) with air injection technology.
– Handheld: Premium multi-function handheld on extended slide bar.
– Body Sprays: 2–4 strategically placed sprays for hydrotherapy.
– Steam Generator: Integrated if designing a steam shower (requires vapor-proof enclosure).
– Materials & Finishes: Solid brass construction throughout. PVD-coated finishes for superior durability. Frameless glass enclosure.
– Accessibility Integration: Curbless shower entry, built-in bench, multiple grab bars, extended hose handheld.
– Why this works: Creates a truly customizable, spa-like experience. Thermostatic control ensures perfect temperature. Premium materials withstand daily use. Accessibility features are seamlessly woven in.
– Pro Tip: Work with a designer to layout spray patterns—avoid body sprays aimed directly at sensitive areas.
Resilience Investments (Critical for Premium Tier):
– Water Quality: Install a whole-house water softener and/or filter if water hardness exceeds 7 grains per gallon. Budget $1,000–$3,000+.
– Access Panels: Include discreet access panels behind shower valves and near toilet carrier frames for future maintenance.
– Warranty & Support: Prioritize brands with strong customer service, readily available parts, and comprehensive warranties.
Budget Allocation Wisdom: Where to Splurge and Save
- Always Splurge: Shower valve (safety and longevity), toilet flush performance (MaP score), water heater capacity matching demand.
- Splurge Selectively: Showerhead spray quality (daily experience), Comfort Height toilet (ergonomics), thermostatic control (safety/convenience).
- Safe to Save: Decorative trim details (choose classic over trendy), non-essential accessories (add later).
- Never Save: Anti-scald valve technology, proper installation labor, water quality solutions in hard water areas.
Remember: The “right” budget tier depends entirely on your household profile, usage patterns, and long-term plans. A Balanced Tier investment in a primary bathroom used daily delivers far greater return than a Premium Tier splurge in a rarely used guest bath.
Common Pitfalls and How to Avoid Them
Even well-researched projects can stumble on overlooked details. These pitfalls stem from fragmented advice, rushed decisions, or underestimating real-world variables. Forewarned is forearmed.
Pitfall 1: The “Spec Sheet Trap” – Trusting Marketing Over Real-World Performance
Scenario: You select a toilet boasting “1.0 GPF Ultra-Efficient” and a showerhead labeled “Luxury Rainfall 1.5 GPM.” Installation complete, you discover the toilet requires repeated flushing, and the showerhead delivers a weak, misty spray.
Root Cause: Relying solely on manufacturer claims without verifying independent performance data or user experiences under conditions matching your home.
Prevention Strategy:
– For toilets: Always check the MaP score. Target 500g+ for reliable single-flush performance. Read reviews filtering for “low pressure” if applicable.
– For showerheads: Search for video reviews demonstrating actual spray pattern and force. Look for reviews mentioning “rinsing power” or “pressure.”
– Cross-reference professional reviews alongside consumer sites.
Key Takeaway: Performance is contextual. Seek evidence relevant to your situation.
Pitfall 2: Ignoring the “Hidden Half” – Valve and Rough-In Compatibility
Scenario: You fall in love with a stunning thermostatic trim kit online. After walls are tiled, the plumber discovers the rough-in valve body is incompatible with the trim. Costly rework ensues.
Root Cause: Purchasing visible trim components without confirming compatibility with the rough-in valve body, wall depth, or existing plumbing configuration.
Prevention Strategy:
– Buy valve rough-in body and trim kit together from the same manufacturer and product line. Do not mix brands.
– During renovation, have the plumber install the rough-in valve body before finalizing tile or wall finishes. Verify operation.
– For retrofits, take clear photos of the existing valve stem to the store or send to manufacturer support for compatibility verification before purchasing.
– Consult a plumber early in the selection process, especially for complex systems.
Key Takeaway: The rough-in is the foundation. Compatibility is non-negotiable.
Pitfall 3: The Pressure Blind Spot – Not Testing Before Buying
Scenario: You install a large rainfall showerhead recommended by a friend. In your home, with its 35 PSI water pressure, the spray is disappointingly weak.
Root Cause: Selecting fixtures without knowing your home’s actual water pressure and flow rate. Fixture performance is highly pressure-dependent.
Prevention Strategy:
– Conduct a pressure test: Purchase an inexpensive pressure gauge ($10–$15). Screw it onto an outdoor spigot. Note the static pressure (should be 40–80 PSI). For dynamic pressure, have someone flush a toilet while you watch the gauge.
– Flow rate test: Place a 1-gallon bucket under a faucet. Time how long it takes to fill. Calculate GPM.
– Share these numbers with a knowledgeable salesperson or plumber when selecting fixtures.
Key Takeaway: Your home’s water characteristics are unique. Fixture selection must be tailored to them.
Pitfall 4: Underestimating Hard Water Impact
Scenario: Six months after installing brushed nickel fixtures in a hard water area, white mineral deposits crust the showerhead nozzles, and the finish appears spotted.
Root Cause: Selecting finishes and internal components not suited for high mineral content water, and failing to implement water treatment.
Prevention Strategy:
– Test your water hardness: Use a $10 test strip kit or contact your municipal water provider. Hardness >7 grains per gallon warrants attention.
– Fixture Selection:
– Finishes: Chrome is most resistant. For other finishes, insist on PVD coating.
– Internal Components: Prioritize valves and showerheads with brass or stainless steel internal parts. Look for “anti-scale” nozzles (rubber tips).
– Water Treatment: Strongly consider a water softener for whole-house protection. It pays for itself in extended fixture/appliance life.
Key Takeaway: Hard water is a silent fixture killer. Proactive selection and treatment preserve appearance and function.
Pitfall 5: The Accessibility Afterthought
Scenario: Years after renovation, an aging parent moves in. The standard-height toilet is difficult to use, and there are no grab bars. Retrofitting is messy and expensive.
Root Cause: Designing solely for current able-bodied occupants without incorporating universal design principles.
Prevention Strategy:
– Integrate during initial build/renovation: Install grab bar blocking in walls before drywall. Plan a curbless shower slope during tile installation.
– Adopt universal design standards as default:
– Toilets: Specify Comfort Height for all full bathrooms.
– Showers: Design thresholds under 1.5″; include space for a future bench.
– Controls: Place shower valves at accessible heights; use lever handles.
– Walls: Reinforce areas around toilet and shower with extra studs for future grab bar installation.
– Think “visitability”: Could a guest using a walker navigate and use the bathroom safely?
Key Takeaway: Universal design enhances safety, comfort, and value for all users, today and tomorrow. The marginal cost during construction is minimal compared to retrofitting later.
Pitfall 6: Overlooking Maintenance Realities
Scenario: You install a complex multi-head shower system. Cleaning mineral deposits from multiple nozzles becomes a weekly chore. Replacing a cartridge requires a specialty tool and a costly service call.
Root Cause: Prioritizing complexity and features over ease of long-term upkeep.
Prevention Strategy:
– Ask maintenance questions before buying:
– “How do I clean the nozzles?” (Prefer self-cleaning rubber nozzles).
– “How often does the cartridge need replacement?” (Ceramic disc cartridges last longer).
– “Are replacement parts readily available?”
– “What is the warranty on function and finish?”
– Simplify where possible: A single high-quality showerhead is easier to maintain than three separate outlets.
– Document everything: Take photos of model numbers on valves and fixtures before closing walls. Keep manuals in a home maintenance binder.
Key Takeaway: The easiest fixture to maintain is the one you’ll maintain consistently. Factor long-term upkeep into your selection criteria.
By anticipating these common pitfalls, you transform from a passive shopper into an informed decision-maker. Each avoided pitfall preserves your budget, sanity, and satisfaction with the final result.
Your Questions, Answered
Real homeowners grapple with nuanced questions beyond basic specs. These answers synthesize technical accuracy, practical considerations, and user-centered insight—addressing the friction points often overlooked.
Q: How do I verify a toilet’s actual flush performance beyond the manufacturer’s claim?
A: Independent testing is key. Consult the Maximum Performance (MaP) testing database. MaP uses standardized test media to measure grams removed per flush. Look for scores: 350–499g is acceptable; 500–599g is very good; 600g+ is excellent. A toilet rated 600g at 1.28 GPF is objectively superior to one rated 400g at the same GPF. This data cuts through marketing language and is widely referenced by plumbing professionals. Always cross-reference the specific model number.
Q: My water pressure is low (around 35 PSI). Can I still have an efficient and comfortable shower?
A: Absolutely, but fixture selection is critical. Avoid large rainfall heads (>8″) and high-GPM models. Instead:
– Choose a showerhead engineered for low pressure (look for terms like “pressure-compensating” or “low-pressure optimized” in specs).
– Prioritize air-injection technology—it creates larger, softer droplets that feel more substantial and retain heat better.
– Consider a handheld showerhead with a pause function to conserve water while lathering.
– Verify compatibility with your valve type; some thermostatic valves perform better under low pressure.
– If pressure is consistently below 40 PSI, consult a plumber about potential solutions. Remember, a well-chosen 1.75 GPM showerhead with air injection can outperform a poorly matched 2.0 GPM model in low-pressure conditions.
Q: What is the difference between a pressure-balancing valve and a thermostatic valve, and which should I choose?
A: Pressure-balancing valves maintain a consistent hot-to-cold water ratio during pressure changes (like a toilet flush), preventing scalding but allowing some temperature fluctuation. Thermostatic valves maintain an exact temperature set by the user, offering superior stability and safety—especially valuable for households with children, elderly residents, or sensitive skin. For primary bathrooms, thermostatic valves are strongly recommended despite a higher initial cost. Pressure-balancing valves are suitable for guest bathrooms or budget-conscious projects where code compliance is the priority. Always ensure any valve meets local plumbing codes for anti-scald protection.
Q: How do I determine if my home has hard water, and how does it affect my fixture choices?
A: Test your water using an inexpensive hardness test strip kit (available online or at hardware stores) or request a water quality report from your municipal provider. Hardness above 7 grains per gallon (120 ppm) is considered hard. In hard water areas: prioritize chrome finishes (most resistant to mineral buildup) or PVD-coated alternatives; select fixtures with brass internal components and rubber nozzles (self-cleaning); and strongly consider a whole-house water softener to protect all plumbing fixtures, appliances, and improve skin/hair health. Regular maintenance, like wiping showerheads after use, also mitigates scaling.
Q: Are dual-flush toilets worth it for water savings?
A: Dual-flush toilets can reduce water usage significantly if household members consistently use the lower-volume flush (typically 0.8–1.1 GPF) for liquid waste. However, in households with children, frequent guests, or inconsistent habits, the behavioral hurdle may lead to underutilization of the water-saving feature. For reliable savings without relying on user behavior, a high-performance single-flush toilet (1.28 GPF) with a strong MaP score (500g+) often proves more effective. Evaluate your household’s routines honestly before choosing.
Q: What are the key considerations for making a bathroom accessible for aging in place?
A: Focus on universal design principles that benefit all users: install Comfort Height toilets (17–19″ rim height); ensure a minimum 30″ clearance in front of the toilet; incorporate grab bars anchored to wall studs (plan blocking during renovation); design showers with thresholds under 1.5″ or curbless entries; place shower controls at 38–48″ height with lever handles; and include a handheld showerhead on a slide bar. These modifications are far more cost-effective during initial construction or renovation than retrofitting later, and they enhance safety and comfort for everyone.
Q: How can I estimate the total cost of ownership for a toilet or shower system beyond the purchase price?
A: Consider long-term factors: water savings (compare GPF/GPM against your local water rates); energy savings (lower GPM reduces hot water demand); maintenance frequency (e.g., cartridge replacements, cleaning effort); durability (warranty length, material quality); and potential repair costs. A higher upfront investment in a resilient fixture with strong performance metrics often yields lower lifetime costs. For example, a toilet with a robust warranty and high MaP score may prevent costly service calls. Factor in your household’s usage patterns—high-traffic bathrooms justify premium durability.
Q: What should I do if I experience temperature fluctuations in my shower when other fixtures are used?
A: This indicates inadequate pressure balancing. First, verify your shower valve type: if it’s a basic pressure-balancing valve, upgrading to a thermostatic valve is the most effective solution. Additionally, check for underlying issues: low overall water pressure, undersized supply lines, or a failing pressure-reducing valve (PRV). A plumber can assess your system’s capacity and recommend solutions, such as dedicated supply lines to the bathroom. Never ignore this issue—it’s a safety concern and often violates plumbing codes.
Q: Is it possible to retrofit a thermostatic valve in an existing shower without major renovation?
A: Retrofitting depends on your existing valve rough-in. If the current valve body is compatible with a thermostatic trim kit from the same manufacturer (rare), a trim-only swap may work. However, most retrofits require opening the wall to replace the entire valve body—a significant renovation involving tile removal. Consult a licensed plumber for an assessment. If walls are already open during a remodel, this is the ideal time to upgrade. For minor improvements without wall demolition, consider an external thermostatic mixing valve installed at the water heater, though this is less precise.
Q: How do bidet seats work, and are they difficult to install?
A: Bidet seats replace your existing toilet seat and connect to the toilet’s cold water supply line via a T-valve. Electric models require a nearby GFCI outlet for features like heated water and seat warming. Installation is typically DIY-friendly for basic models (taking 20–30 minutes with standard tools), but electrical work for premium models should be handled by a professional. Non-electric “bidet attachments” (cold water only) offer a lower-cost trial option. Always verify compatibility with your toilet bowl shape and dimensions before purchasing. Many users find the hygiene and comfort benefits transformative once acclimated.
Q: What are the signs that my current plumbing system may not support a new high-efficiency toilet or shower system?
A: Warning signs include: frequent clogs with your current toilet (indicating drain line issues); noticeable pressure drops when multiple fixtures run simultaneously; water hammer (loud banging pipes); or visible corrosion on supply lines. Before investing in new fixtures, conduct a pressure test (ideal: 40–80 PSI static) and flow rate test. For older homes, consider a camera inspection of drain lines and verification of venting adequacy. Addressing underlying plumbing issues first prevents frustration and ensures new fixtures perform as intended. When in doubt, a pre-renovation consultation with a plumber is a wise investment.
Q: How often should I maintain my showerhead and toilet to ensure longevity?
A: For showerheads: wipe nozzles weekly to prevent mineral buildup; deep-clean monthly by soaking in vinegar (for non-PVD finishes) or using a manufacturer-recommended solution; inspect hoses and connections quarterly for leaks or wear. For toilets: clean the bowl and seat regularly; check the flapper or flush valve seal annually for leaks (add food coloring to the tank—if color appears in the bowl without flushing, replace the seal); and inspect the floor flange and wax ring every few years for signs of moisture. In hard water areas, maintenance frequency should increase. Proactive care extends fixture life significantly and prevents minor issues from becoming major repairs.
Conclusion and Next Step
Selecting a toilet and shower system is a nuanced decision that extends far beyond aesthetics or isolated specifications. By embracing a holistic perspective, you transform your bathroom into a harmonious ecosystem where efficiency, comfort, and resilience coexist. This approach not only enhances daily living but also safeguards your investment and supports mindful resource use.
Recap: Three foundational principles anchor this guide:
1. System Interdependence: Your toilet and shower share plumbing infrastructure—pressure, drainage, and thermal dynamics. Decisions must account for these interactions to avoid real-world frustrations.
2. Contextual Performance: Fixture success depends on your home’s unique conditions (water pressure, hardness, household patterns). Prioritize verified metrics (MaP scores, independent reviews) over marketing claims.
3. Strategic Investment: Allocate budget toward hidden components (valves, rough-ins) and durability. Comfort and accessibility features deliver compounding returns in safety, usability, and long-term value.
The 24-Hour Rule: Within the next day, take two actionable steps: First, locate and test your home’s main water shutoff valve to ensure it operates smoothly—a critical safety preparedness measure. Second, measure your existing toilet’s rough-in distance (from the finished wall to the center of the closet bolts) and record it. These simple actions build momentum and equip you with essential data for confident decision-making.
The Big Picture: Your bathroom choices ripple outward. Water-efficient fixtures contribute to community conservation efforts. Universal design elements foster inclusivity for visitors of all abilities. Durable selections reduce waste and resource consumption over decades. By thoughtfully curating this intimate space, you cultivate a sanctuary that nurtures well-being, reflects mindful stewardship, and adapts gracefully to life’s evolving chapters. The journey to your ideal bathroom begins with informed, intentional steps—and you now hold the blueprint.
Explore Our Complete System:
The Ultimate Guide to Bathroom Ventilation: Preventing Mold and Moisture | Water Heater Sizing Fundamentals: Matching Capacity to Household Needs | Universal Design Principles for Every Room in Your Home | Understanding Your Water Quality Report: A Homeowner’s Guide | Step-by-Step: Planning a Bathroom Renovation Timeline and Budget | Whole-House Water Treatment: Softeners, Filters, and When You Need Them | Sustainable Bathroom Upgrades: Conservation Without Compromise